TR7600 SIII_Hardware_en_v_2_0_4 - 第65页
Test Research, Inc . TR7600 SIII Seri es User Gu ide – Hardw are 55 Figure 51: Digital Fib er Sensor/ [ Super] mode 3) Input the proper sensiti vity. a) After [Super] mode is c on firm ed, u se the to change the value to…
Test Research, Inc.
TR7600 SIII Series User Guide – Hardware 53
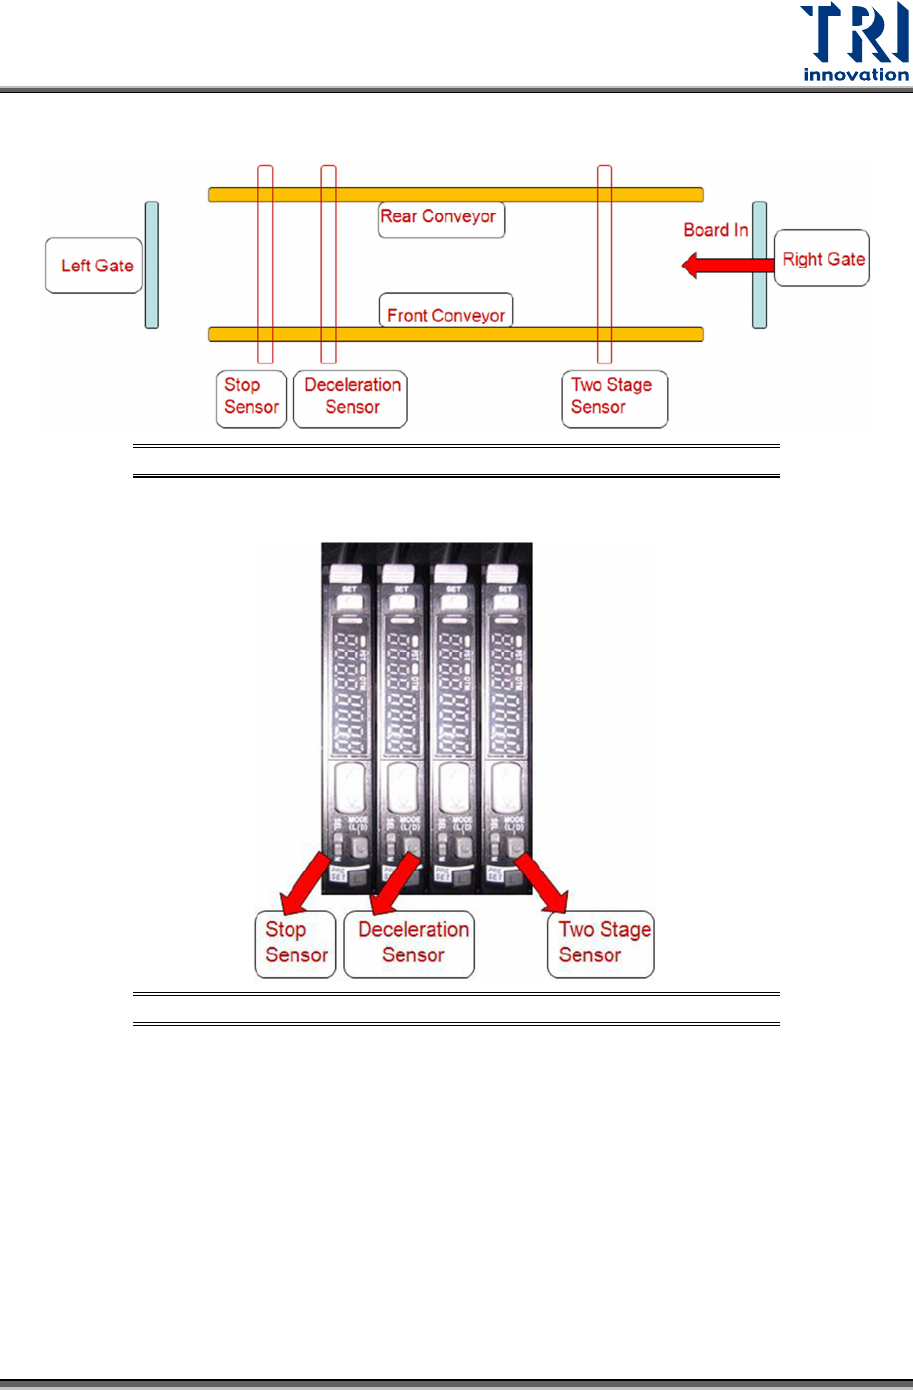
b) Case 2: Right-In board condition
Figure 47: Sensor Arrangement for Right-In Board
Figure 48: Sensors for Right-In Board
Test Research, Inc.
54 TR7600 SIII Series User Guide – Hardware
Sensor Setup
The purpose of digital fiber sensor is to make boards decelerate and stop at the right position.
If boards don’t stop at the right position, users can use below procedures to increase the
sensitivity of digital fiber sensors.
Basically, there are three steps 1) Initialization 2) Adjust the power of sensor 3) Input the
proper sensitivity 4) Select the [D on] Dark on mode.
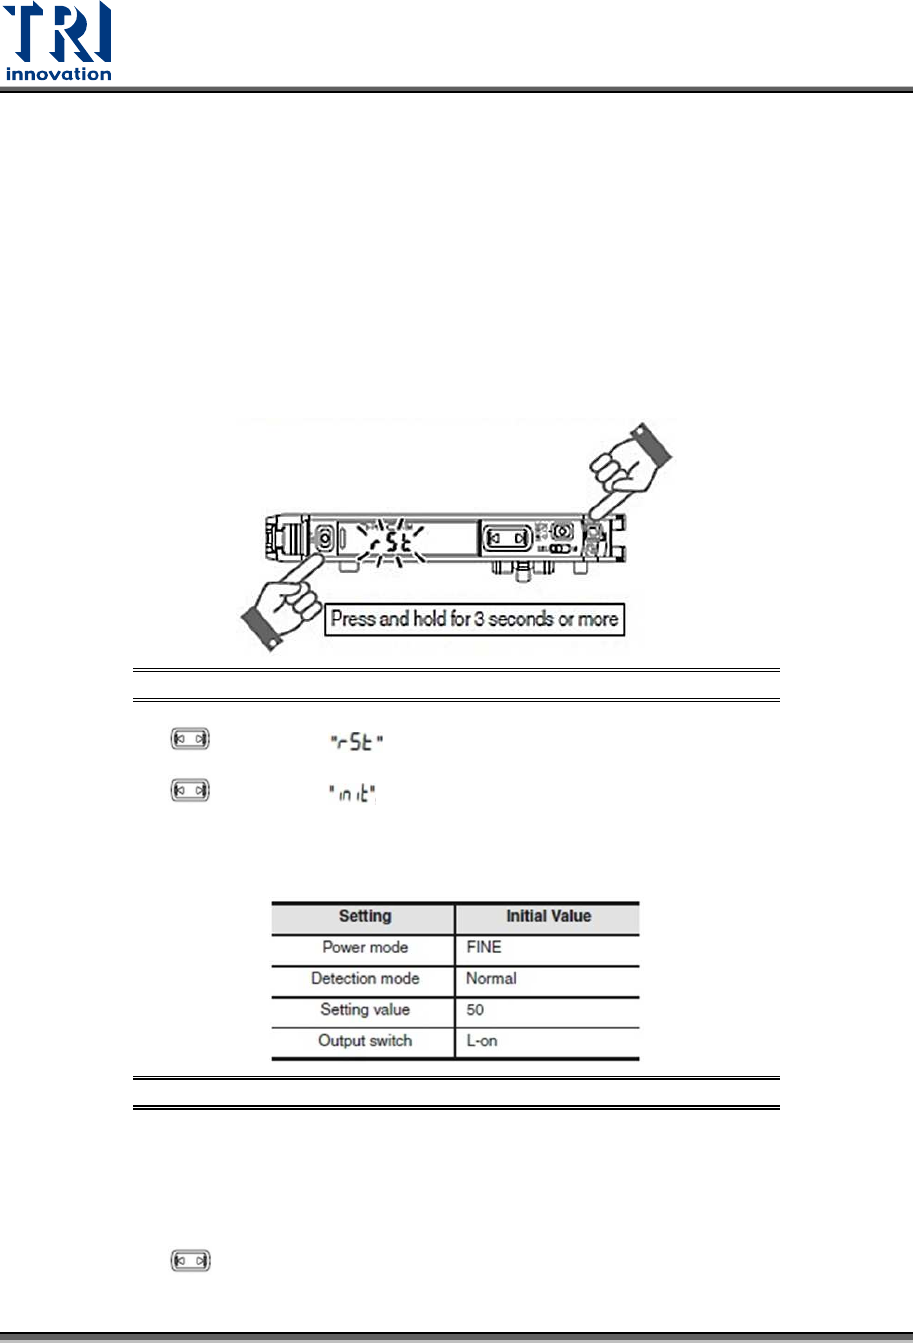
1) Initialization
a) Press and hold the [SET] and [PRESET] buttons simultaneously for three seconds.
Figure 49: Digital Fiber Sensor/Initialization
b) Use the to select the , then click the [MODE] button.
c) Use the to select the , then click the [MODE] button.
After the initialization is completed, the setup will recover to the default settings.
Figure 50: Digital Fiber Sensor/Default Settings
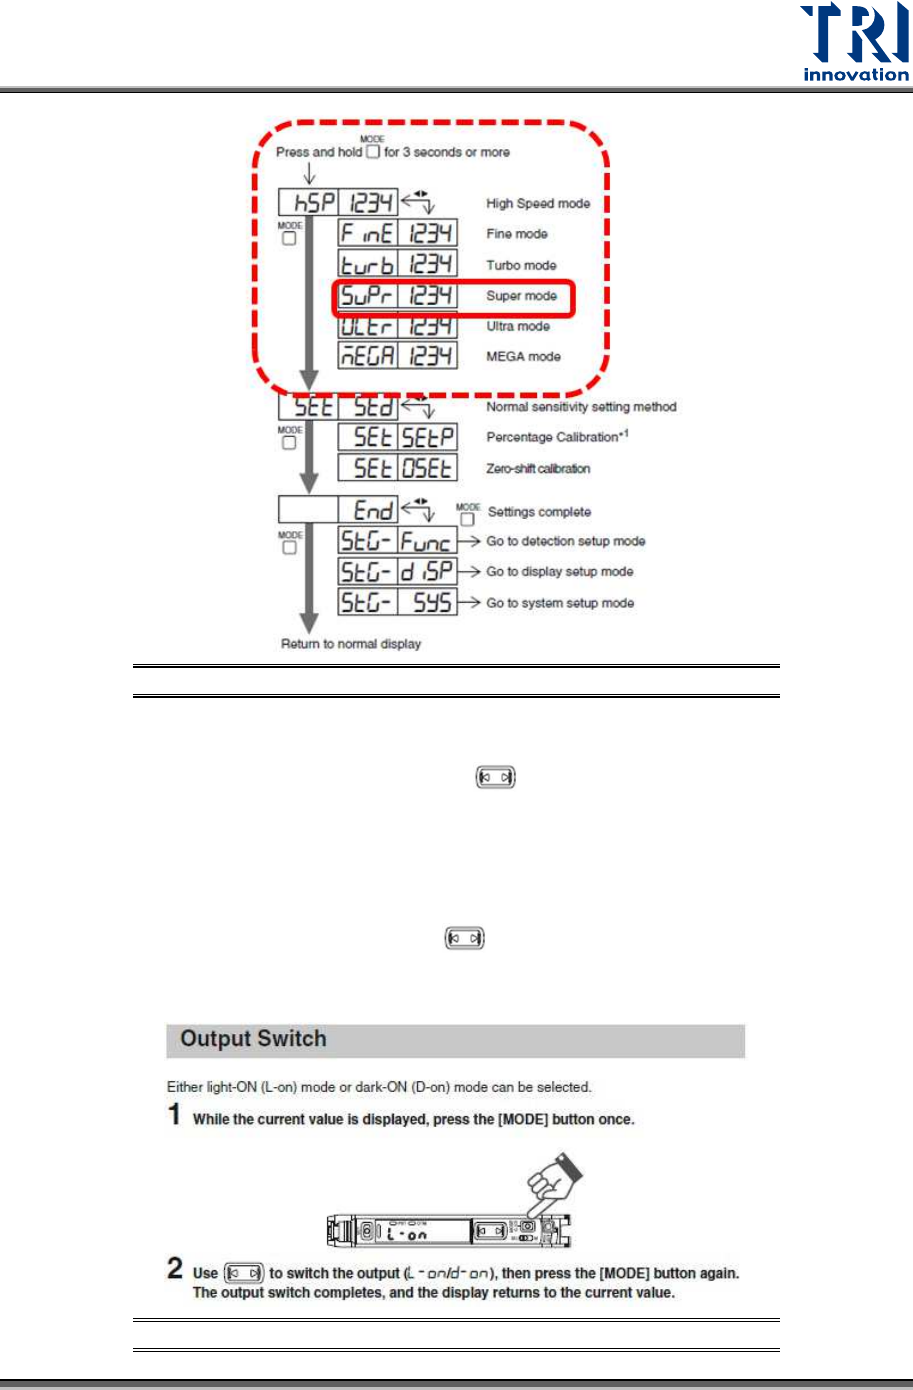
2) Adjust the power of the sensor to [Super] mode.
a) Press and hold [Mode] button for three seconds.
b) Use the to select the [Super] mode, and then press [Mode] button.
Test Research, Inc.
TR7600 SIII Series User Guide – Hardware 55
Figure 51: Digital Fiber Sensor/ [Super] mode
3) Input the proper sensitivity.
a) After [Super] mode is confirmed, use the to change the value to 100.(100 is a
suggestion, but not necessary)
b) Press [Mode] to finish.
4) Select the [D_on] (Dark on) mode.
a) After Sensitivity is confirmed, use the to choose the [D_on] (Dark on) mode.
b) Press [Mode] to finish.
Figure 52: Digital Fiber Sensor/ [D_on] mode