00196845-02_AI_Vakuumpumpe_SXDX4_X-Serie-S_de_en - 第100页
Fitting the Vacuum Pump Changeover 3.2.10 Inserting the Cooling Plate F astening Screw 100 Vacuum Pump Vakuumpumpe 3.2.10 3 . 2 . 1 0 I n s e r t in g t h e C o o lin g P la t e F a s t e n in g S c r e w Inserting the C…
Fitting the Vacuum Pump
3.2.9 Running the Supply Cable Changeover
Vacuum Pump Vakuumpumpe 99
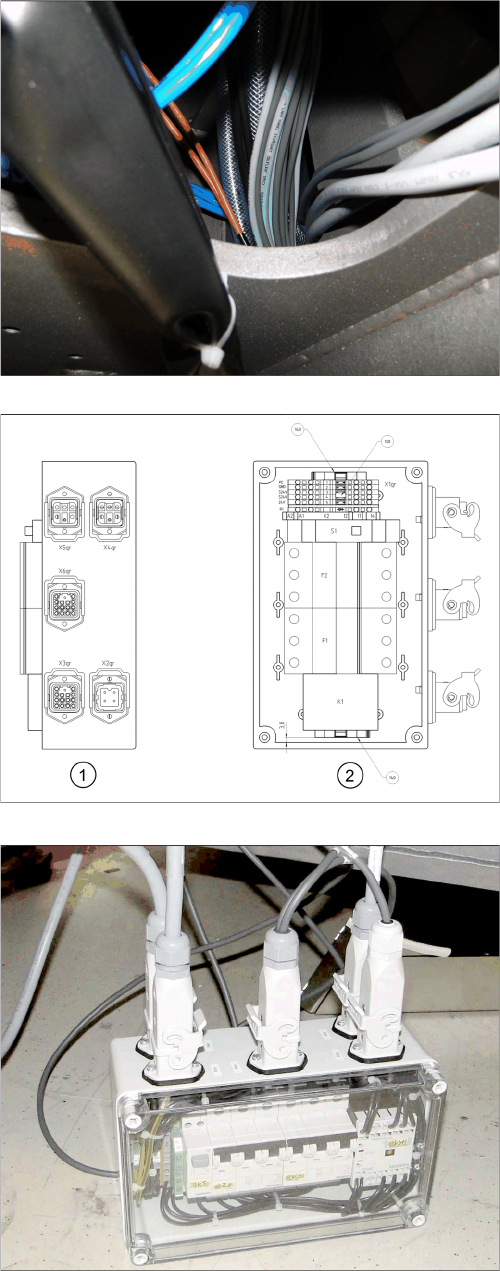
Location 2
Connection unit assembly
1. Side view: connection side
2. View from above
► Connect the cable to the vacuum pump connection
unit:
X2pr: voltage
X3pr: control
X4pr: pump 1
X5pr: pump 2
X6pr: fan
► If you connect only one pump, close the second con-
nection with a bridge connector [03055299-xx]. This
is provided with the "Vacuum pump connection unit
assembly [03079448-xx].
► After the function test, stow the connection unit in the
machine base.
Fitting the Vacuum Pump
Changeover 3.2.10 Inserting the Cooling Plate Fastening Screw
100 Vacuum Pump Vakuumpumpe
3.2.10
3.2.10 Inserting the Cooling Plate Fastening Screw
Inserting the Cooling Plate Fastening Screw
Before you insert the vacuum pump into the machine, you need to insert a screw (from inside to outside)
at the top right, above the installation point. After the vacuum pump is installed, the cooling plate for clos-
ing the installation point will be positioned on this screw.
3.2.11
3.2.11 Inserting the Vacuum Pump into the Machine
Inserting the Vacuum Pump into the Machine
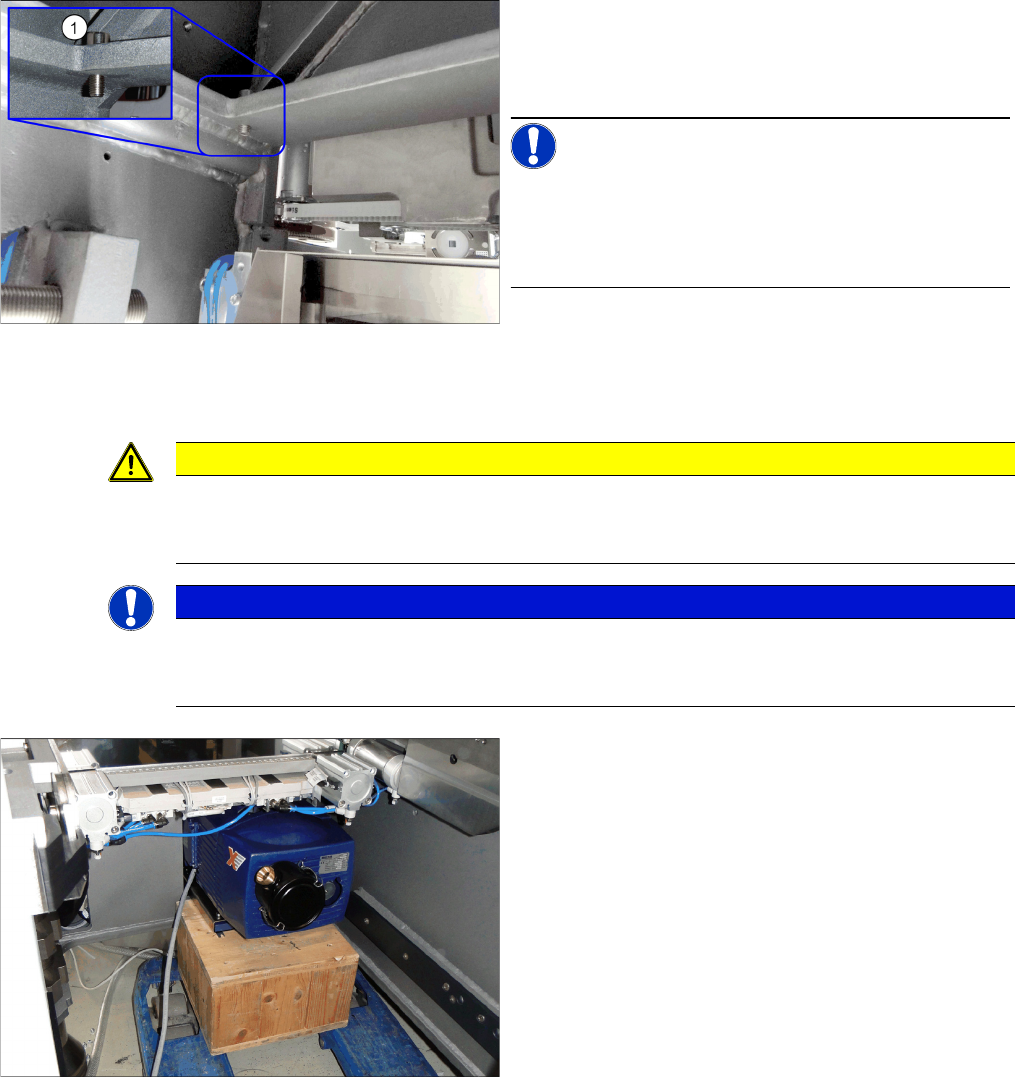
► Fix the cable or hoses to the machine base, above the place where the vacuum pump is to be fitted.
► Insert the cooling plate fastening screw (1) into the
machine base, above the vacuum pump installation
point. The photo shows the view from the inside of the
machine.
NOTICE!
The screws are inserted from the outside to the inside on
SX4 machines.
The screws are inserted from the inside to the outside on
DX4 machines and the fan sheets are secured with nuts.
CAUTION
DO not bend or trap the cables and hoses.
The vacuum pump is pushed so far into the machine that cables could be damaged. Take care
that there are therefore no cables behind the vacuum pump.
NOTICE
Fit-up aid
The vacuum pump weights over 30 kg and should not be lifted by a single person alone.
Enlist the help of a second person when lifting or transporting the vacuum pump.
► Move the vacuum pump to the installation point. Use
a suitable pallet jack with pallet to lift the vacuum
pump to the required height.
Fitting the Vacuum Pump
3.2.12 Fitting the Exhaust Air Sheet to the Pump Support Sheet Changeover
Vacuum Pump Vakuumpumpe 101
3.2.12
3.2.12 Fitting the Exhaust Air Sheet to the Pump Support Sheet
Fitting the Exhaust Air Sheet to the Pump Support Sheet
3.2.13
3.2.13 Installation Variant 2 Only: Fitting the Cap
Installation Variant 2 Only: Fitting the Cap
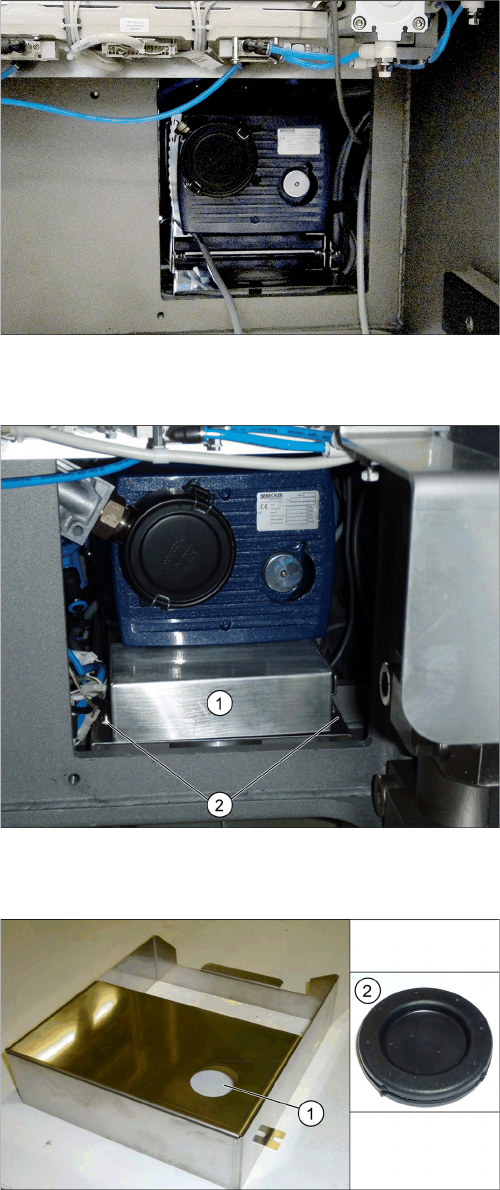
► Push the vacuum pump into the machine.
► Lift the vacuum pump slightly and fit the exhaust air
sheet (1) above the air outlet.
► Use two M4 screws to fasten the exhaust air sheet at
(2).
► Insert the cap (2) into the opening (1) on the exhaust
air sheet.