00196845-02_AI_Vakuumpumpe_SXDX4_X-Serie-S_de_en - 第93页
Fitting the Vacuum Pump 3.2.5 Prefitting the Vacuum Pump Changeover Vacuum Pump Vakuumpumpe 93 3.2.5.2 3 . 2 . 5 . 2 C o n n e c t in g t h e P o w e r c a b le Connecting the Power cable Screws 1 -4 on the cover 5. Stra…
Fitting the Vacuum Pump
Changeover 3.2.5 Prefitting the Vacuum Pump
92 Vacuum Pump Vakuumpumpe
3.2.5
3.2.5 Prefitting the Vacuum Pump
Prefitting the Vacuum Pump
Before the pump can be fitted, it needs to be prepared. This preparation work covers the following tasks:
▪ "3.2.5.1 Closing the Opening Mechanism" [ ➙ 92]
▪ "3.2.5.2 Connecting the Power cable" [ ➙ 93]
▪ "3.2.5.3 Fitting and Positioning the Filter" [ ➙ 94]
▪ "3.2.5.4 Preparing the Distributor Block" [ ➙ 96]
Vacuum pump in original state
3.2.5.1
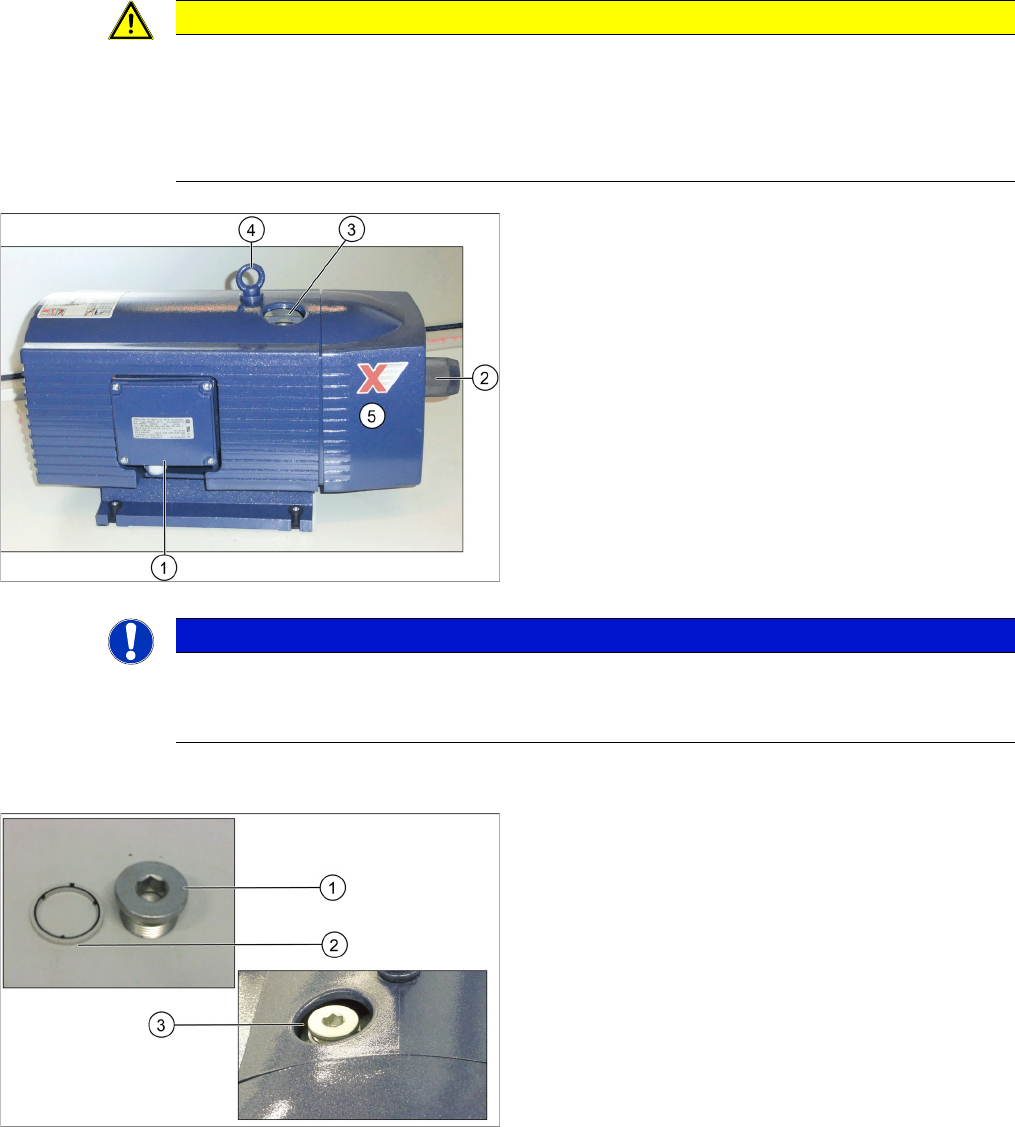
3.2.5.1 Closing the Opening Mechanism
Closing the Opening Mechanism
CAUTION
Lifting the vacuum pump
► When lifting the vacuum pump, always take hold of its base. As its center of gravity is above
this base, parts of the pump could be pulled off if you take hold of it elsewhere.
► Never lift the vacuum pump by its front plate! The front plate of the vacuum pump is only
fixed with rubber buffers. Take care not to damage the rubber buffers.
1. Cover on electricity connection box
2. Leakage valve
3. Opening mechanism
4. Eyelet (only in pumps for SX1/SX2 and DX1/DX2 ma-
chines
5. Front plate
► If necessary, replace the eyelet (4) with a screw
ISO4762-M 10x25-A2-70 [03042599-xx]
NOTICE
Clean the parts if necessary
► If the vacuum pump has previously been fitted in a machine, clean it before fitting all vacu-
um-conducting parts to remove any existing contaminants e.g. Loctite residues.
1. Sealing plugs
2. Sealing ring
3. Opening mechanism
► If not prefitted, position the sealing ring (2) on the
sealing screw (R3/4 St+NBR) [03004775-xx] (1) and
screw both into the opening on the top of the pump
(3).
If there is no sealing ring available, first apply Loctite
55 onto the threaded connection as a sealant.
Fitting the Vacuum Pump
3.2.5 Prefitting the Vacuum Pump Changeover
Vacuum Pump Vakuumpumpe 93
3.2.5.2
3.2.5.2 Connecting the Power cable
Connecting the Power cable
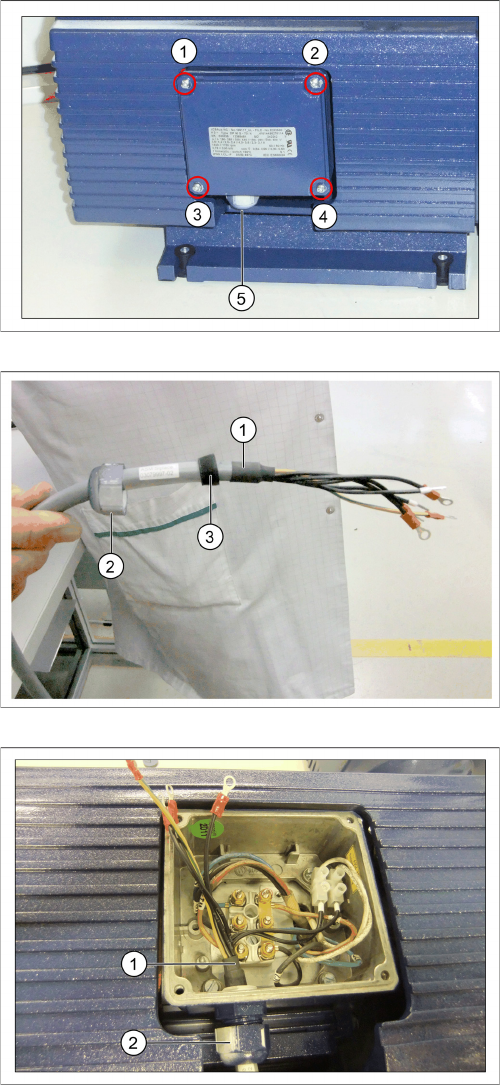
Screws 1 -4 on the cover
5. Strain relief
► Remove the four screws (1) to (4) fastening the cover
on the electricity connection box and then remove the
cover.
► Turn the strain relief out (5).
1. Power cable
2. Tension relief
► Thread the power cable [03079997-xx] (1) through
the strain relief (2) and the sealing ring (3).
1. Power cable
2. Tension relief
► Thread the power cable into the electricity connection
box (1) and turn the strain relief until tight (2).
Fitting the Vacuum Pump
Changeover 3.2.5 Prefitting the Vacuum Pump
94 Vacuum Pump Vakuumpumpe
► Place the cover back on the electricity connection box and fix it with the four screws which you re-
moved.
3.2.5.3
3.2.5.3 Fitting and Positioning the Filter
Fitting and Positioning the Filter
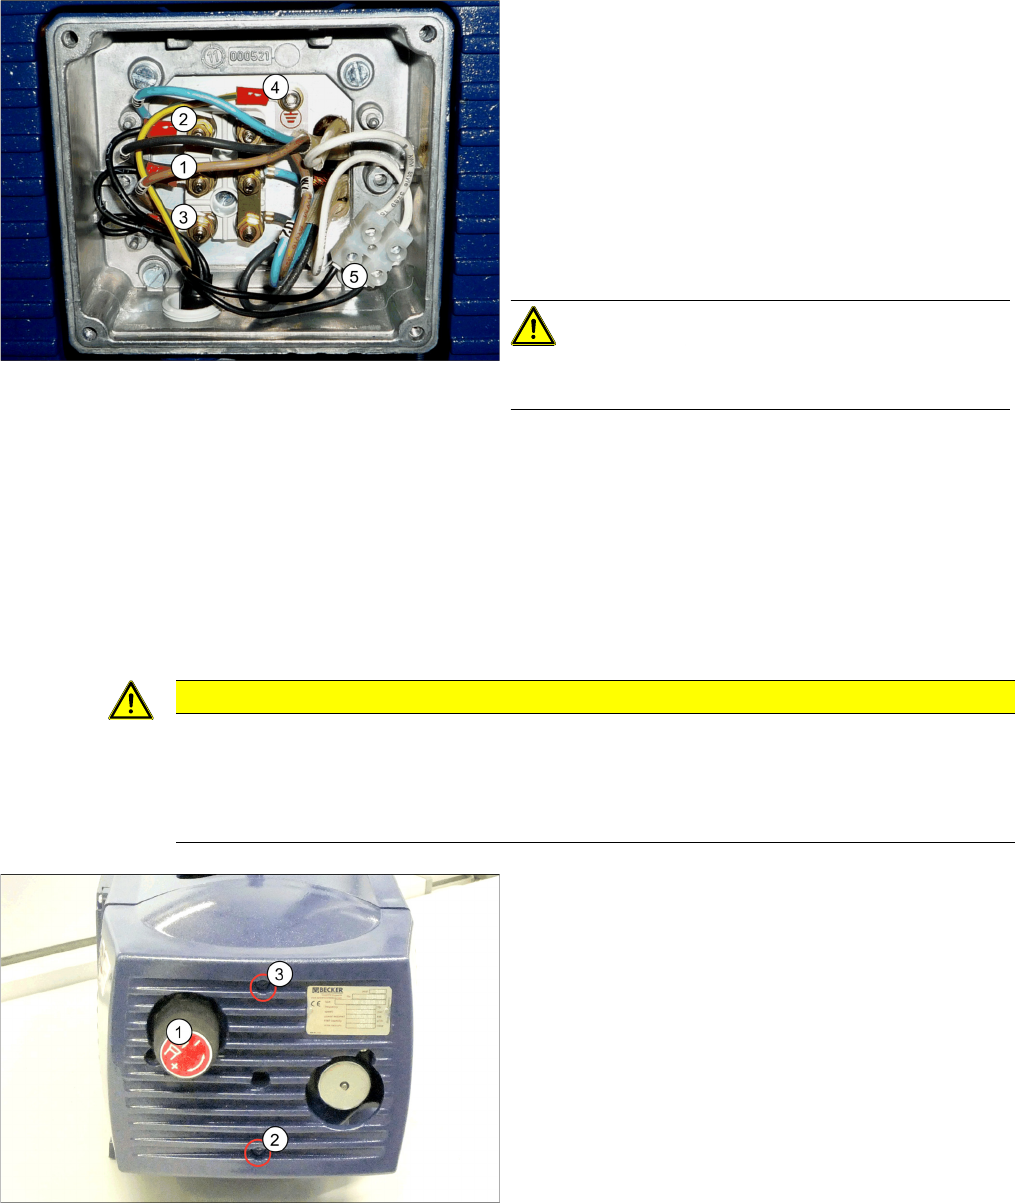
► Fit cable connections to the pump connections as fol-
lows:
⇨ Conductor (2) to connection U1
⇨ Conductor (1) to connection V1
⇨ Conductor (3) to connection W1
⇨ Protective ground 4 – to connection 4
⇨ The two black cables (temperature monitor) are
connected to a luster terminal (5).
► Remove the nuts from connections U1, V1, W1 and
the protective ground connection (4).
CAUTION!
Make sure that none of the nuts or washers fall inside the
pump.
► Place a washer onto each connection. Position the
corresponding cable shoe onto each connection.
Place another washer onto each cable shoe.
► Hand-tighten the nuts.
CAUTION
Do not lift on the front plate
The front plate of the vacuum pump is only fixed with rubber buffers.
► Take care not to damage the rubber buffers.
► Always lift the vacuum pump on its housing or filter, not on the front plate.
1. Leakage valve
2. Fastening screw
3. Fastening screw
► If present, unscrew the leakage valve (1).
► Loosen the screws (2 and 3) fastening the front plate
and then remove the front plate.