00191376-07.pdf - 第28页
5 Monthly m aintenance jobs HS Preventive Maintenance 01/2006 US E dition 28 5 Monthly maintenance jobs 5

HS Preventive Maintenance 4 Weekly maintenance jobs
01/2006 US Edition
27
Empty the component drawer or flap of the 8 mm S feeder 4
: Unplug the 8 mm S feeder and lift it off the changeover table.
4
a Remove loose components from the changeover table with a brush or using the vacuum
cleaner.
4
s Empty the component drawer of the 2x8 mm S feeder (if present).
4
d Open the flap of the 3x8 mm S feeder (if present) and remove the components.
4
f Wipe the base of the feeder module to remove any dirt.
4
g Cut off the used tape so that it is flush with the feeder.
4
: Return the feeders to their original (correct) locations.
4
Make sure that the feeder is seated firmly on the changeover table and is inserted at the right po-
sition. 4
4
4
4
: Close the protective cover.
: Repeat these tasks in every placement area.
4
4
4
4
5 Monthly maintenance jobs HS Preventive Maintenance
01/2006 US Edition
28
5 Monthly maintenance jobs
5

HS Preventive Maintenance 5 Monthly maintenance jobs
01/2006 US Edition
29
5
You will need the following tools, equipment and consumables for monthly maintenance. 5
– Laboratory gloves
– Lint-free cloths
– Lens cloth
– Lint-free cottonwool buds
– SIPLACE cleaning tissue
– Ethyl alcohol
– Set of cleaned sleeves
– Set of cleaned and lightly greased valve plungers
– Switch for head crash guard, if necessary
5
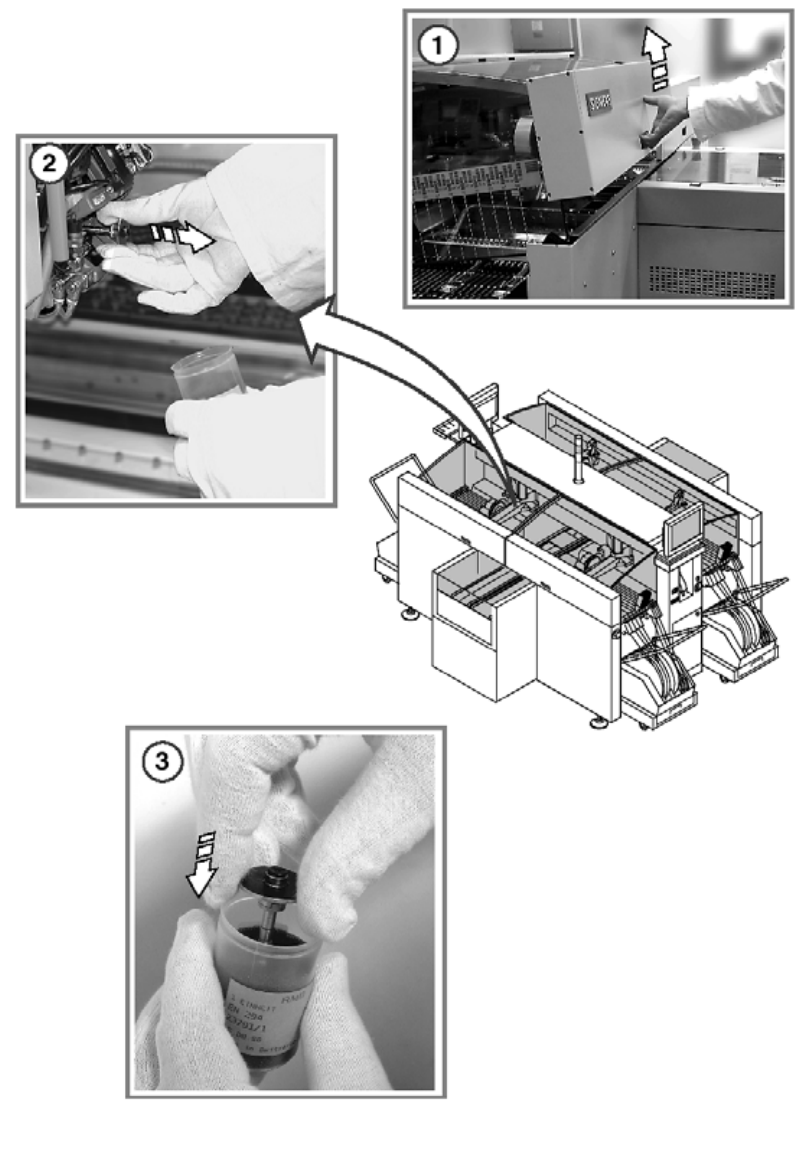
Replace the sleeves and valve plungers 5
: Use the "Single Functions" menu to return the nozzles of the Collect&Place head to the nozzle
changers.
a Open the protective cover.
5
Do not hold the sleeves in your bare hands. Wear laboratory gloves when carrying out any main-
tenance work on the sleeve. 5
5
This will avoid dirtying the glass disk, the friction wheel, and the suction plate unnecessarily, which
could lead to faults (counting errors and overshooting). 5
Do not hold the suction plates to avoid damage. 5
5
s Remove the sleeves from the head.
Pull out the sleeves as shown in the diagram. 5
5
5
d Place them in the container provided.
Use the "Single Functions" menu to advance the star.
5
5