00191376-07.pdf - 第34页
6 2-monthly maintenance jobs HS Preventive Maintenance 01/2006 US E dition 34 6 2-monthly maintenance jobs 6
HS Preventive Maintenance 5 Monthly maintenance jobs
01/2006 US Edition
33
Clean the linear guides for the Y axis 5
a Clean the linear guides for the Y axes thoroughly over their entire length using the SIPLACE
cleaning tissue.
a Use a lint-free cloth to remove any stubborn dirt from the linear guides.
a Oil and preserve the linear guides using a new SIPLACE cleaning tissue.
5
Clean the linear guides for the X axis 5
s Clean the linear guides for the X axes thoroughly over their entire length using the SIPLACE
cleaning tissue.
s Use a lint-free cloth to remove any stubborn dirt from the linear guides.
s Oil and preserve the linear guides using a new SIPLACE cleaning tissue.
5
Clean the running surface of the Y axis opposing bearing 5
d Use a SIPLACE cleaning tissue to clean the running surface of the opposing bearing.
5
Clean the Y axis friction surface 5
f Use a SIPLACE cleaning tissue to clean the Y axis friction surface.
5
Check the switch for the head crash guard 5
g Check the switch for the head crash guard for function and damage by actuating the switch
several times.
Replace the switch, if necessary.
5
5
: Close the protective cover.
: Repeat these tasks in every placement area.
5
5
5
6 2-monthly maintenance jobs HS Preventive Maintenance
01/2006 US Edition
34
6 2-monthly maintenance jobs
6

HS Preventive Maintenance 6 2-monthly maintenance jobs
01/2006 US Edition
35
6
You will need the following tools, equipment and consumables for the 2-monthly maintenance. 6
– Vacuum cleaner
– Condensate catch tray
– Short-bristled brush
– Phillips screwdriver
– Whetstone
–Scissors
– Lint-free cloths
– ISOFLEX TOPAS NCA52 grease
–WD40
– Filter insert,
5 microm. for series 112, if required
– New silencer for the Collect&Place head DLM1, HS-50, if required
– New silencer for the Collect&Place head DLM2, HS-60, if required
6
6
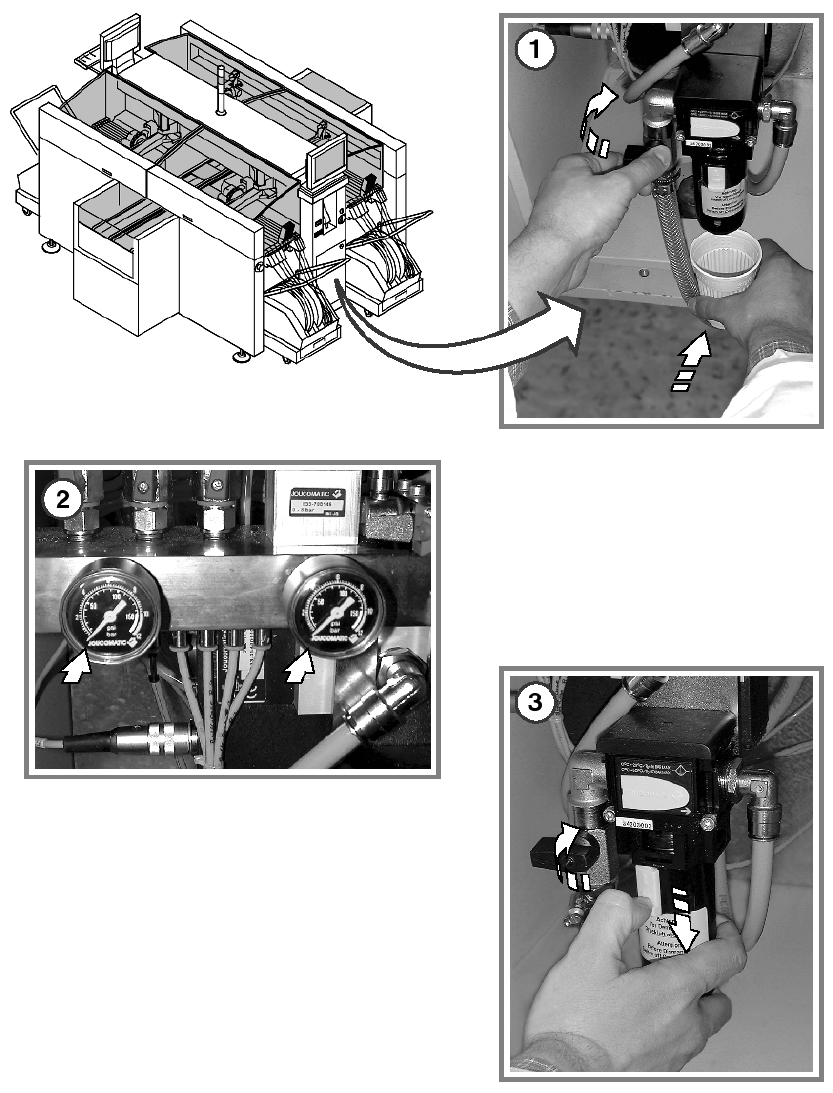
Inspect or replace the filter cartridge 6
: Open the door to the compressed air supply.
: Place a catch tray beneath the compressed air maintenance unit.
a Close the main compressed air valve.
s Once both manometers read 0, switch the machine off at the main switch.
6
d Remove the cover flap by pulling the yellow cap release down and turning the cover flap
counter-clockwise (bayonet fitting).
6
6
6