Portal_Manual_1.2.1_Rev_H-1.pdf - 第14页
Portal PVA Revisio n H ( 2018 ) 14 of 93 3 System Ov erview 3.1 Softwa re The compl ete Portal software package has s everal components . E ver y operat or must understa nd wha t each p iece o f so ft wa re i s a nd it s…

Portal
PVA
Revision H (2018)
13 of 93
2 Installation, Upgrade, and Recovery
Before you operate a tool, workcell, or program a path, know the tool and workcell
components and the steps to program a path. Workcells from PVA will come with the
current version of Portal installed. Refer to the installation guide for more information.
NOTE: Restart the computer after you install or upgrade Portal or Portal Shell.
2.1 Install Portal Shell or Portal
1. Insert the USB flash drive, or access the electronic file provided by PVA for the
workcell.
2. Navigate to the software file named with the correct portal version and build.
NOTE: The folder will be named according to the Portal version and build.
3. Run ‘PVAPortal_Setup.exe’ and follow the instructions on the screen.
NOTE: Install the software in its default directory (c:\Program Files\PVA for
32 bit systems, c:\Program Files (x86)\PVA for 64 bit systems).
2.2 Upgrade Portal
Upgrading Portal may include, but not is limited to, main program changes and
configuration file changes. Before you upgrade Portal on any workcell, do the backup
procedure and contact PVA for additional guidance.
2.3 Backup Portal
To backup Portal, copy and save the entire contents of the ‘C:\Program
Files\PVAPortal\Config’ and ‘C:\Program Files\PVAPortal\Lib’ directories.
2.4 Restoring Portal
To restore Portal, do the installation process and then paste the backup ‘Lib’ and
‘Config’ folders into the ‘C:\Program Files\PVAPortal’ directory.

Portal
PVA
Revision H (2018)
14 of 93
3 System Overview
3.1 Software
The complete Portal software package has several components. Every operator must
understand what each piece of software is and its function before you operate the
workcell.
3.1.1 Portal
Portal is the main user interface that allows the user to interact with the workcell. It sets
the mode the workcell is operating in, allows the operator to monitor each system of
the workcell, allows the operator to select different PathMaster routines, and conveys
system messages to the user.
3.1.2 PathMaster®
PathMaster is PVA’s Windows®-based programming software. It is used to create,
maintain and download project files for the workcell. Refer to the PathMaster manual
for more information.
Portal
PVA
Revision H (2018)
15 of 93
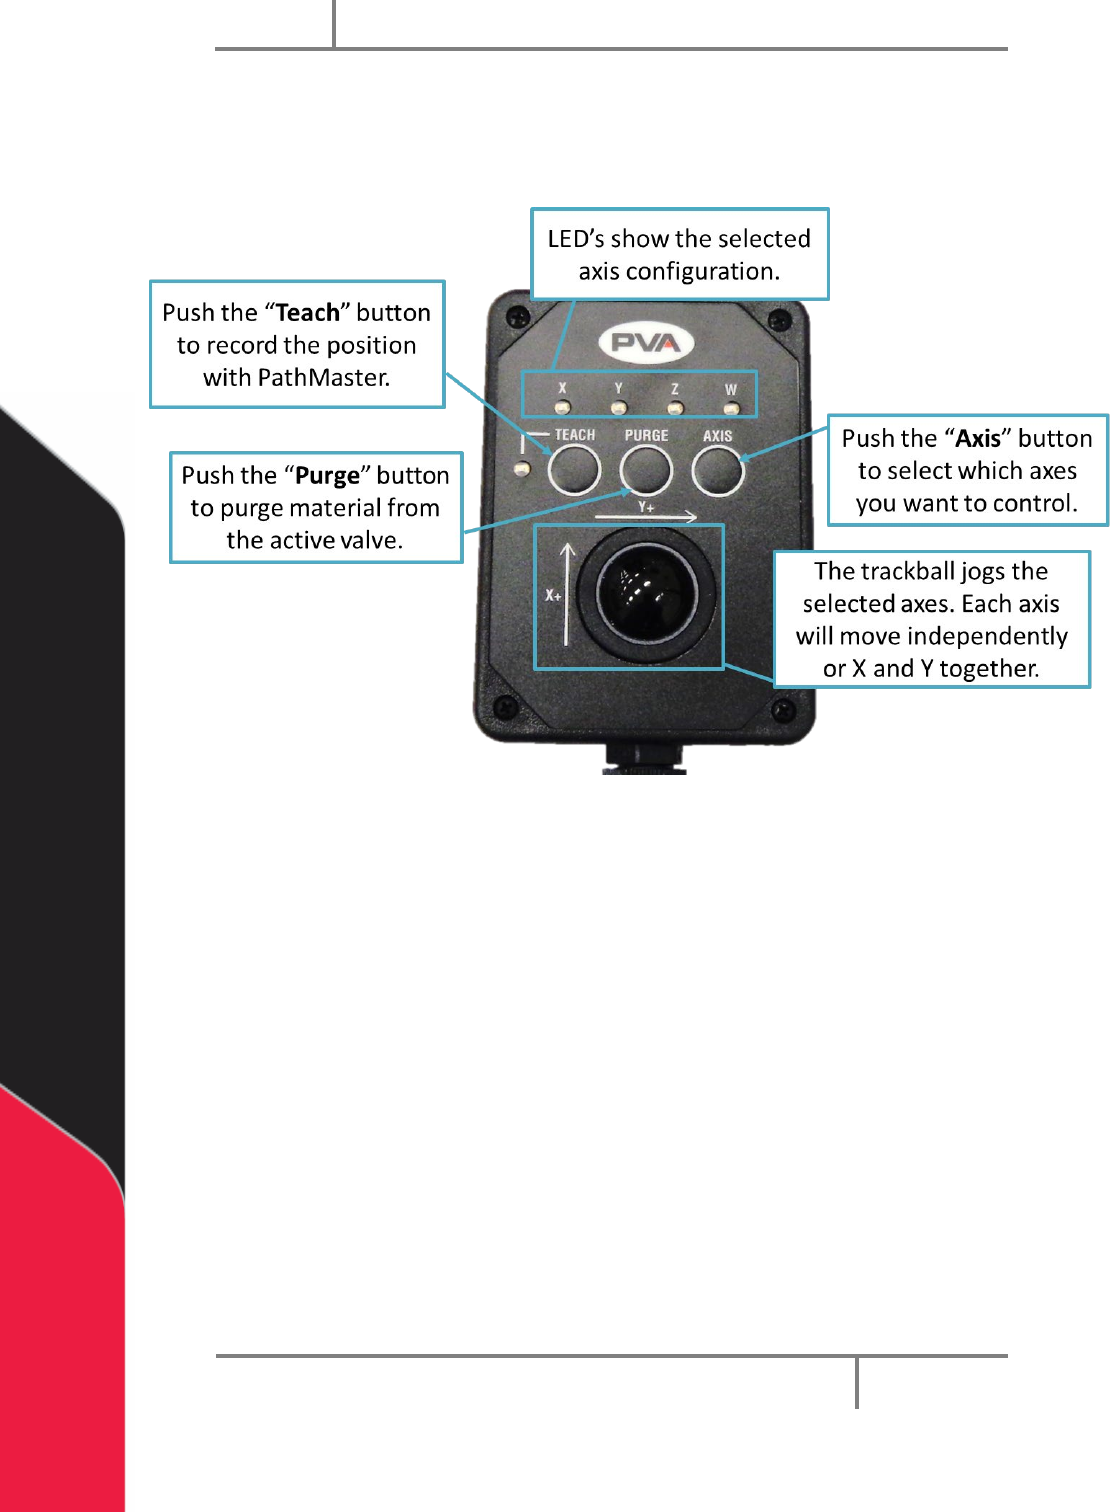
3.2 Teach Pendant
PVA workcells come with a teach pendant. Each teach pendant has a Trackball, Teach
button, Purge button, Axis selection button, and LED indicators for selected axes and
teach function.
Figure 1: Teach Pendant-Update Image
LED’s – The X, Y, Z and W LED’s show the selected axis configuration. The Teach LED
shows a position was correctly recorded by PathMaster®. The light tower buzzer will
“beep” when the Teach LED illuminates.
NOTE: W-axis trackball control is locked if the Teach Tool is enabled, unless
the PathMaster Tool Offset window is open (Setup-> Machine Parameters->
“Tool Offsets”). This is so the operator does not accidentally teach a theta
position with the teach tool. You can also enable or disable this function in
Setup mode (refer to Figure 24). When teaching with a device that is not the
camera, the theta position will be taught.
The speed of the trackball can be changed if you have a vision system.
1. Push and hold the “Axis” button for three seconds.
2. The red teach light will illuminate and the trackball function will move 10x
slower.
3. Do the steps again to change the speed back to normal.