Portal_Manual_1.2.1_Rev_H-1.pdf - 第28页
Portal PVA Revisio n H ( 2018 ) 28 of 93 6.7 FIS The PV A integrated factory infor mation system (FIS) is an optional add - on . It is configurable and will interface and hand shake with t he majority of f act or y in fo…
Portal
PVA
Revision H (2018)
27 of 93
6.6 SMEMA Status
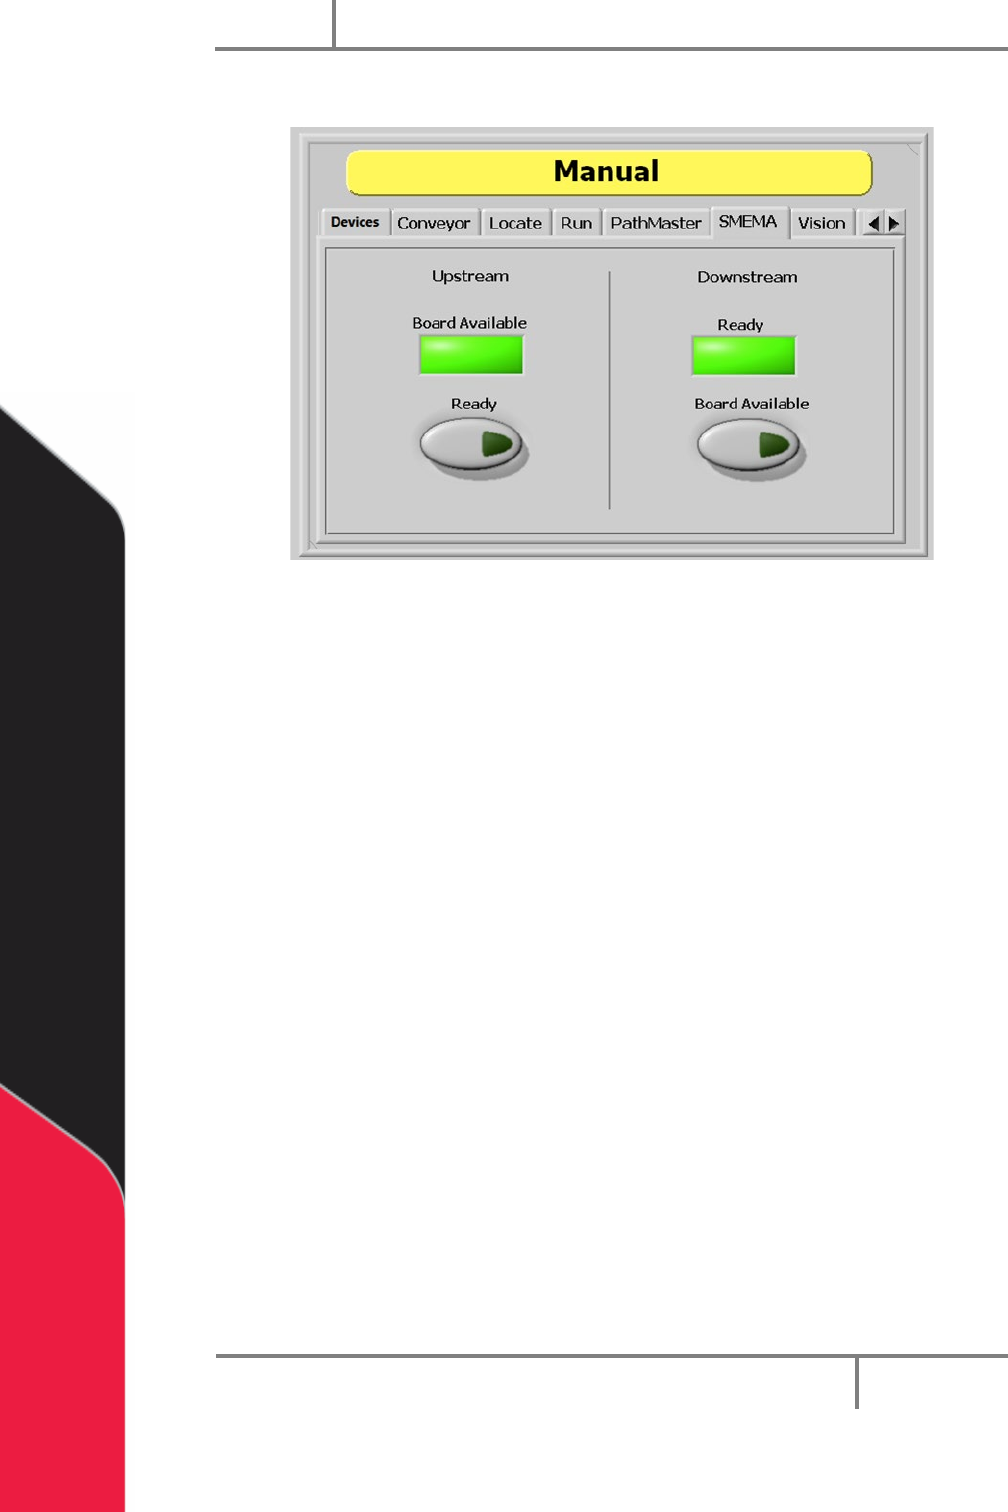
Figure 15: SMEMA Status, Manual Mode
When the workcell is put in-line, SMEMA signals communicate with upstream and
downstream machines. You can check the inputs to the workcell and change the
Upstream Ready and Downstream Board Available output signals under the “SMEMA”
tab.
1. Select the “SMEMA” tab.
The Upstream “Board Available” signal turns on when the upstream machine sends a
board available signal.
2. Select Upstream “Ready” to toggle the Ready output to the upstream machine
on or off. When on, the workcell can receive parts.
The Downstream “Ready” signal turns on when the downstream machine sends a ready
signal.
3. Select Downstream “Board Available” to toggle the Board Available output to
the downstream machine on or off. When on, the workcell can send parts.
Portal
PVA
Revision H (2018)
28 of 93
6.7 FIS
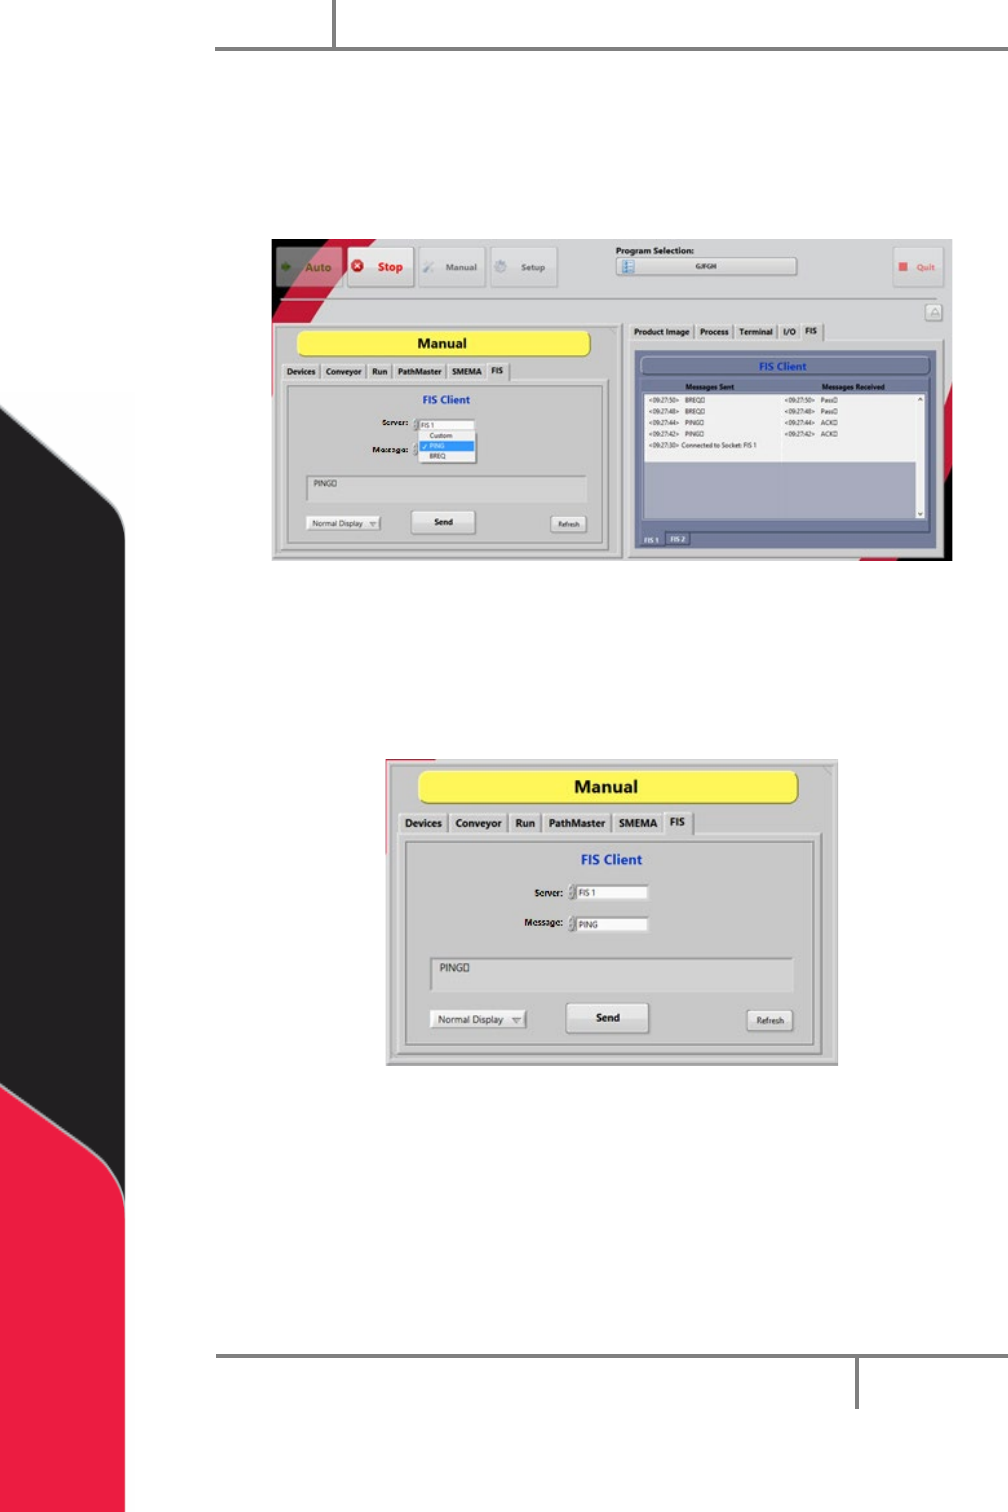
The PVA integrated factory information system (FIS) is an optional add-on. It is
configurable and will interface and handshake with the majority of factory information
systems. If necessary, messages can be customized.
Figure 16: FIS Client Mode and Messages Screens
6.7.1 FIS Client Mode Screen
1. The FIS Client mode screen can be seen in manual mode when the FIS tab is
selected.
Figure 17: FIS Function
2. To change the display format, select an option from the Display drop down
menu (Normal, ‘\’ Code, Hex Code).
3. Select the Server menu to select the sever you want to send a message to. This
list is specific to each workcell.
4. Select the message you want to send from the Message drop down menu. The
message will be shown in the message box.

Portal
PVA
Revision H (2018)
29 of 93
5. If Custom Message is selected from the Message menu, you can edit the
message window. Use the keyboard to type the message exactly as it should be
received by the server.
6. Select “Clear” to clear the custom message. This button is only available for
custom messages.
7. After you have selected or typed the message, select the “Send” button to send
the message.
8. Select “Refresh” to refresh any dynamic data in the message, such as a Galil
variable. The “Refresh” button is not shown for custom messages.