OM-1078-002.pdf - 第55页
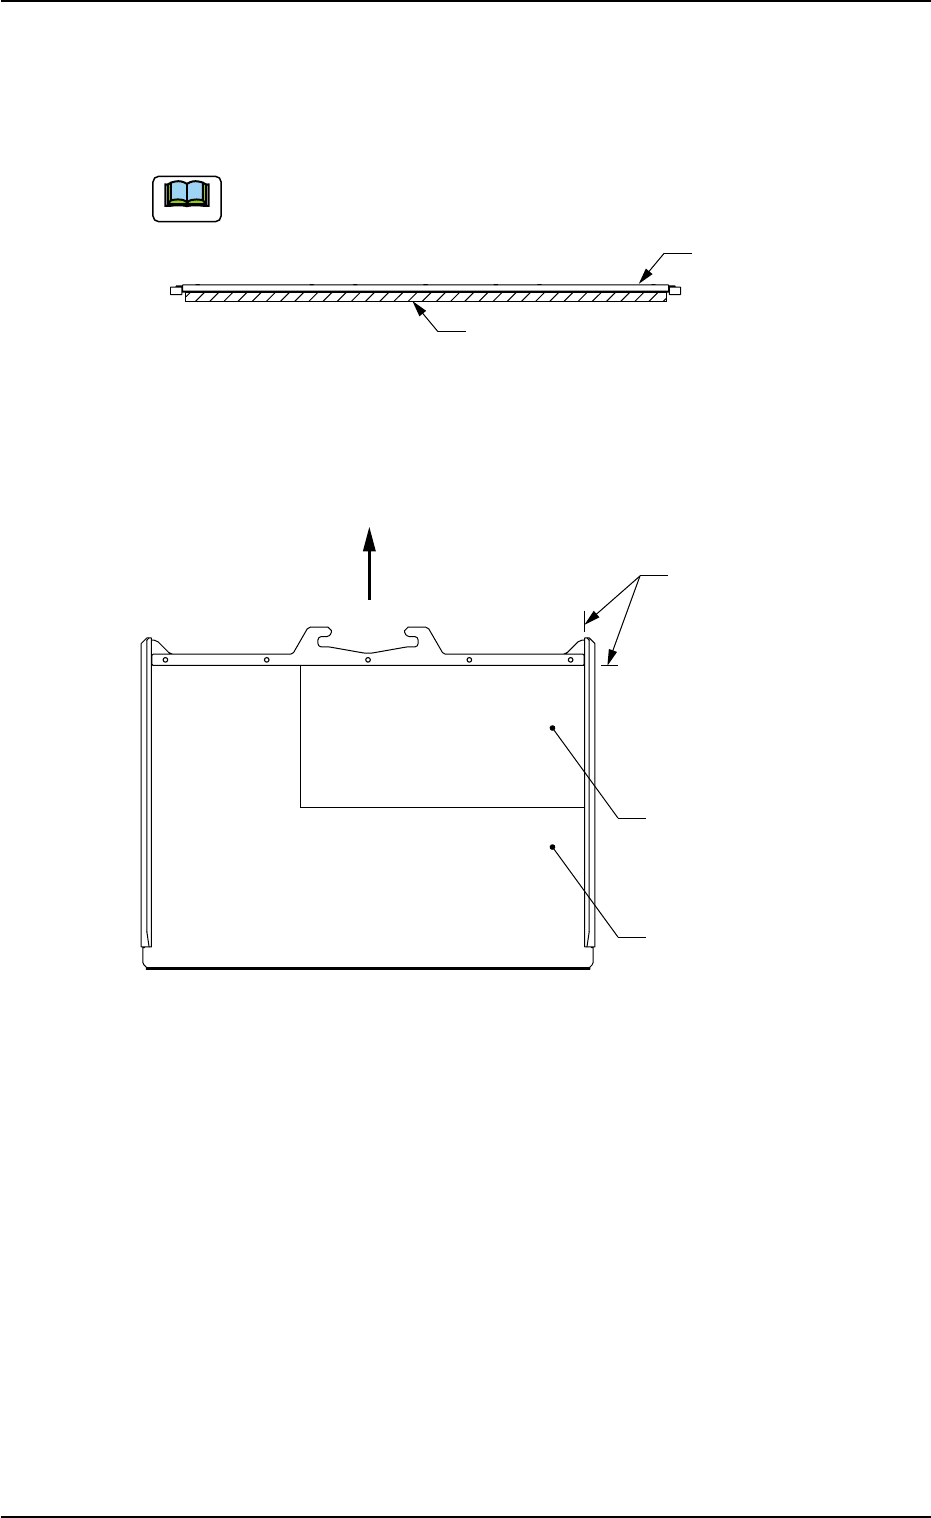
031 1-003 1-18 AHI01EGP 3.3.4 Procedure of T ray Attachment to Pallet (1) Put a flat and rigid object (thickness: 2 mm or more) under the pallet as shown in the figure below . Do not set the pallet upside down (wrong sid…
How to handle the tray magnets
Do not bring the tray magnet close to any implanted
pacemaker. Otherwise, the pacemaker may be influ-
enced by electromagnetic impulses of the magnet,
causing the wearer to faint, etc.
Do not bring a magnetic card or a watch close the tray
magnets. Otherwise, the data of the magnetic card
might be cleared or a watch, etc., may be damaged
due to the strong magnetism.
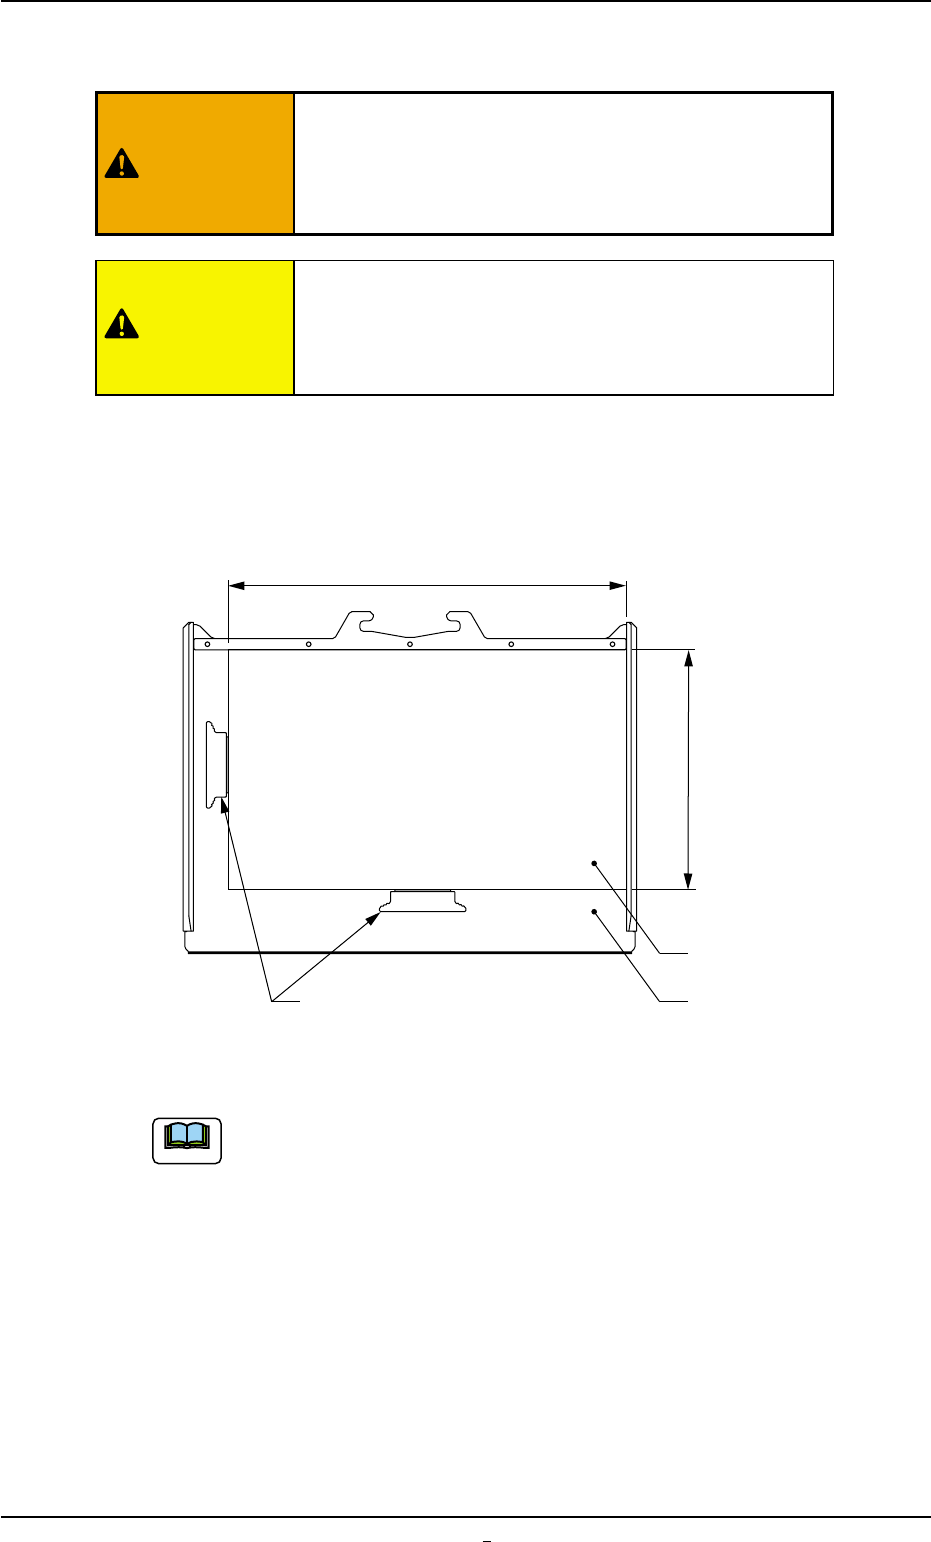
• Tolerable Mass and Size of Tray Fixation with Tray Magnets
Mass: Approx. 500 g
Dimensions: Max. 360 × 230 mm
Fig. A21-2
Consult our marketing department or sales agency when a larger
tray than the above-described one is used.
0311-002 1-17-1
AHI01EGP
3.3 Preparation before Operation
Tray
Tray Magnets
Pallet
360
230
Note
CAUTION
WARNING
0311-003 1-18 AHI01EGP
3.3.4 Procedure of Tray Attachment to Pallet
(1) Put a flat and rigid object (thickness: 2 mm or more) under the pallet
as shown in the figure below.
Do not set the pallet upside down (wrong side facing up or down).
Fig. A21-3
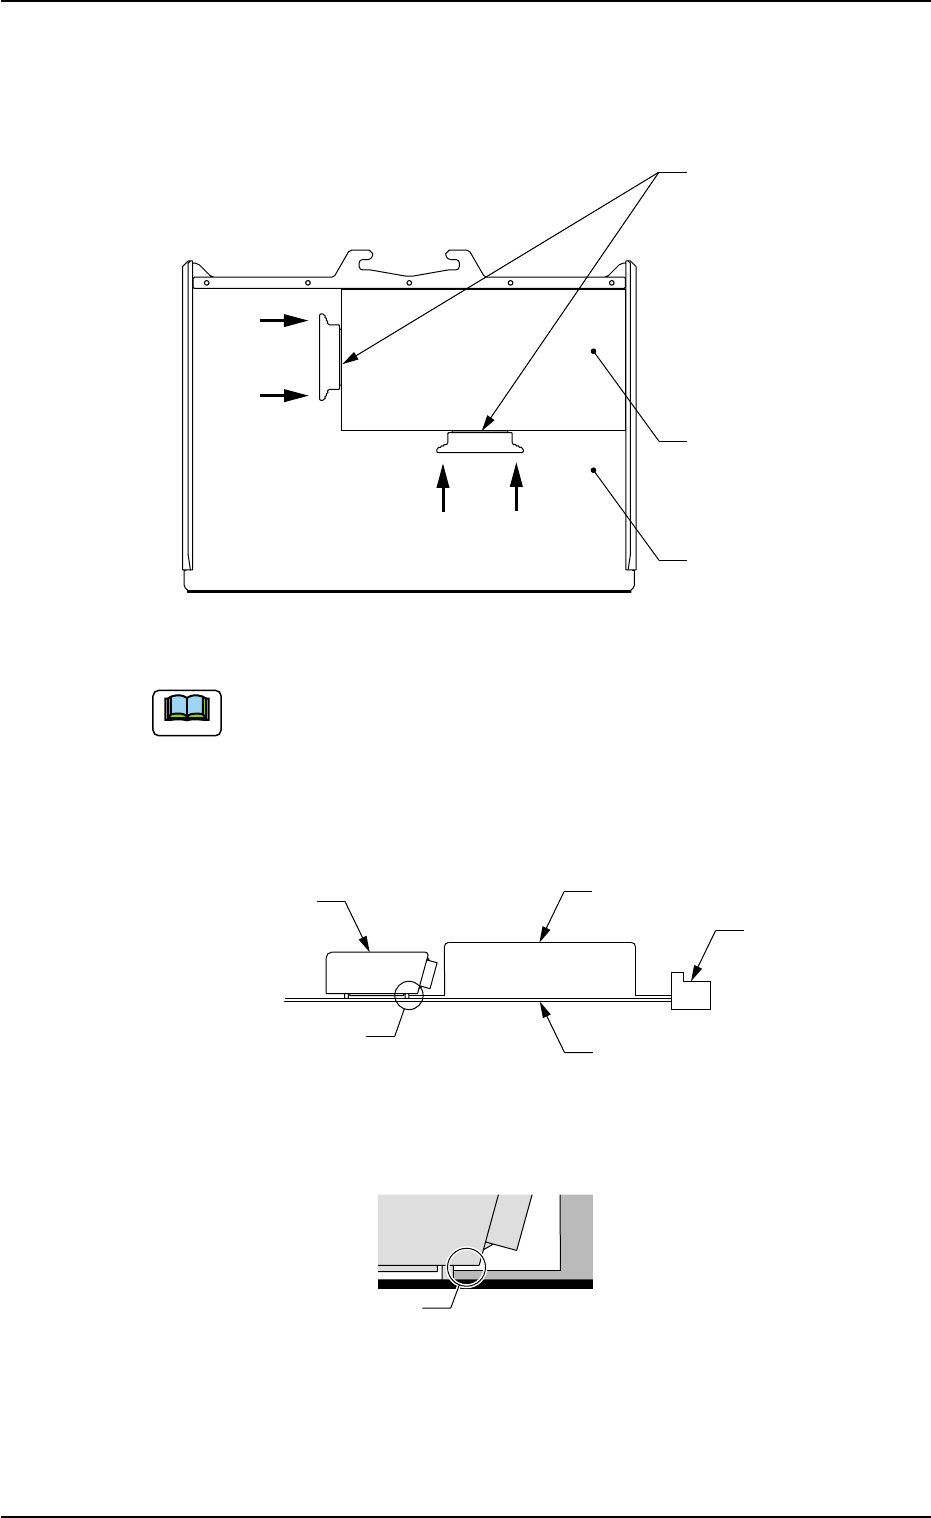
(2) Place a tray on the right rear area of the pallet.
Fig. A22
3.3 Preparation before Operation
Flat and Rigid Object
(Thickness: 2 mm or more)
Pallet
Direction of Insertion into Rack
Reference Plane
Tray
Pallet
Note
0311-003 1-19 AHI01EGP
(3) Hold the tray securely on the pallet with the tray magnets.
The tray magnets must be attached as close to the center (both
sides) of the tray as possible.
Fig. A23
(a) Note that the tray magnets must be attached differently,
depending on the type of shape of a tray.
• Soft Trays
Make use of the clearance of the tray magnet and hold
the soft tray securely as shown in Fig. A24.
Fig. A24
Fig. A25 Magnified View of Clearance
3.3 Preparation before Operation
Tray
Tray Magnets
Pallet
Tray Magnet
Clearance
Soft Tray
Rail
Pallet
Note
Clearance