OM-1078-002.pdf - 第58页
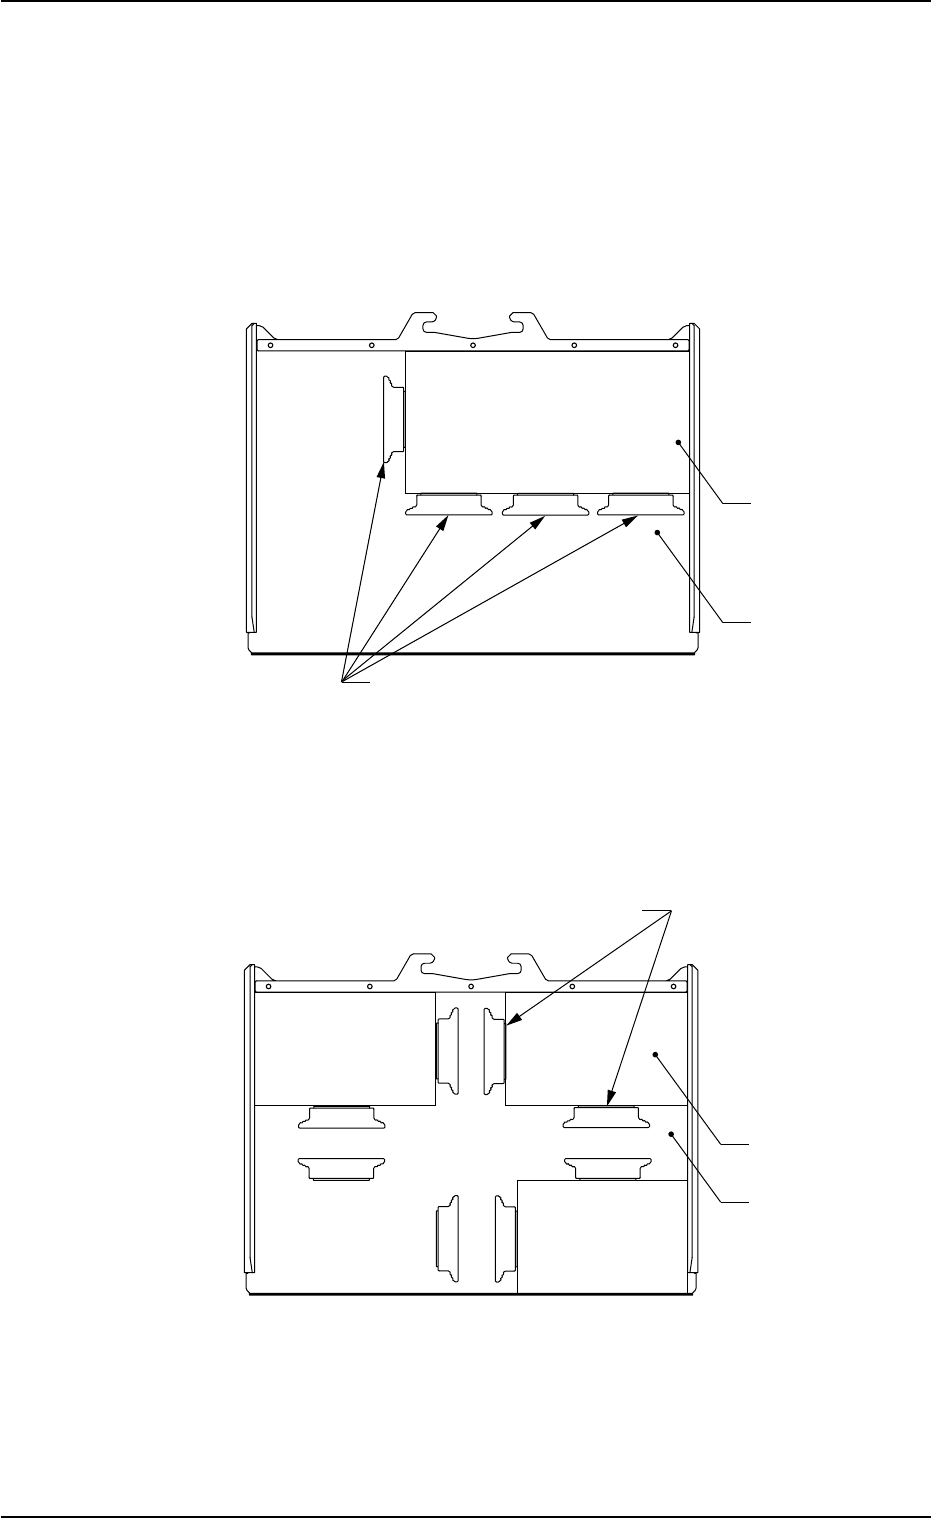
3.3.5 How to detach a tray from the pallet (1) Shift the tray magnets in the arrow directions and keep the tray away from the tray magnets. Fig. A29 (2) Detach the tray from the pallet. 031 1-003 1-21 AHI01EGP 3.3 Prepar…
(b) When the total mass (components and tray) exceeds 500 g,
additional tray magnets are required in the pallet drawing di-
rection to comply with the total mass.
Ref.: The mass (500 g) can be secured, using one tray
magnet.
Example: When the total mass is 1.2 kg, use four pieces of
tray magnets to hold the tray securely as shown in
the figure below.
Fig. A27
(c) It is recommended that up to 4 trays be mounted as shown
in Fig. A28 when more than one tray must be used although
the data can accept 9 types of trays to be mounted.
Fig. A28
(4) Check how the trays are mounted.
Check for any positional deviation of a component, missing compo-
nents, incorrectly seated trays (trays seated afloat), and incorrect
attachment of the tray magnets.
3.3 Preparation before Operation
Tray
Tray Magnets
Pallet
Tray
Tray Magnets
Pallet
0311-003 1-20 AHI01EGP

3.3.5 How to detach a tray from the pallet
(1) Shift the tray magnets in the arrow directions and keep the tray away
from the tray magnets.
Fig. A29
(2) Detach the tray from the pallet.
0311-003 1-21
AHI01EGP
3.3 Preparation before Operation
Tray
Tray Magnets
Pallet
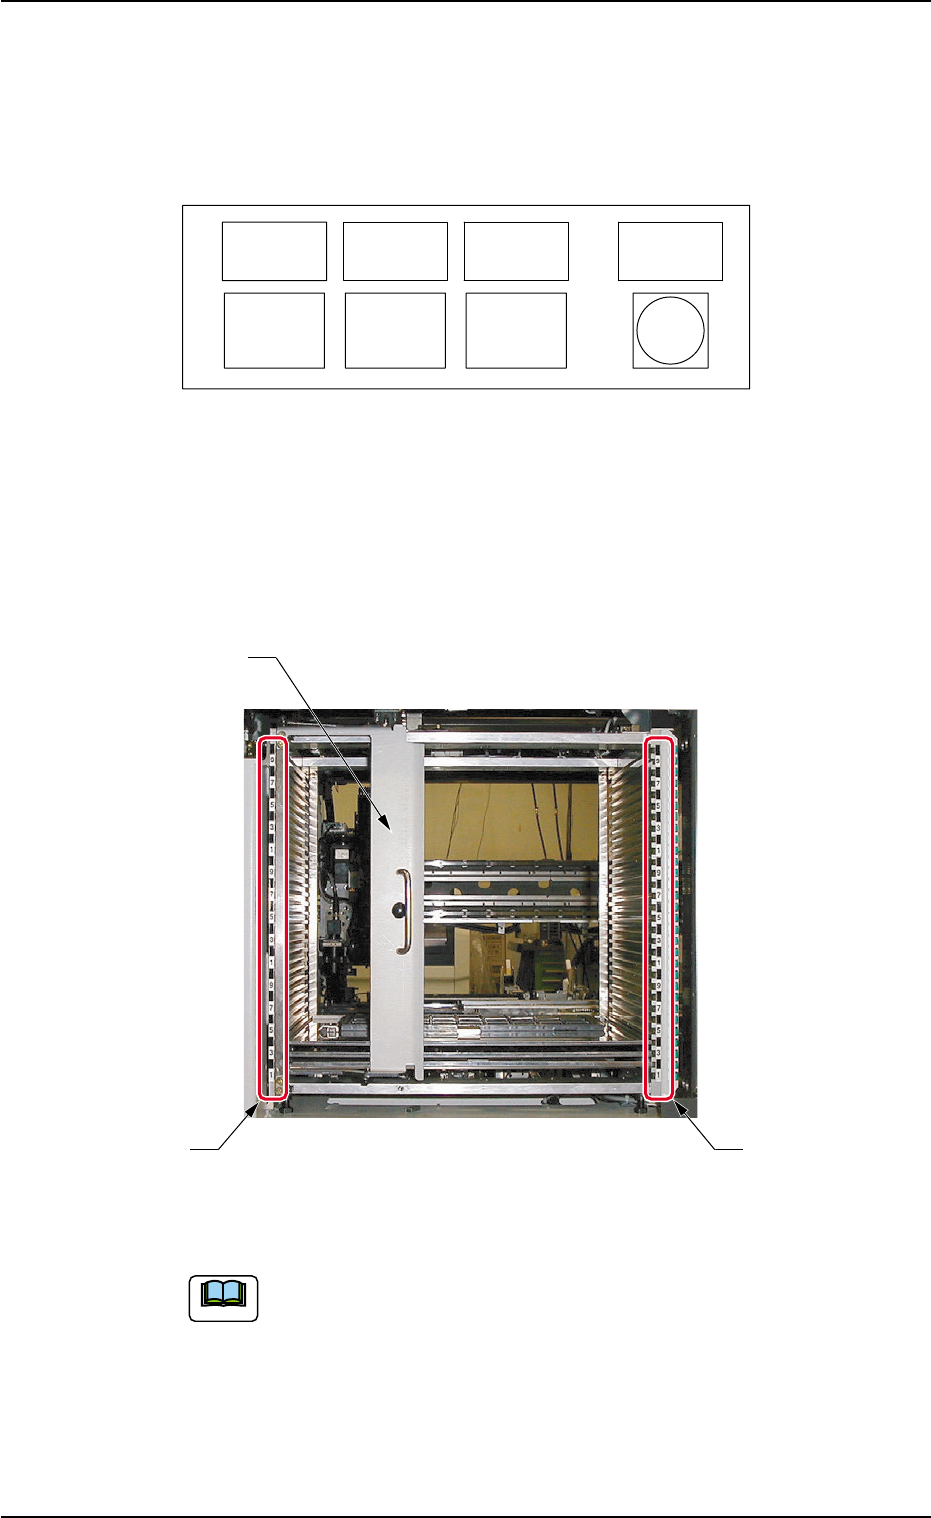
3.3.6 Procedure for Pallet Insertion into Rack
(1) Press the [HOME POSITION] button (one of the operation switches)
with the safety door closed.
Fig. A30
(2) Press the [READY] button (one of the operation switches) for approx.
1 second to release the electromagnetic lock of the safety door.
(3) Open the safety door of the feeder.
(4) Open the rack shutter on the operator’s side.
Fig. A31
(5) Set the pallet equipped with a tray on the rack.
Use both hands to hold the pallet securely and set it in the
rack such that no components fall down from the tray.
(6) Check the numbers on the right and left rack step Nos. to confirm
that the pallet is inserted horizontally.
(7) Close the rack shutter on the operator’s side.
(8) Close the safety door of the feeder.
(9) Confirm that the pallet is inserted parallel to the line on the door.
3.3 Preparation before Operation
0311-003 1-22 AHI01EGP
ALL
ALL
READY
READY
CHANGE
CHANGE
HOME
HOME
POSITION
POSITION
POWER
POWER
ELEV.
ELEV.
Rack Shutter on
Operator's Side
Rack Step Nos.
Rack Step Nos.
Note