OM-1078-002.pdf - 第59页
3.3.6 Procedure for Pallet Insertion into Rack (1) Press the [HOME POSITION] button (one of the operation switches) with the safety door closed. Fig. A30 (2) Press the [READY] button (one of the operation switches) for a…

3.3.5 How to detach a tray from the pallet
(1) Shift the tray magnets in the arrow directions and keep the tray away
from the tray magnets.
Fig. A29
(2) Detach the tray from the pallet.
0311-003 1-21
AHI01EGP
3.3 Preparation before Operation
Tray
Tray Magnets
Pallet
3.3.6 Procedure for Pallet Insertion into Rack
(1) Press the [HOME POSITION] button (one of the operation switches)
with the safety door closed.
Fig. A30
(2) Press the [READY] button (one of the operation switches) for approx.
1 second to release the electromagnetic lock of the safety door.
(3) Open the safety door of the feeder.
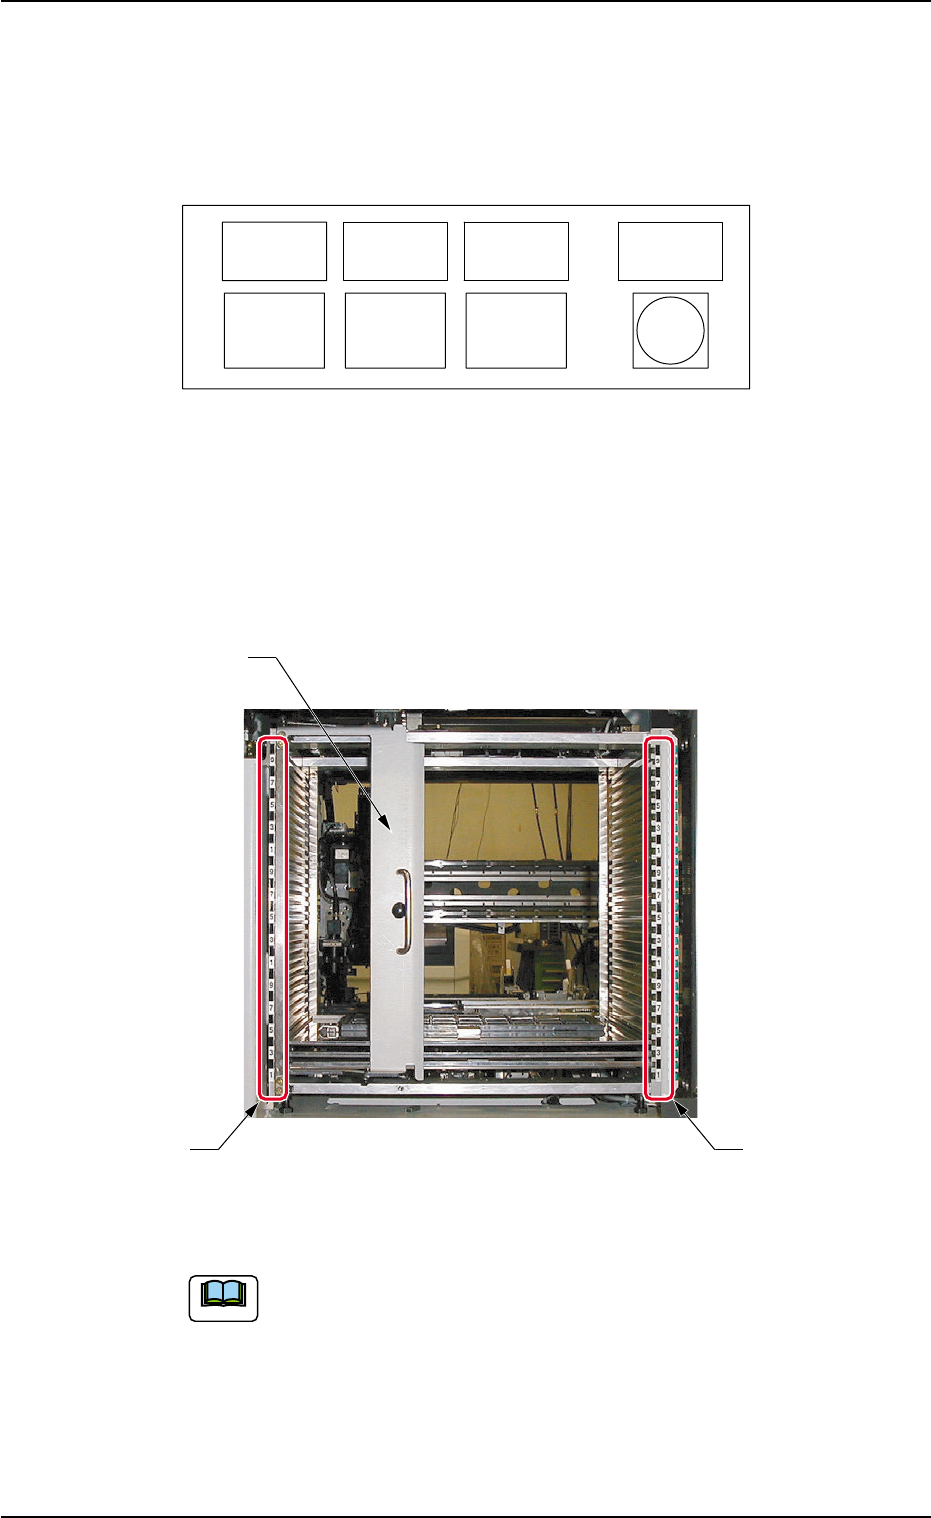
(4) Open the rack shutter on the operator’s side.
Fig. A31
(5) Set the pallet equipped with a tray on the rack.
Use both hands to hold the pallet securely and set it in the
rack such that no components fall down from the tray.
(6) Check the numbers on the right and left rack step Nos. to confirm
that the pallet is inserted horizontally.
(7) Close the rack shutter on the operator’s side.
(8) Close the safety door of the feeder.
(9) Confirm that the pallet is inserted parallel to the line on the door.
3.3 Preparation before Operation
0311-003 1-22 AHI01EGP
ALL
ALL
READY
READY
CHANGE
CHANGE
HOME
HOME
POSITION
POSITION
POWER
POWER
ELEV.
ELEV.
Rack Shutter on
Operator's Side
Rack Step Nos.
Rack Step Nos.
Note
(10) Press the [READY] button (one of the operation switches).
When the tray is loaded with new components, check for
positional deviations of components and a play of the tray.
Refer to "5.2 "UNIT ADJ." Window (Submenu)" in "Section
2" for details.
Be sure to insert a pallet horizontally. Otherwise, the
pallet cannot be drawn out, causing some components
to be dispersed or the pallet or the feeder to be dam-
aged.
• Maximum Mass of Installable Rack
Total mass ((pallet + tray component) × steps) which can install in
rack is up to 45 kg.
Example: Tray Components of 600 g
(Rack 1 kg + Tray Components 600 g) × 28 = 44.8 kg
• Number of Steps Available for Pallets
The number of available steps differ, depending on the height of com-
ponents.
Height of Components Available Number of Steps in Rack
8 mm or less 1 step
8 to 16.5 mm 2 steps
16.5 to 28 mm 3 steps
• Component Height for 29- and 30-Step Racks
When the 29- and 30-step racks are used, the component height is
regulated as follows.
The 29-step rack can store only the components of 16.5 mm or less
in height.
The 30-step rack can store only the components of 8 mm or less in
height.
3.3.7 Preparation for P.C.B.'s
In the case of normal automatic operation, confirm that P.C.B.'s are
prepared in the input machine.
Refer to "1.2.3 Preparation for Components and P.C.B.'s" in "Section 3"
(the instruction manual (Vol. 1) of the main machine) for details.
3.3 Preparation before Operation
0311-003 1-23 AHI01EGP
Note
CAUTION