TR7500E_Manual_en_v28 - 第279页
C h a p t e r 6 A u t o C o n v e y e r W i d th T R 7500 U S E R M A N U AL 2 72 C h a p t e r 6 A u t o C o n v eye r W i d th 1 . H a r d w a r e ( 1) N e e d t o h a v e a u t o c o n v e y e r w i d t h modu l e . (…

Chapter 5 Inspection dialog function
TR7500 USER MANUAL
271
l Reset Fail Count – Reset the [Fail Statistic] field.
l Close&Stop – Close the window.
Chapter 6 Auto Conveyer Width
TR7500 USER MANUAL
272
Chapter 6 Auto Conveyer Width
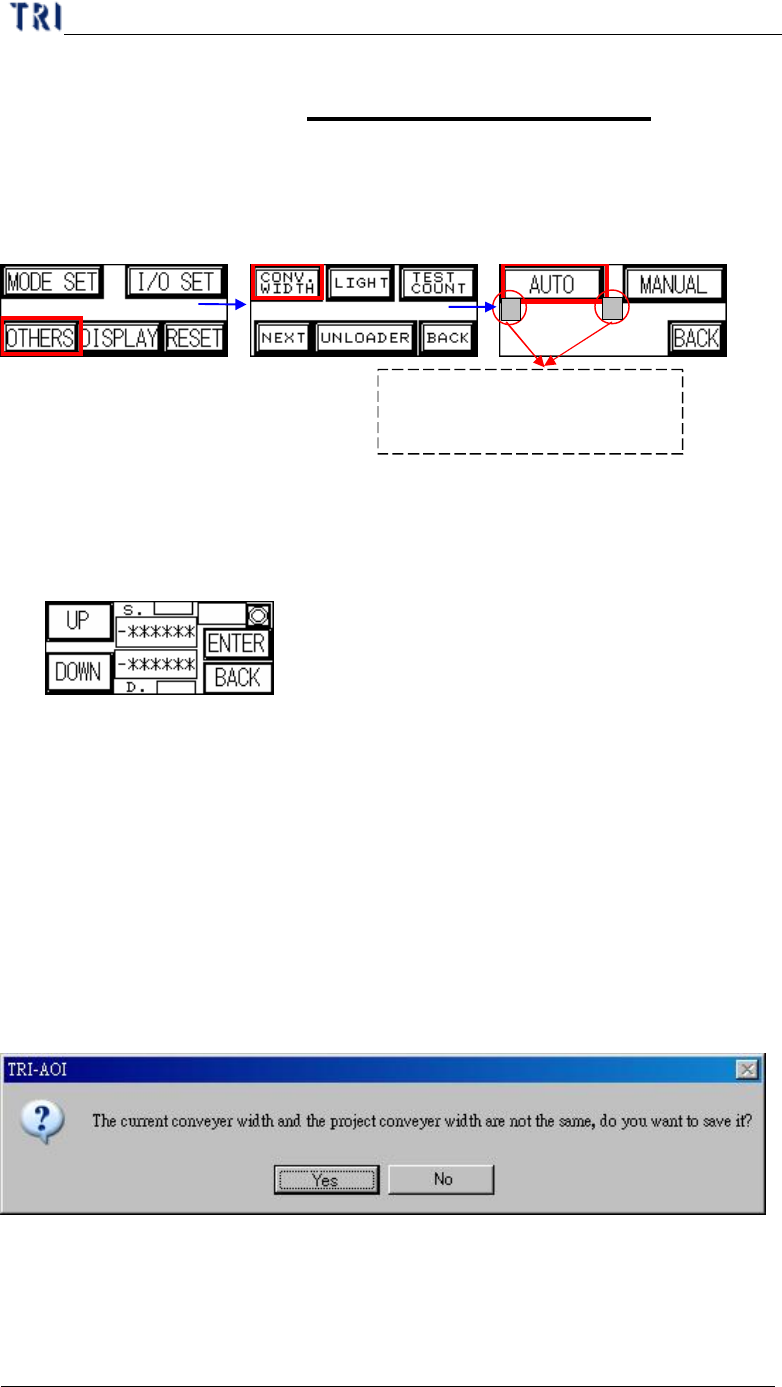
1. Hardware
(1) Need to have auto conveyer width module.
(2) Open the auto conveyer adjustment function on man-machine interface.
(3) Press [AUTO] then the conveyer will go to the original position first. Then you
can press [UP] or [DOWN] to enlarge or reduce the width. When you finish,
press [Enter] to save the data. Then press [Back] to go back to the stand-by
image.
2. Software Setting
(1) The version of DOS PC must cooperate with the auto conveyer width system.
(2) Add a DWORD [AutoConveyerWidth] and the value is [1] in Registry.
3. Saving Width Data to Project
(1) Adjusting the conveyer width with [Auto Conveyer] Function.
(2) When saving the project, the system saves the width to the project automatically.
(3) If the current width is not the same with the width in project, system shows the
below dialog to ask if you want to replace the saved width with current width. .
4. Width Loading
(1) When opening a existing project, the system shows the below dialog to ask if you
want to use the saving width.
Press the two buttons in the
meantime to enable the auto
conveyer width function.
ORIGIN

Chapter 6 Auto Conveyer Width
TR7500 USER MANUAL
273
(2) When select [Yes], the system starts to adjust the conveyer width; If there is a
board on the conveyer, you have to remove the board first. When you select [No],
the system does not do any action.
(3) If there is not any data saved in the project before, there is also no any
information asked.