TR7500E_Manual_en_v28 - 第284页
C h a p t e r 7 S t a r t t o I n s p e c t i on T R 7500 U S E R M A N U AL 2 77 ( 2) C h e c k [ P a r a m e t e r / P a n e l / B a r c od e / C h e c k B a r C o d e ] 4 . L i nk t o Re p a ir S t a tio n ( 1) S e l …
Chapter 7 Start to Inspection
TR7500 USER MANUAL
276
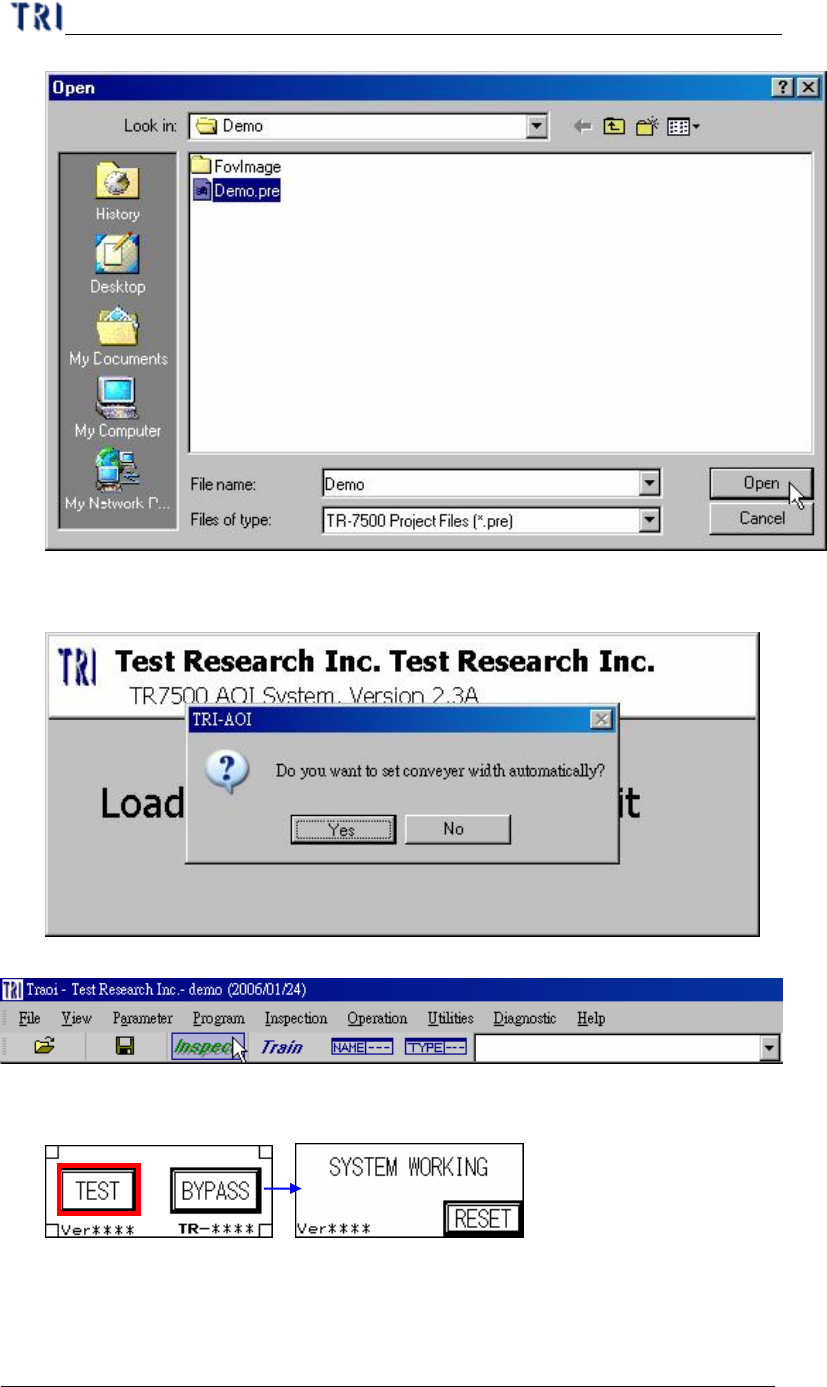
(3) The system will ask if you want to set conveyer width automatically. If there is
no auto conveyer width system, you have to set the width manually with PLC.
(4) Press [Inspect] button to start inspecting.
(1) Press [TEST] on man machine interface.
3. Check Barcode
(1) Set [Parameter/Panel/Barcode/Barcode Setting]
Chapter 7 Start to Inspection
TR7500 USER MANUAL
277
(2) Check [Parameter/Panel/Barcode/Check Bar Code]
4. Link to Repair Station
(1) Select [Parameter/User Mode/Link to Repair Station]
(2) Set the path in [Parameter/Panel/Repair Station] directing to
[//RepairPC/C/AOI_Repair_Data]
(3) Select [Utilities/Resend Image Data to Repair]
(4) Save the project and start to inspect.
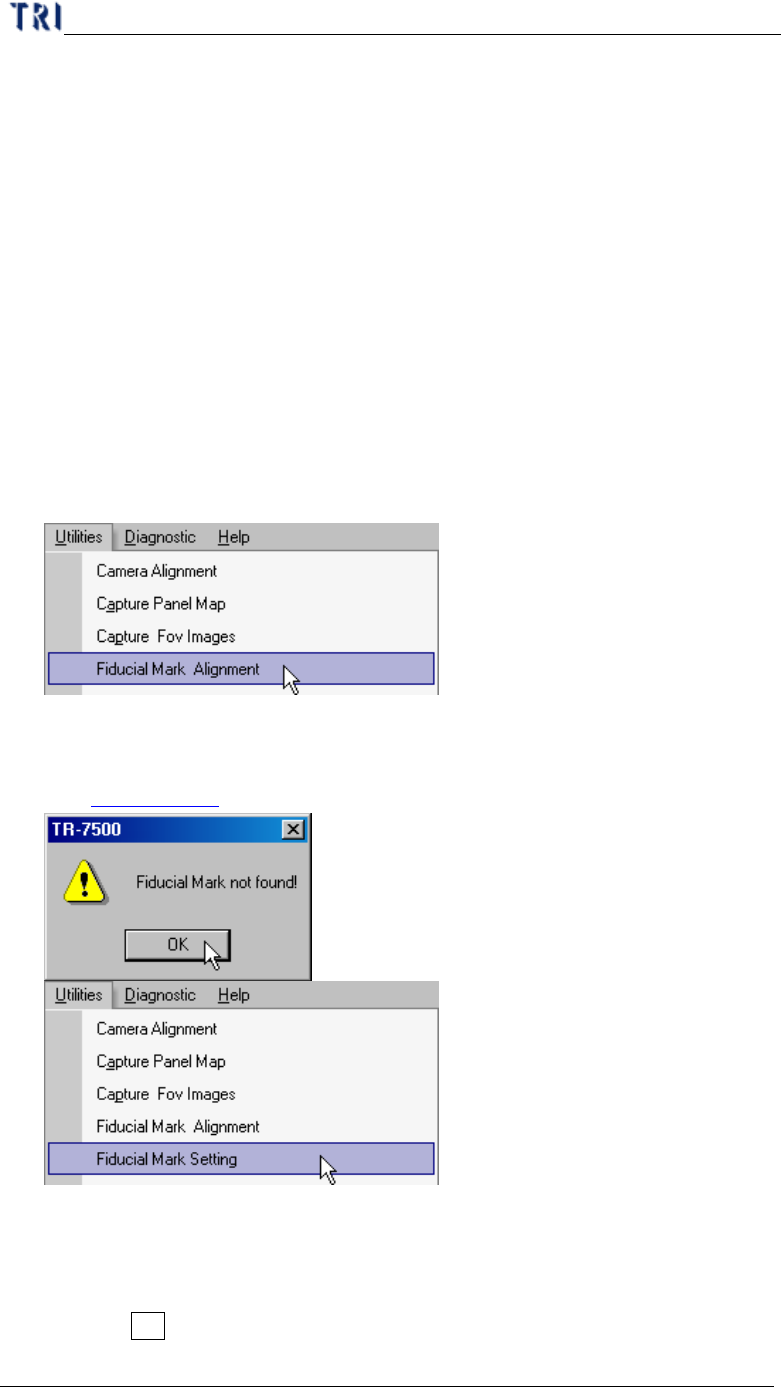
5. Inspect on Another Machine
(1) Copy the project (*.pre ) and panel map to another AOI machine.
(2) Select[Utilities/Fiducial Mark Alignment]
(3) If the system can’t find the fiducial mark you should change the fiducial 0
position. Select [Utility/Fiducial Mark Setting] to set the position of fiducial 0.
(See Chapter 2 7.5. )
(4) Start to inspect.
6. Stop testing and shut down
(1) Press the Esc key on keyboard to stop the project that is testing.

Chapter 7 Start to Inspection
TR7500 USER MANUAL
278
(2) Press button to close the TR7500E main program. At the same time the
system asks if you want to save the project and you can choose to save according
to your own demand.
(3) Select [Start/Shut down] to close down the TR7500E main pc.
(4) Turn the power switch counterclockwise to shut down the machine.
(5) Close the breaker.