TR7500E_Manual_en_v28 - 第47页
C h a p t e r 1 AO I S t a nd a r d P r o j ec t Cr ea t i on T R 7500 U S E R M A N U AL 40 ( 1 1) D i s p l a y f i d u c i a l m a r k 1 c o o r d i n a t e s . ( 1 2) T h e f i n i s h e d i m a g e s o f tw o f i d …
Chapter 1 AOI Standard Project Creation
TR7500 USER MANUAL
39
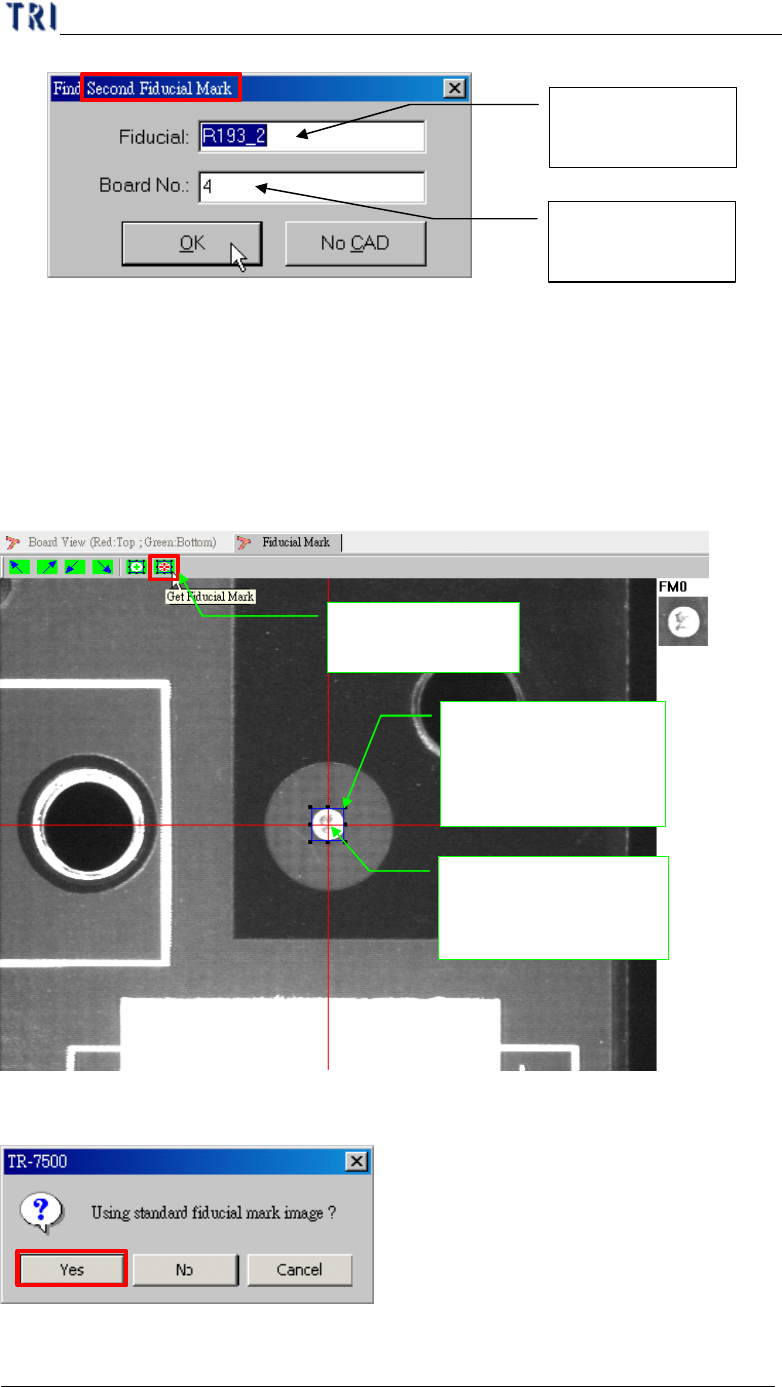
(8) Set the lighting for the second fiducial mark. When the shape of fiducial mark is
not clear under the current lighting, you can adjust the lighting manually. Press
the [Light] button then the [Lighting Control Editor] window appears. Select the
[Fiducial1] item and adjust the lighting then press [Save] to finish the setting.
(9) Press [Get Fiducial Mark] icon to get the second fiducial mark coordinates.
3. Push the button the
fiducial mark
1. Moving the component
to the screen center (cross
red line point)
2. Adjust the blue frame
for assistant user
adjustment; pad can near
the center closely
(10) Choose if you want to use the standard fiducial mark image.
Input component
name
Input component
in which board
Chapter 1 AOI Standard Project Creation
TR7500 USER MANUAL
40
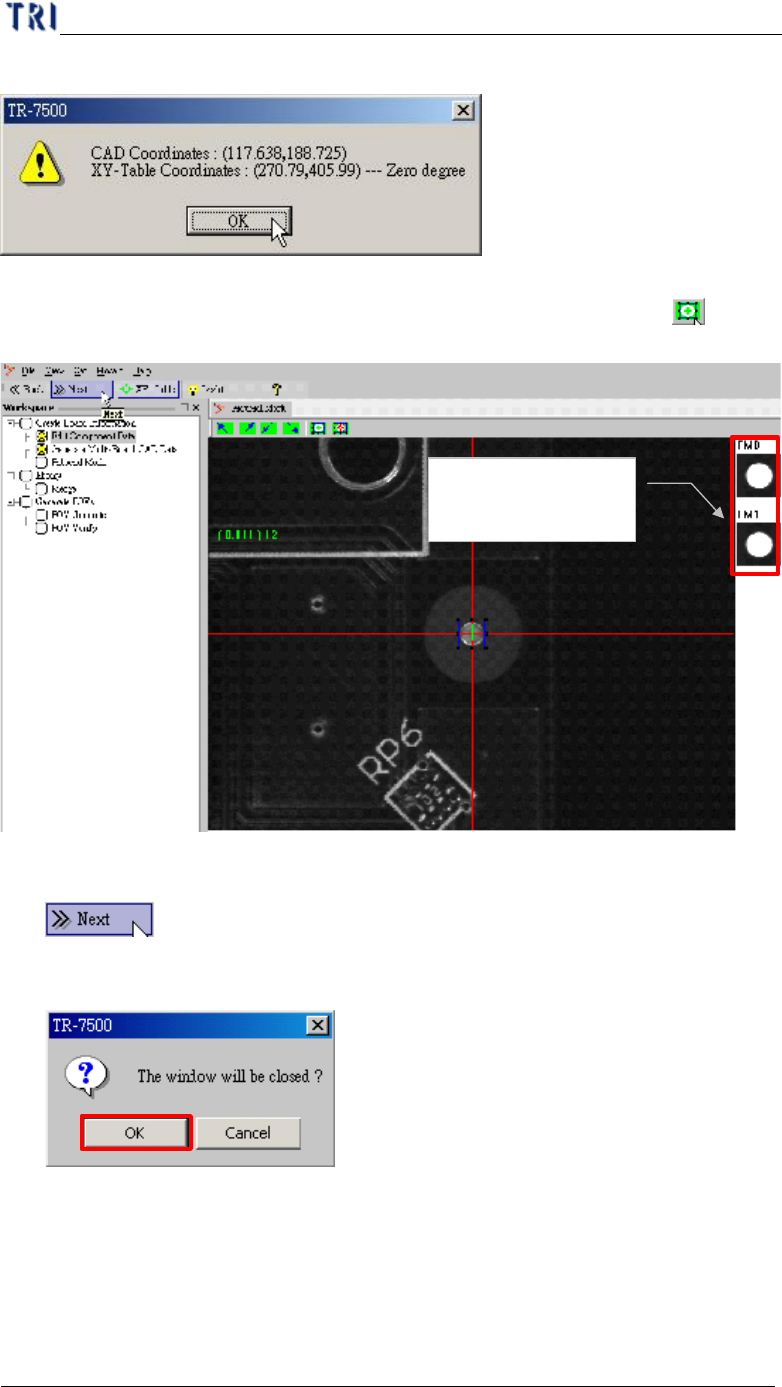
(11) Display fiducial mark 1 coordinates.
(12) The finished images of two fiducial marks are shown at the right side of the
active window. If you are not satisfied with the images, pressing the [ Set
Fiducial Mark] to train the images again.
(13) Press [Next]
(14) Displays the message below. Press [OK].
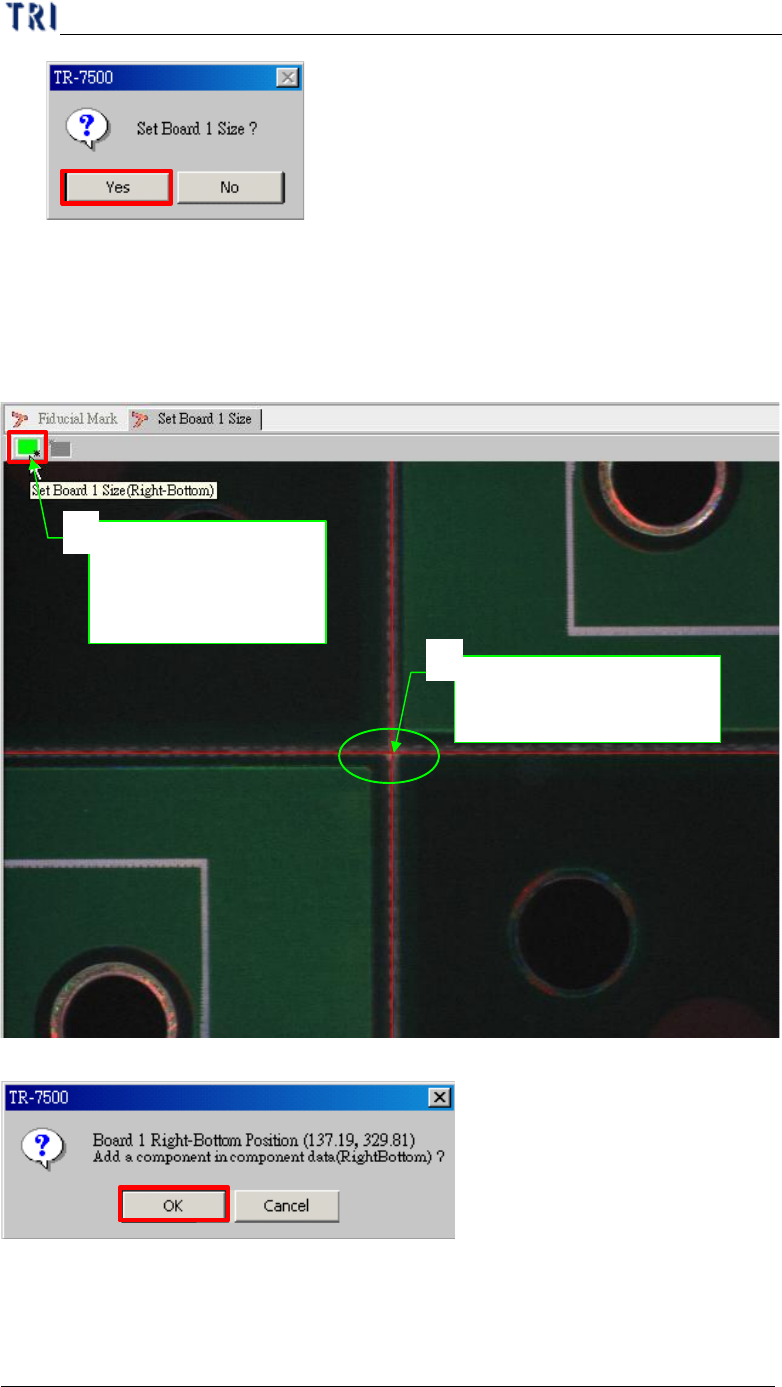
(15) Select [Yes] to starting to set board 1 size.
Fiducial marks are
displayed here.
Chapter 1 AOI Standard Project Creation
TR7500 USER MANUAL
41
5.2. Board Size Setting
l Board size setting is detection for golden pin in panel outside edge.
(1) Moving the screen center to right-bottom side corner of board 1 and press setting
button.
(2) Confirm the board 1 right-bottom position.
(3) Moving the screen center to left-top side corner of board 1 and press setting
button.
Move to right-
bottom side
corner
1
Push the button set
board 1 right-bottom
side limitation
2