00198761-01_SM_Head_Care_Station_II_EN - 第24页
4 Service work – HCSII Head Unit 4.2 Replacing the compressed air filter 24 Service Manual SIPLACE Head Care Station II 11/2019 4.2 Replacing the compressed air filter Parts Fig.15: Compressed air filter 1. Pressure co…
4 Service work – HCSII Head Unit
4.1 Equipment and tools
Service Manual SIPLACE Head Care Station II 11/2019 23
4 Service work – HCSII Head Unit
DANGER
Observe safety instructions!
► Please observe the safety instructions in this Service Manual and in the HCSII User
Manual for all work!
NOTICE
Observe the detailed circuit diagrams!
► For more detailed information refer to the circuit diagrams folder of the HCSII.
●
Detailed circuit diagrams folder for HCSII [DEEN:00198762‑xx]
4.1 Equipment and tools
Equipment and tools needed for service work on the HCSII Head Unit:
00353832‑xx Allen key set 1.5 mm, 2 mm, 2.5mm, 3mm
00376516-xx Socket wrench set 5.5 mm
00096290-xx Spanner wrench set 5.5 mm, 7 mm
03080081-xx Torx allan key TX8
00318673-xx Side cutter electronic Size 110
00096487-xx Angled tweezers 140mm oval
00308458-xx Cable ties B=2.5mm, L=102mm Panduit
4 Service work – HCSII Head Unit
4.2 Replacing the compressed air filter
24 Service Manual SIPLACE Head Care Station II 11/2019
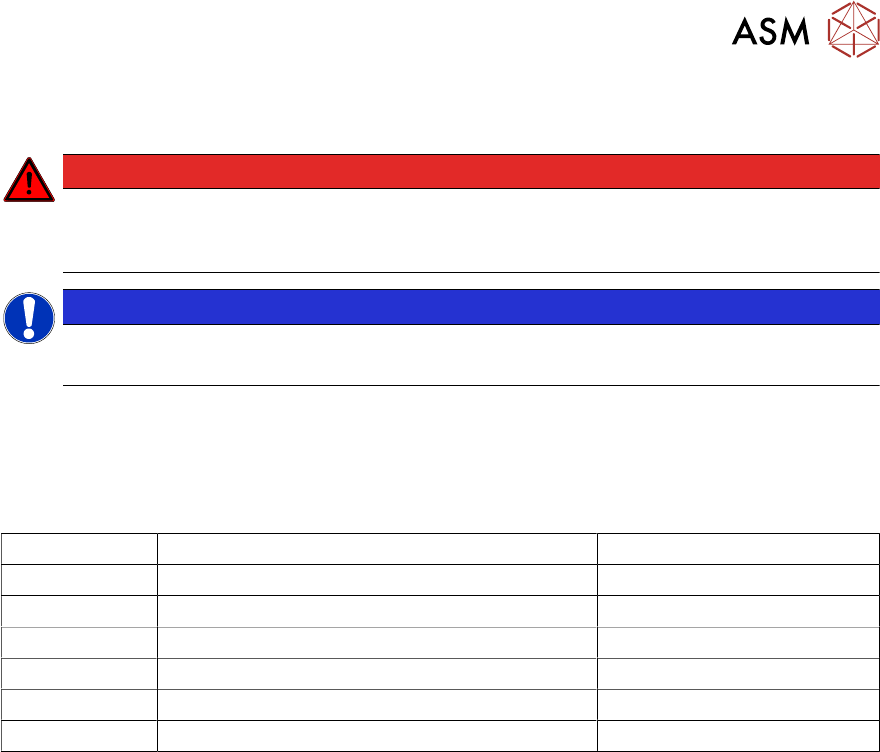
4.2 Replacing the compressed air filter
Parts
Fig.15: Compressed air filter
1. Pressure container
(part of compressed air filter
[03079075-xx])
2. Lock
3. Filter element AF40P-060S for com-
pressed air
CAUTION!
Maintenance
Annually check the compressed air fil-
ter and replace it if necessary.
.
Preparatory work...
► Turn off and disconnect the HCS II. See 3.1 "Turn off and disconnect the HCS II" [}19].
Removal
Fig.16: Remove compressed air filter
► Vent the system at the bottom of the
compressed air filter(1). Hold a cloth
underneath to capture any escaping
liquid.
► Press the lock and turn the pressure
container out of the compressed air
unit.
4 Service work – HCSII Head Unit
4.3 Replacing the cooling air filter element
Service Manual SIPLACE Head Care Station II 11/2019 25
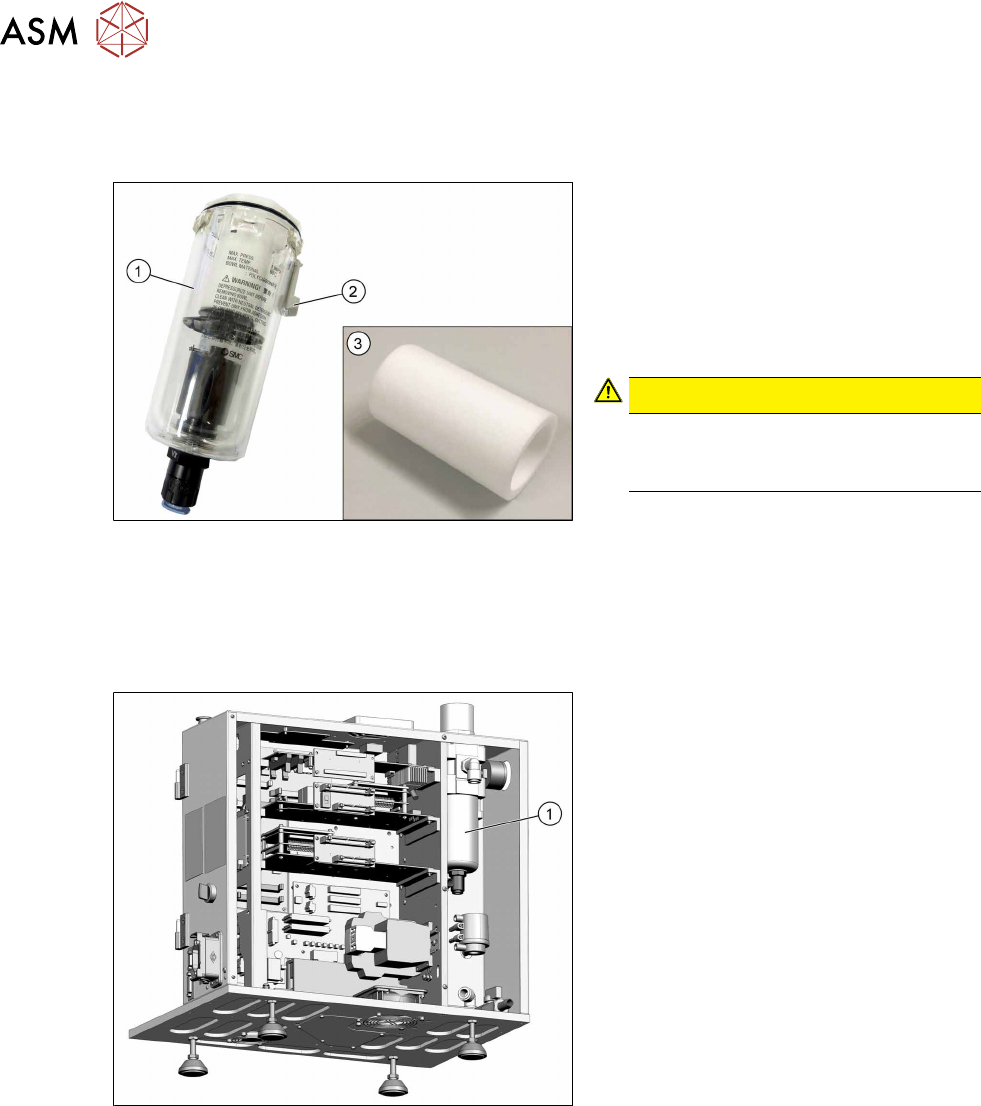
Fig.17: Filter
► Open the white lock(1) at the top.
► Take out the filter unit(2).
► Remove the black lock(3) at the bot-
tom.
► Exchange the filter(4).
Installation
► Follow the removal instructions in reverse order for installation.
4.3 Replacing the cooling air filter element
Parts
Fig.18: Cooling air filter element
Cooling air filter element [03003717‑xx]
CAUTION!
Maintenance
Annually check the filter and replace it
if necessary.
.
Preparatory work...
► Turn off and disconnect the HCS II. See 3.1 "Turn off and disconnect the HCS II" [}19].
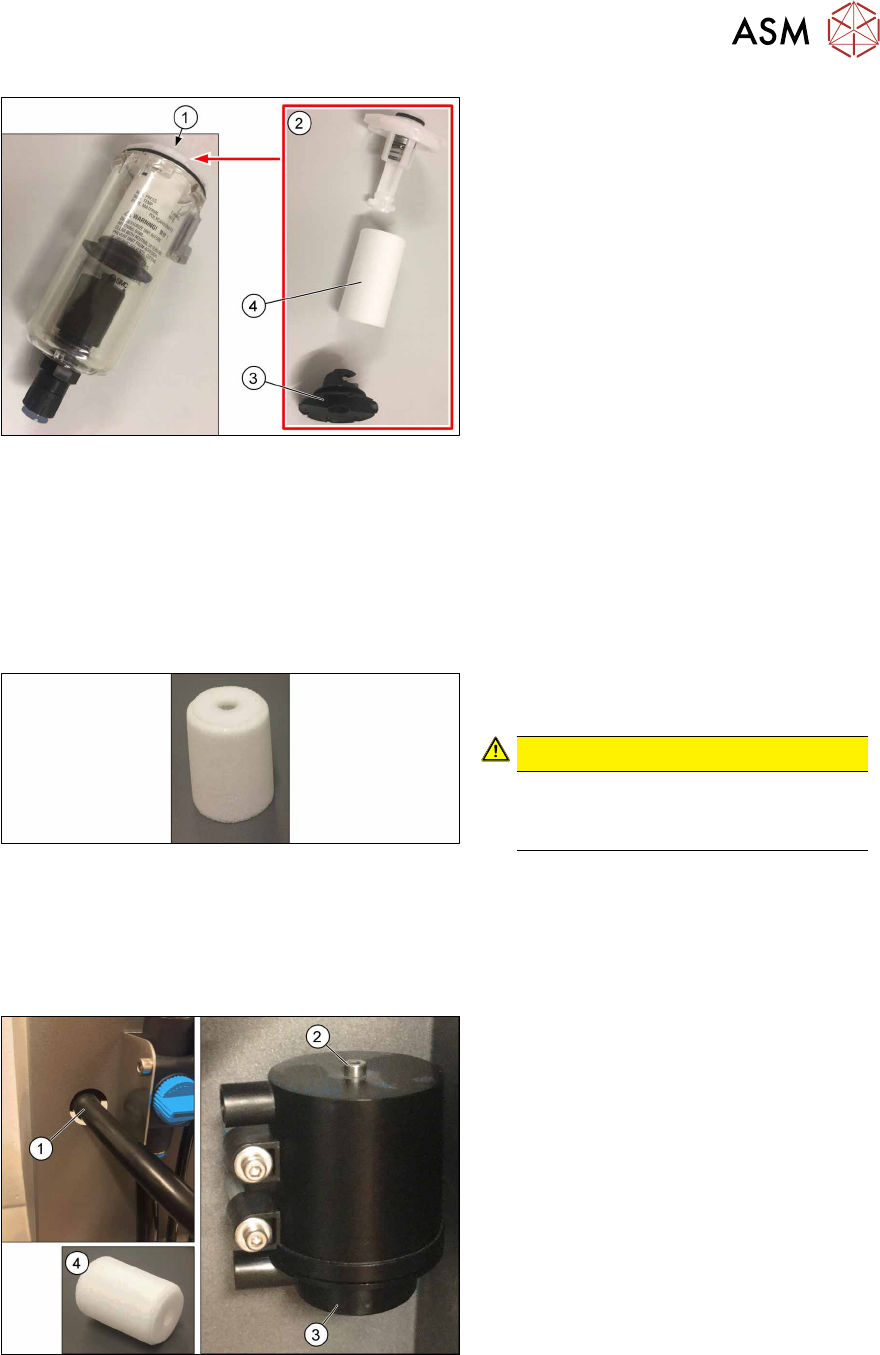
Removal
Fig.19: Remove cooling air filter element
► Remove the hose(1) at the front.
► Remove the screw(2).
► Open the housing at the bottom(3) and
pull out the filter(4).
Installation
► Follow the removal instructions in reverse order for installation.