EN 3.pdf - 第163页
Model DECAN Series Company SAMSUNG TECHWIN Module 3.1 1 HEAD V ersion 01 Tit le HEAD BLOW & V ACUUM SETTING (F2) Page 3-1 1-3 Note Head V acuum operation check 1. Manually lower the Z axis of Head1~10 and then m ou…
Model
DECAN Series
Company
SAMSUNG TECHWIN
Module
3.11 HEAD
Version
01
Title
HEAD BLOW & VACUUM SETTING (F2)
Page
3-11-2
Note
[HEAD BLOW & VACUUM SETTING (F2)]
Check the Main Air Setting.
Check if the Digital Gauge is set to 0.5 Mpa (Spec 0.45~0.55Mpa) and if not reset it.
Check the air pressure level.
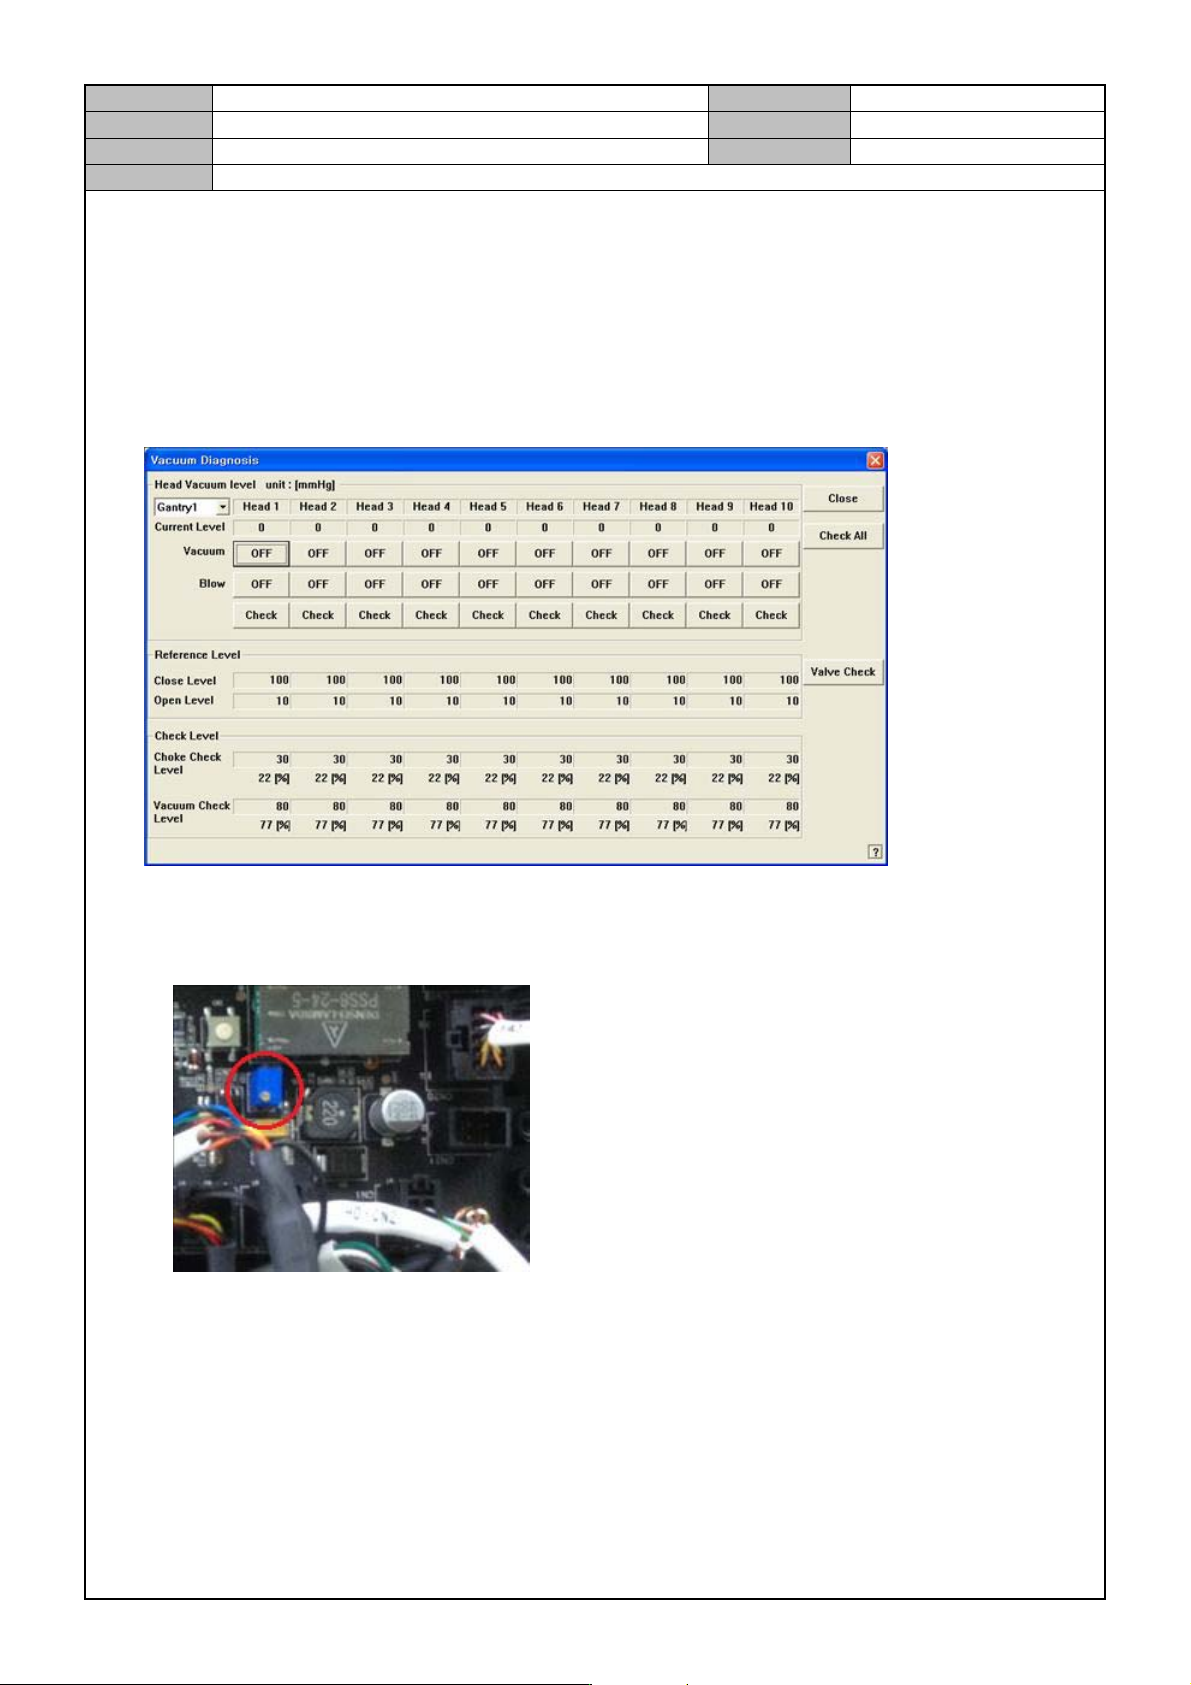
1. Select MMI <Diagnosis> → <Vacuum>.
2. While the Vacuum/Blow is Off, check the current level.
Check if the current level is 0±9 mmHg.
If not, adjust the VR of the Head IO Board.
3. Check the same thing for Gantry2's Head 11~20.
Model
DECAN Series
Company
SAMSUNG TECHWIN
Module
3.11 HEAD
Version
01
Title
HEAD BLOW & VACUUM SETTING (F2)
Page
3-11-3
Note
Head Vacuum operation check
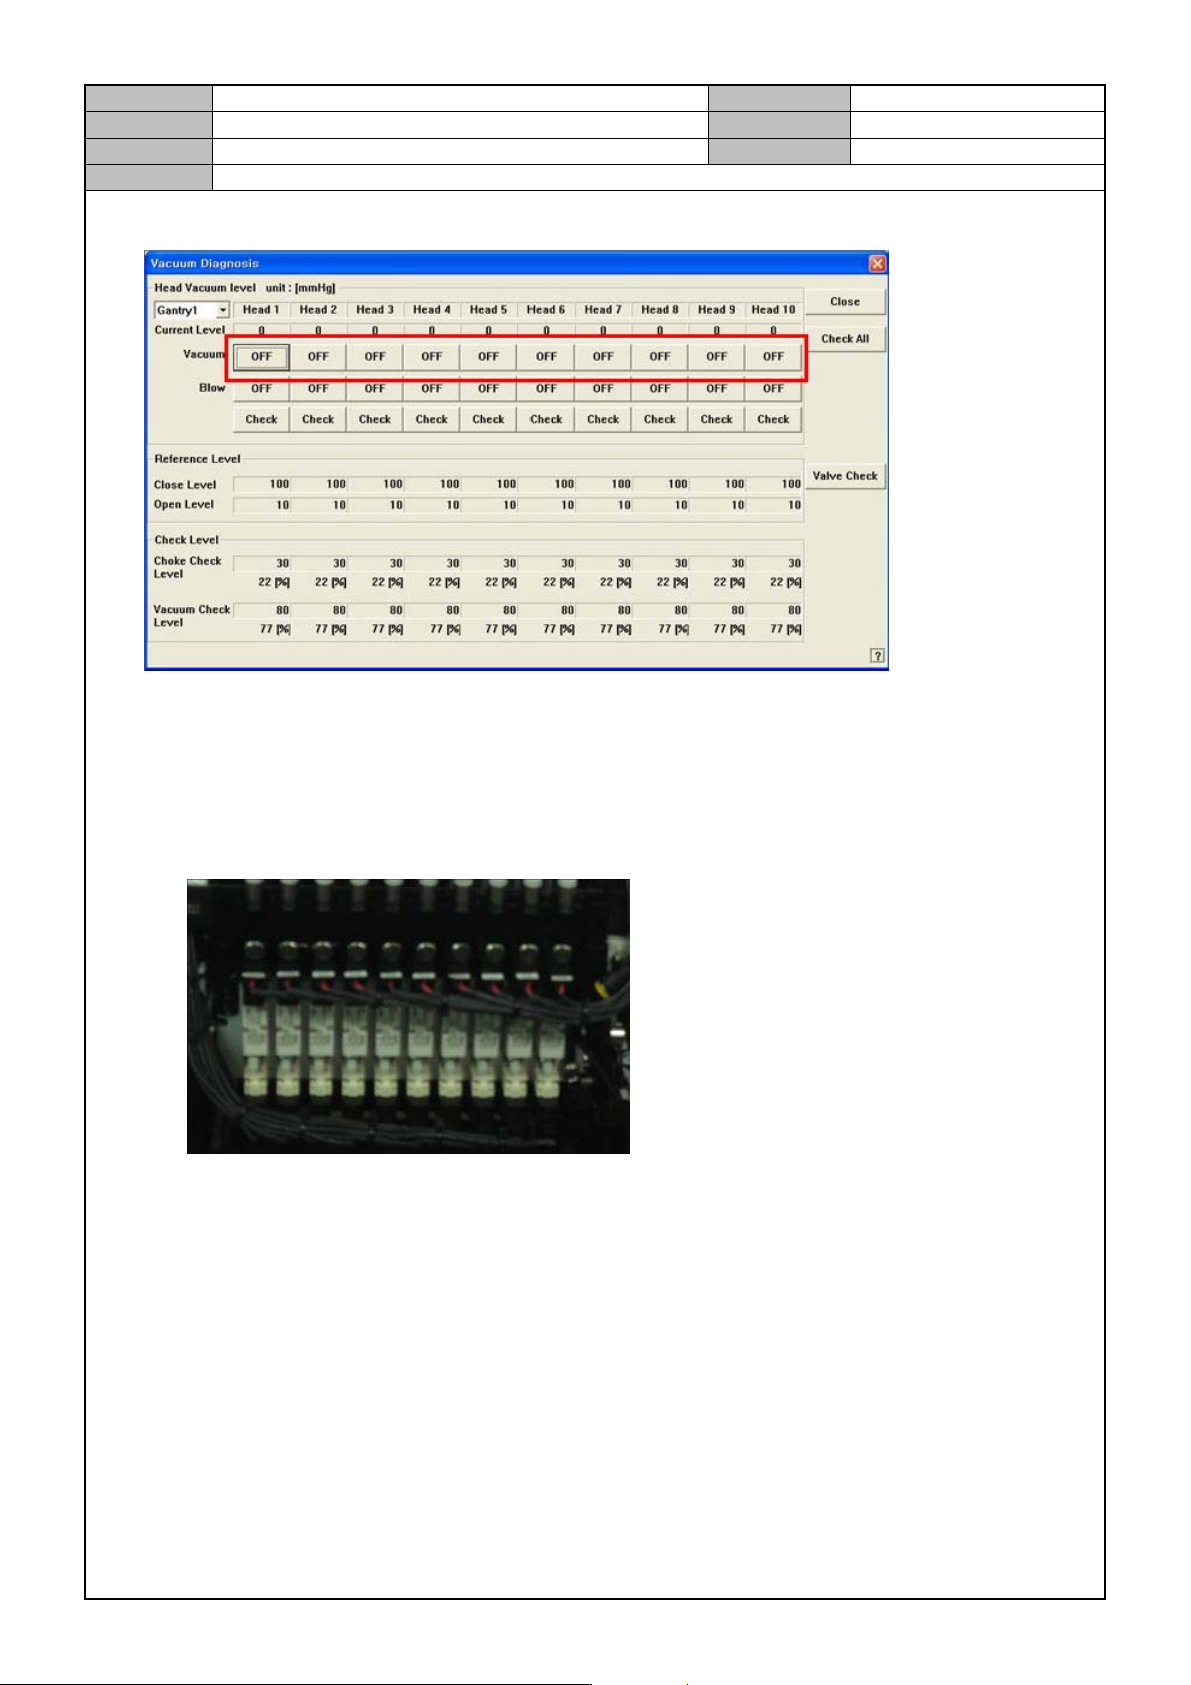
1. Manually lower the Z axis of Head1~10 and then mount the CN040 Nozzle.
2. While the blow is off, turn on/off each head's vacuum condition and check if the vacuum is created
and check the current value.
When it is on, the vacuum is greater than480mmHg.
When the Vacuum is On/Off, check if the Sol Valve's Vacuum LED is lit.
3. When the Vacuum is On, block the nozzle and see if the degree of vacuum is greater than 600mmHg.
Model
DECAN Series
Company
SAMSUNG TECHWIN
Module
3.11 HEAD
Version
01
Title
HEAD BLOW & VACUUM SETTING (F2)
Page
3-11-4
Note
Head Blow operation check and setting
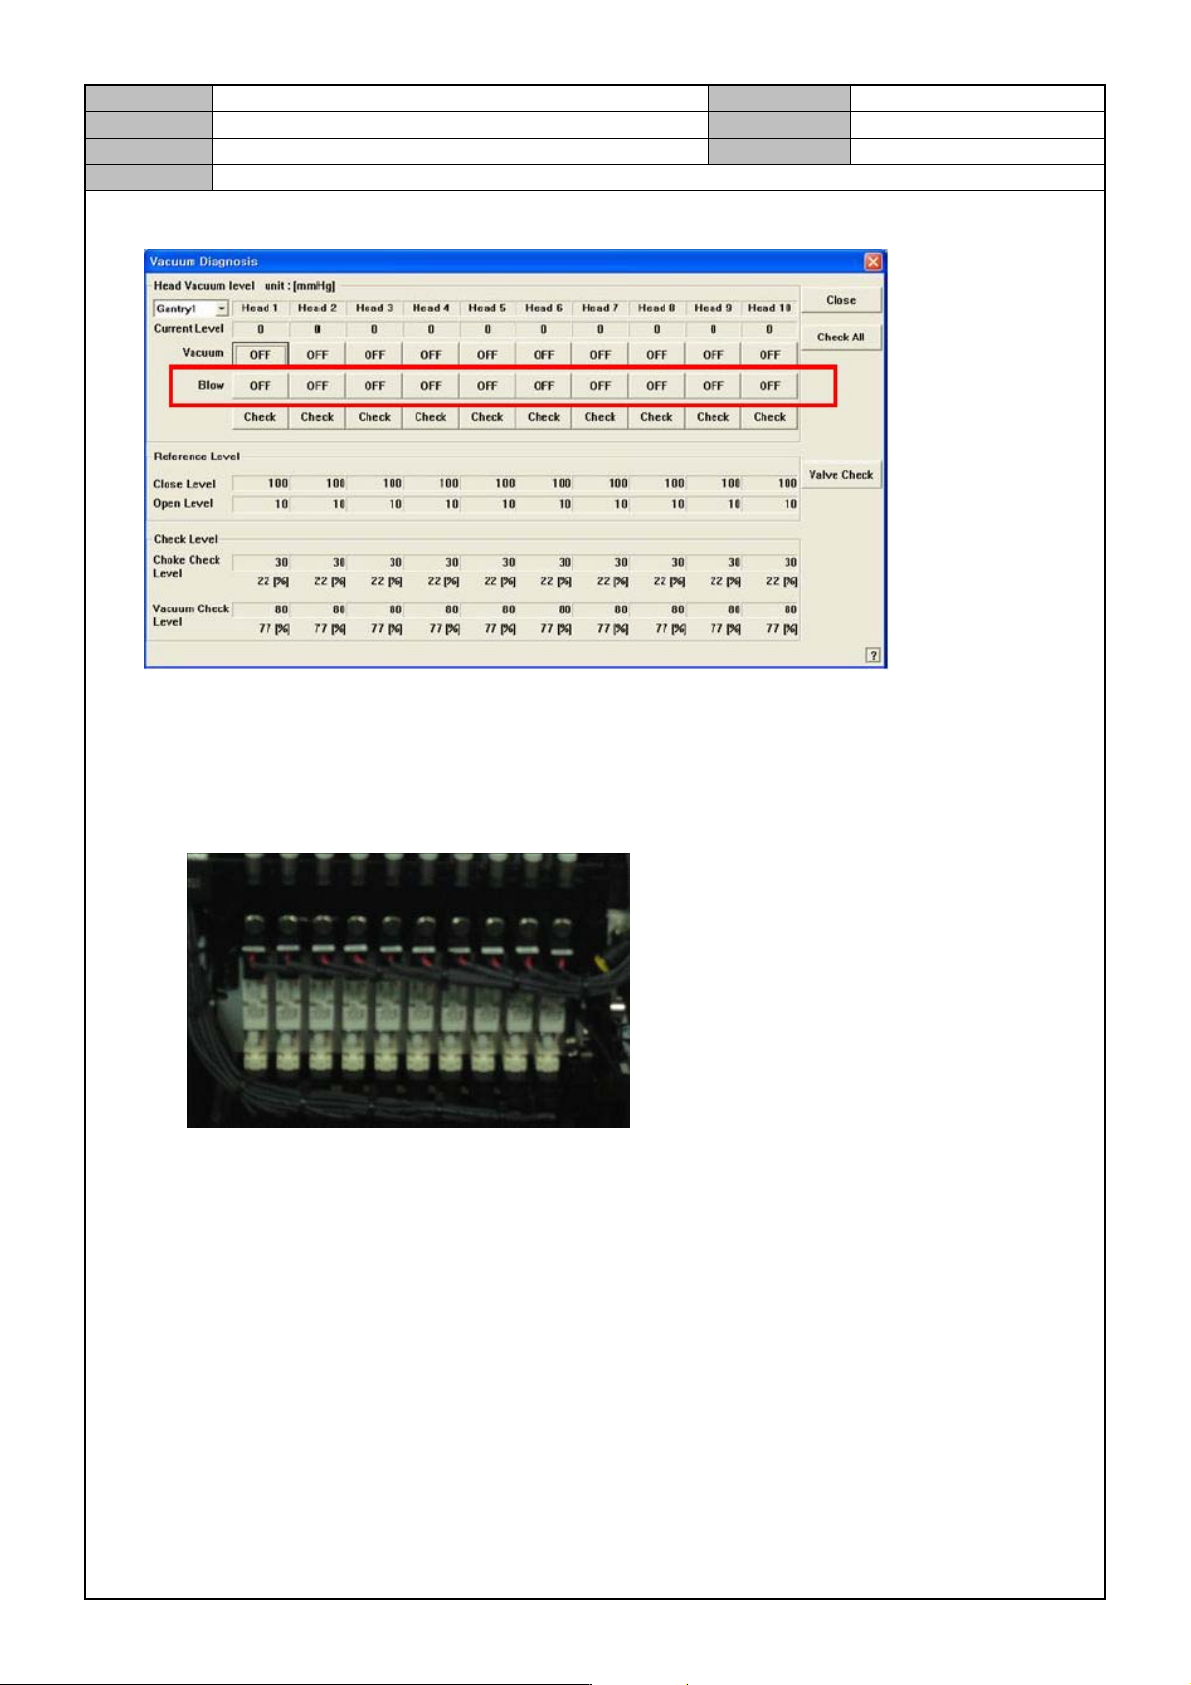
1. Turn the vacuum on one by one.
2. Adjust the speed control, so that the current blow reading is within -70~-90 mmHg.
After the adjustment, fix the nuts securely.
When the Vacuum is On/Off, check if the Sol Valve's Vacuum LED is lit.