EN 3.pdf - 第172页
Model DECAN Series Company SAMSUNG TECHWIN Module 3.1 1 HEAD V ersion 01 Tit le HEAD EX TERIOR CHECK Page 3-1 1-12 Note [HEAD EXTERIOR CHECK] Head exterior checkpoints Check if the head has no contact sticker attache…
Model
DECAN Series
Company
SAMSUNG TECHWIN
Module
3.11 HEAD
Version
01
Title
HEAD BLOW & VACUUM SETTING (L2)
Page
3-11-11
Note
Vacuum setting while the nozzle is not mounted.
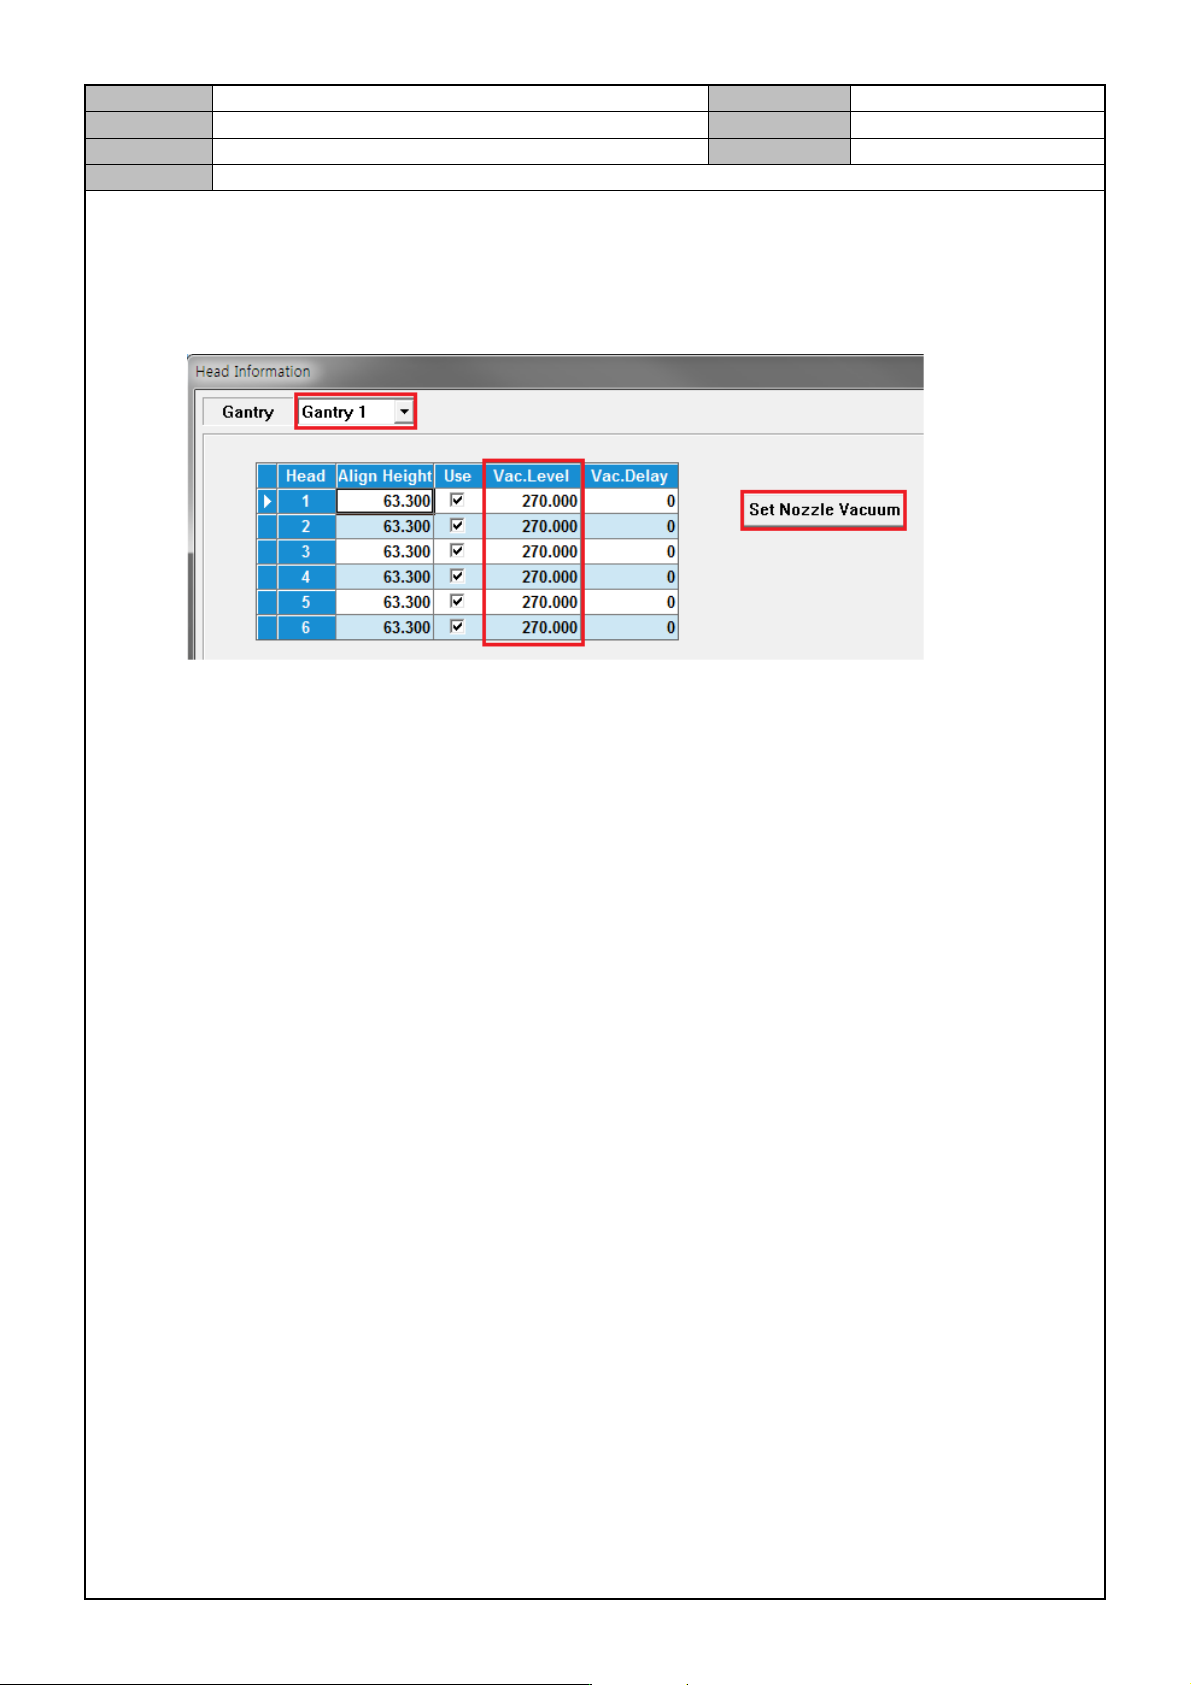
1. Select <Sys. Setup> → <Head Information>→ <Head> → <Gantry1>.
2. Click on <Set Nozzle Vacuum>. When the head does not have a nozzle, set the air pressure l evel and
click on Update.
*Vacuum Level should be 60mmHg ~ 120mmHg.
3. Select <Gantry2> and set the air pressure level for Head 7~12.

Model
DECAN Series
Company
SAMSUNG TECHWIN
Module
3.11 HEAD
Version
01
Title
HEAD EXTERIOR CHECK
Page
3-11-12
Note
[HEAD EXTERIOR CHECK]
Head exterior checkpoints
Check if the head has no contact sticker attached or damaged.
Check the Fiducial Camera Dip Switch setting.
Check the fixing of the Sol Valve Cable and check if the Head Cover is interfered with.
Check for alien substances in the Head Ball Spline, and the Slide Ar m.
Check for Coil Spring breakages or dents.
Check for alien substances in the Fly Camera or Mirror.
Check the Mirror CAM Spring for breakage or deformation and interference with the cable.
Check if the Head Motor Cable and the X Frame interfere with each other.
Check various Sensor Cable fixing and damages.
Gently pull the air tube and see if it is removed.
Check for operational interferences or problems.
Evaluation criteria
There should be no fixing failures in the air hole of the Air Distributor.
Fiducial Camera's Dip Switch No4,10 should be turned on.
Z-axis Coil Tube should be firmly attached and fixed to the fitting.
There should be no cable interferences, shell damages or connection failures.
Z-axis Spring should be free of damages or missing items.
NO contact sticker should be damaged.
Vacuum Filter should not be broken or shaking.
Model
DECAN Series
Company
SAMSUNG TECHWIN
Module
3.11 HEAD
Version
01
Title
HEAD ASSEMBLY (F2)
Page
3-11-13
Note
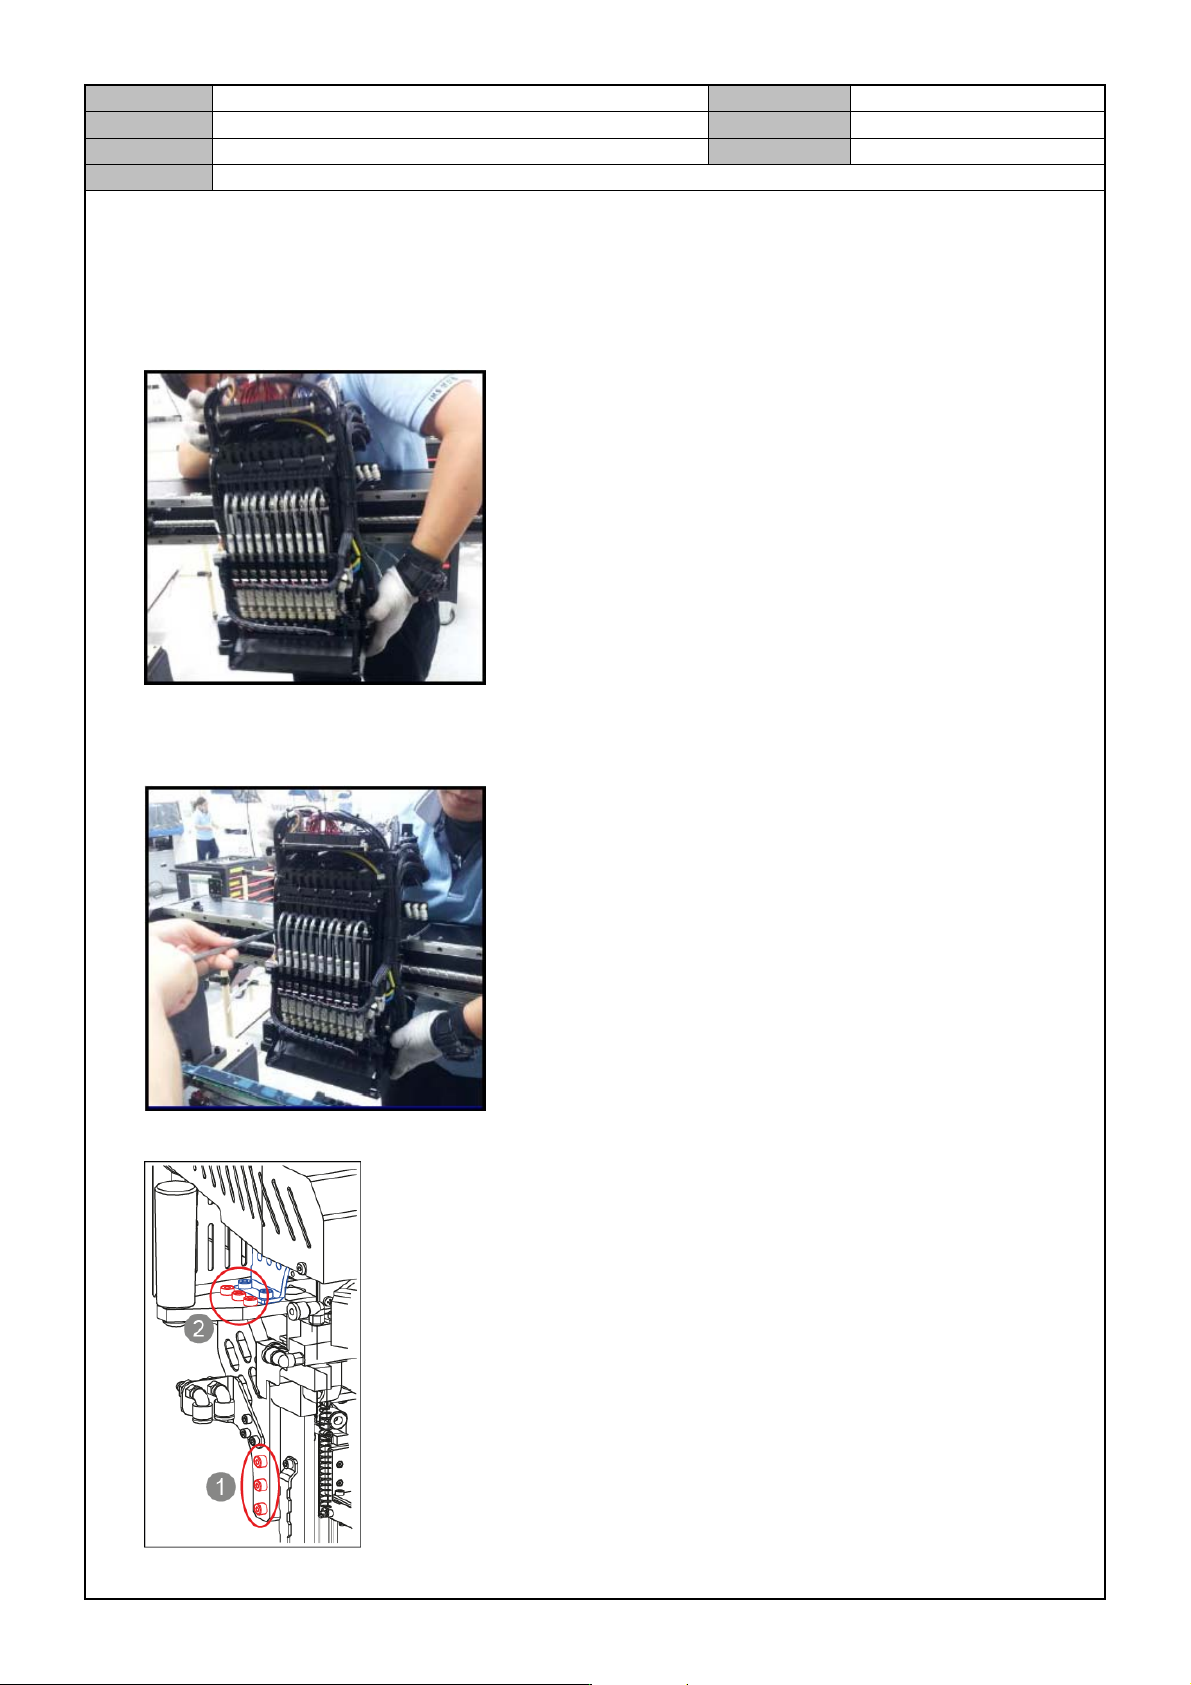
[HEAD ASSEMBLY (F2)]
1. Clean the Head Base.
2. Mount the Head in the Head Base.
*Z Motor should not collide with the Head Base, causing damages.
*Torque : 45
3. Adjust the pin and assemble it.
4. Temporarily fix screw 1/2 of the Harness Support unit.