EN 3.pdf - 第189页
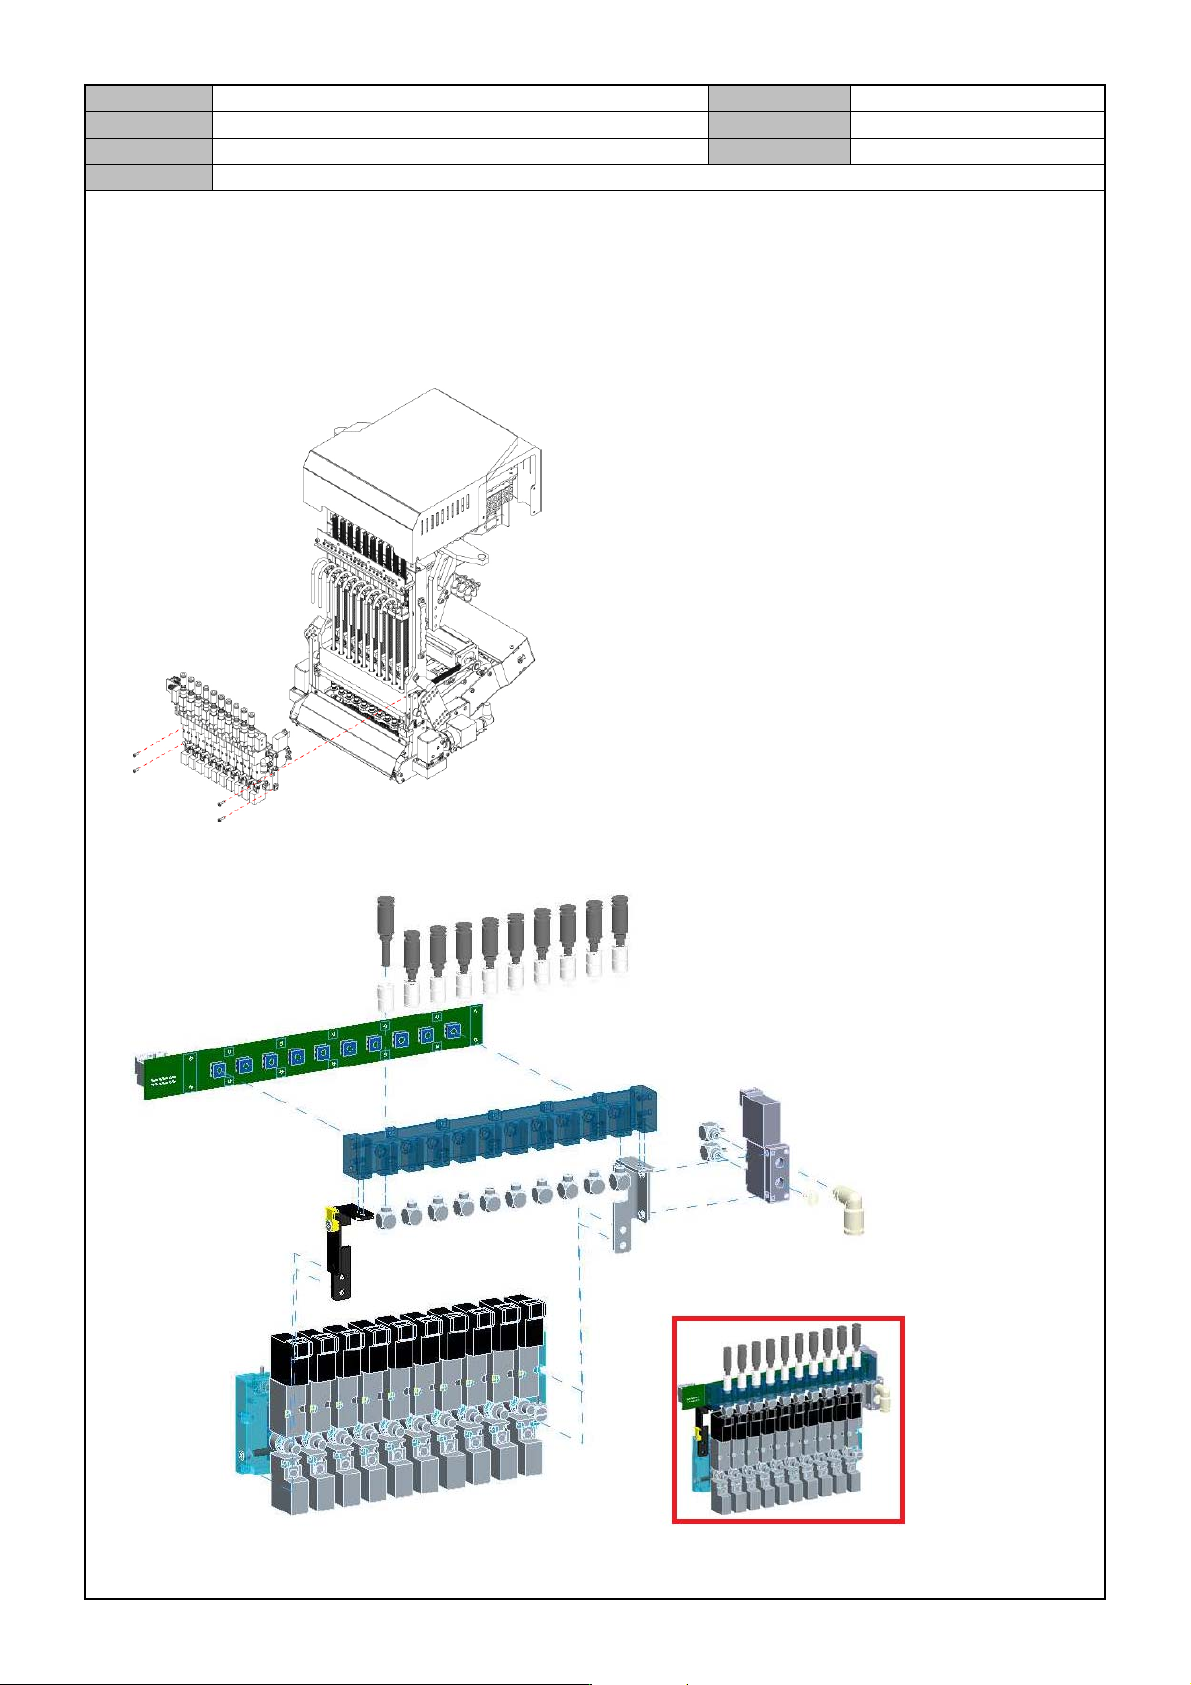
Model DECAN Series Company SAMSUNG TECHWIN Module 3.1 1 HEAD V ersion 01 Tit le HEAD SOLENOID V A L VE REPLACEMENT (F2) Page 3-1 1-29 Note Air Module assembly 1. Assemble the following in the order: Elbow Fitting, Stra…
Model
DECAN Series
Company
SAMSUNG TECHWIN
Module
3.11 HEAD
Version
01
Title
HEAD SOLENOID VA LVE REPLACEMENT (F2)
Page
3-11-28
Note
[HEAD SOLENOID VALVE REPLACEMENT (F2)]
Separate the Air Module.
Separate the Air Tube from the Air Module Assy and then separate the Air Module Assy by releasing the
fixing bolts.
Disassemble the Air Module.
Model
DECAN Series
Company
SAMSUNG TECHWIN
Module
3.11 HEAD
Version
01
Title
HEAD SOLENOID VA LVE REPLACEMENT (F2)
Page
3-11-29
Note
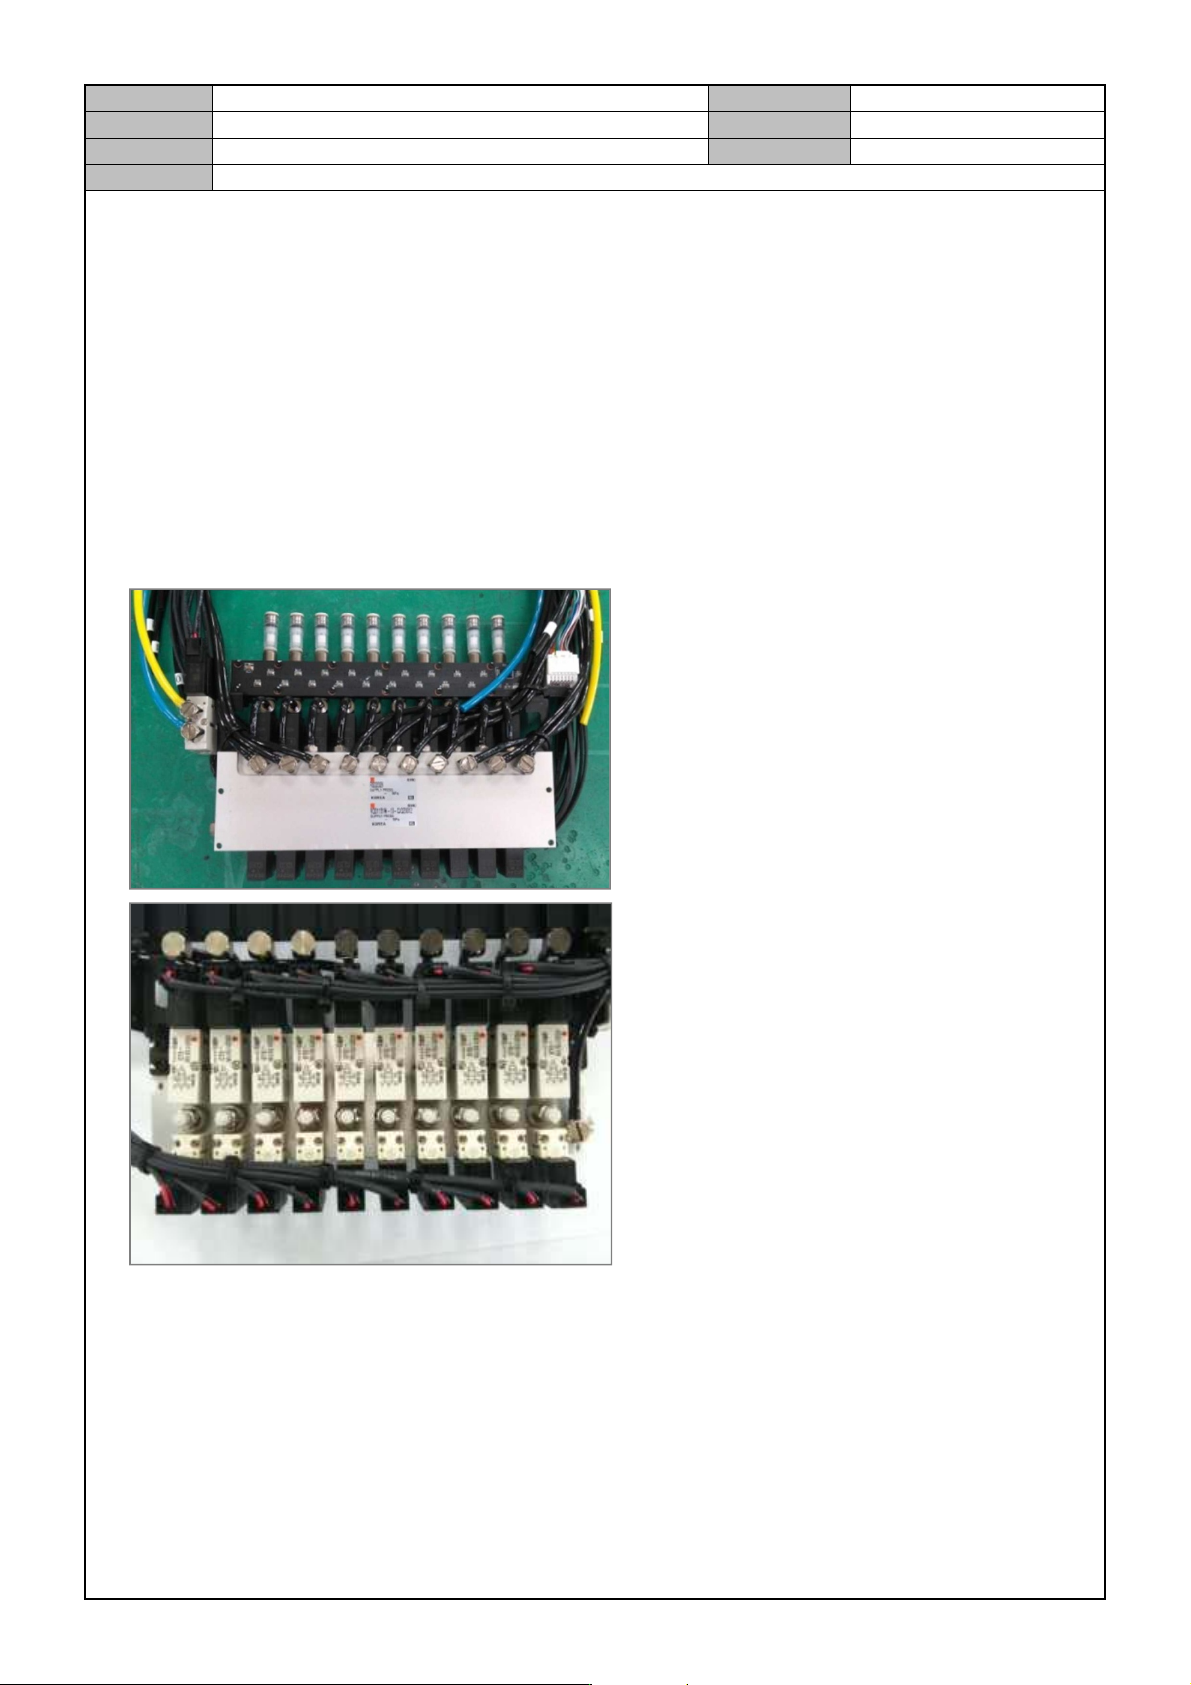
Air Module assembly
1. Assemble the following in the order: Elbow Fitting, Straight Fitting, Filter.
2. Insert the O-ring and fix the Vacuum Sensor Board with Screws.(3Kgf.cm)
3. Assemble the Plug Fitting and the Elbow Fitting.
4. Fix the Blow Valve with Screws.(10Kgf.cm)
5. Fix the Manifold Plate1 and 2 with Screws.(7Kgf.cm)
6. Fix the Manifold Plate1/2 into the Air Module Assy with Screws.(10Kgf.cm)
Connect the air pressure tube.
Model
DECAN Series
Company
SAMSUNG TECHWIN
Module
3.11 HEAD
Version
01
Title
HEAD SOLENOID VA LVE REPLACEMENT (L2)
Page
3-11-30
Note
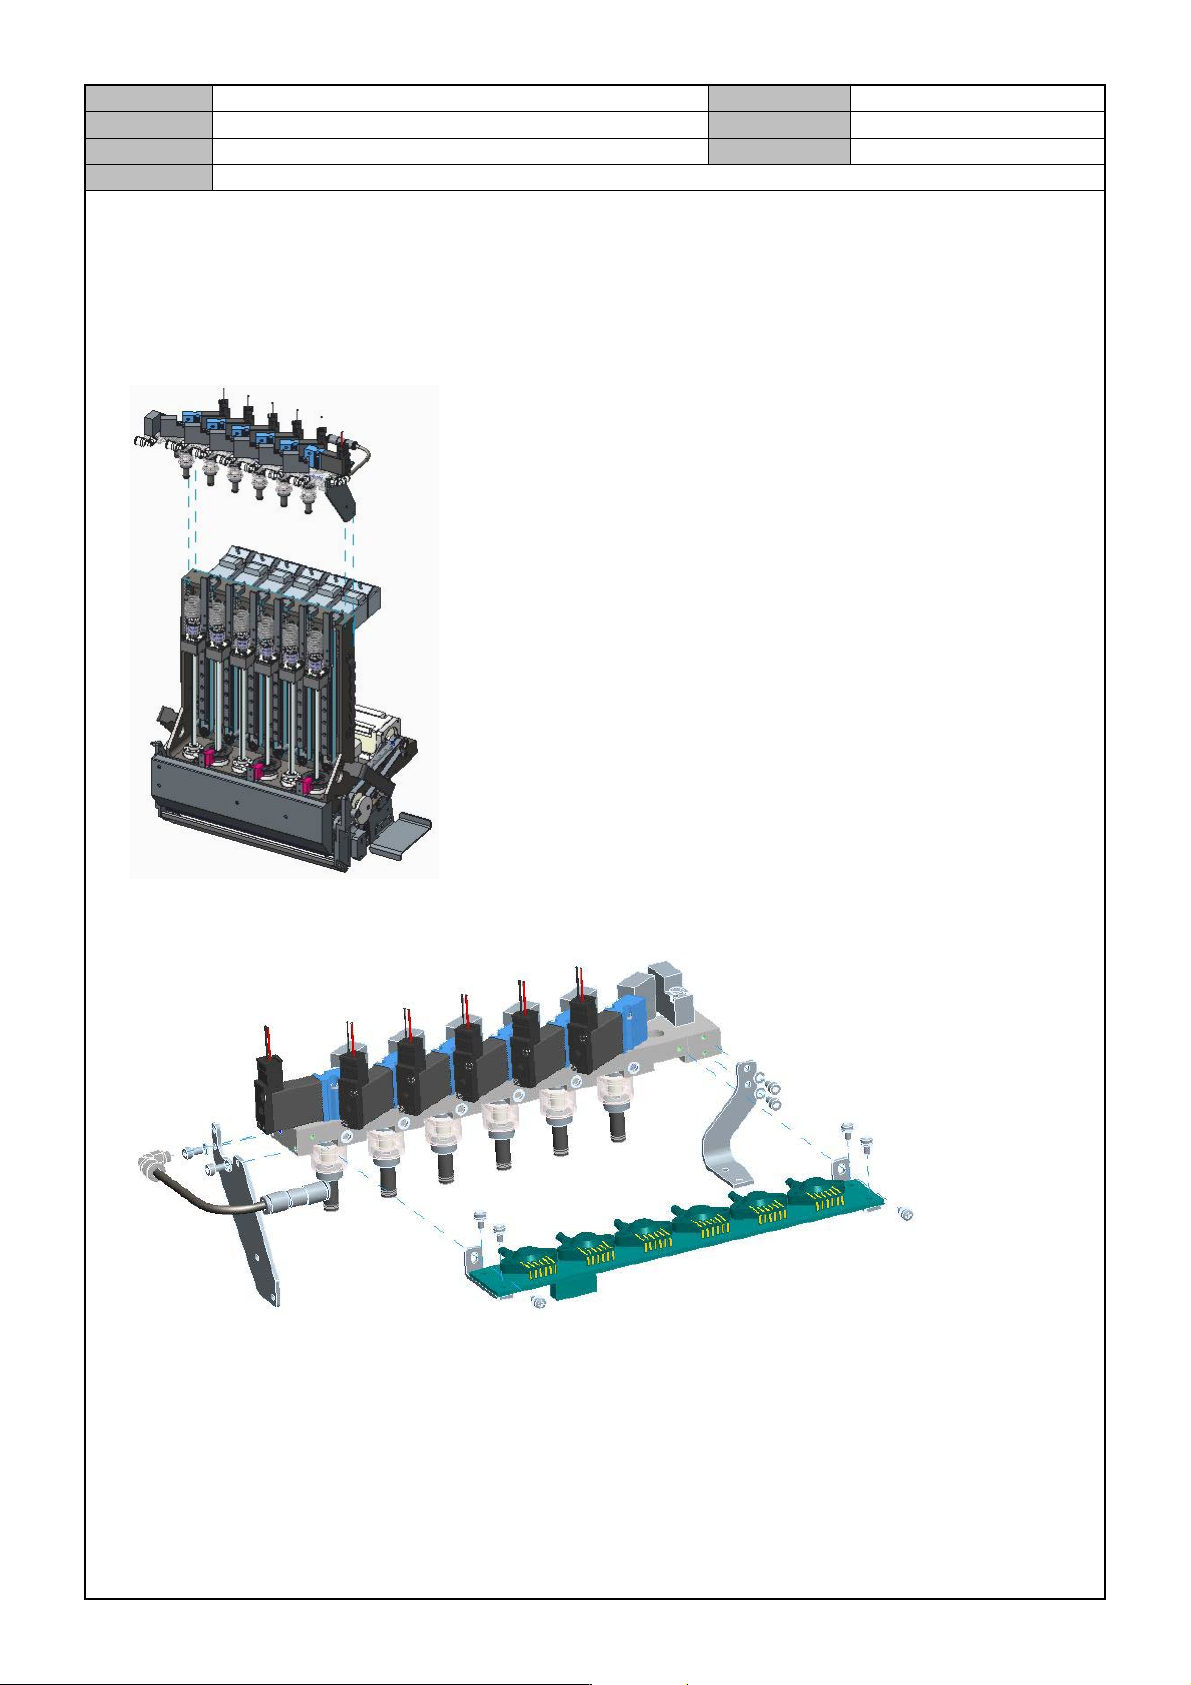
[HEAD SOLENOID VALVE REPLACEMENT (L2)]
Separate the Air Module.
Separate the Air Tube from the Air Module Assy and then separate the Air Module Assy by releasing the
fixing bolts.
Disassemble the Air Module.