EN 3.pdf - 第317页
Model DECAN Series Company SAMSUNG TECHWIN Module 3.18 V ACUUM DEVICE V ersion 01 Tit le V ACUUM PUMP & AIR PRESSURE CHECK Page 3-18-9 Note [V ACUUM PUMP & AIR PRESSURE CHECK] Run a Running T est to check every…
Model
DECAN Series
Company
SAMSUNG TECHWIN
Module
3.18 VACUUM DEVICE
Version
01
Title
REAR SOL ASSY SUB ASSEMBLY
Page
3-18-8
Note
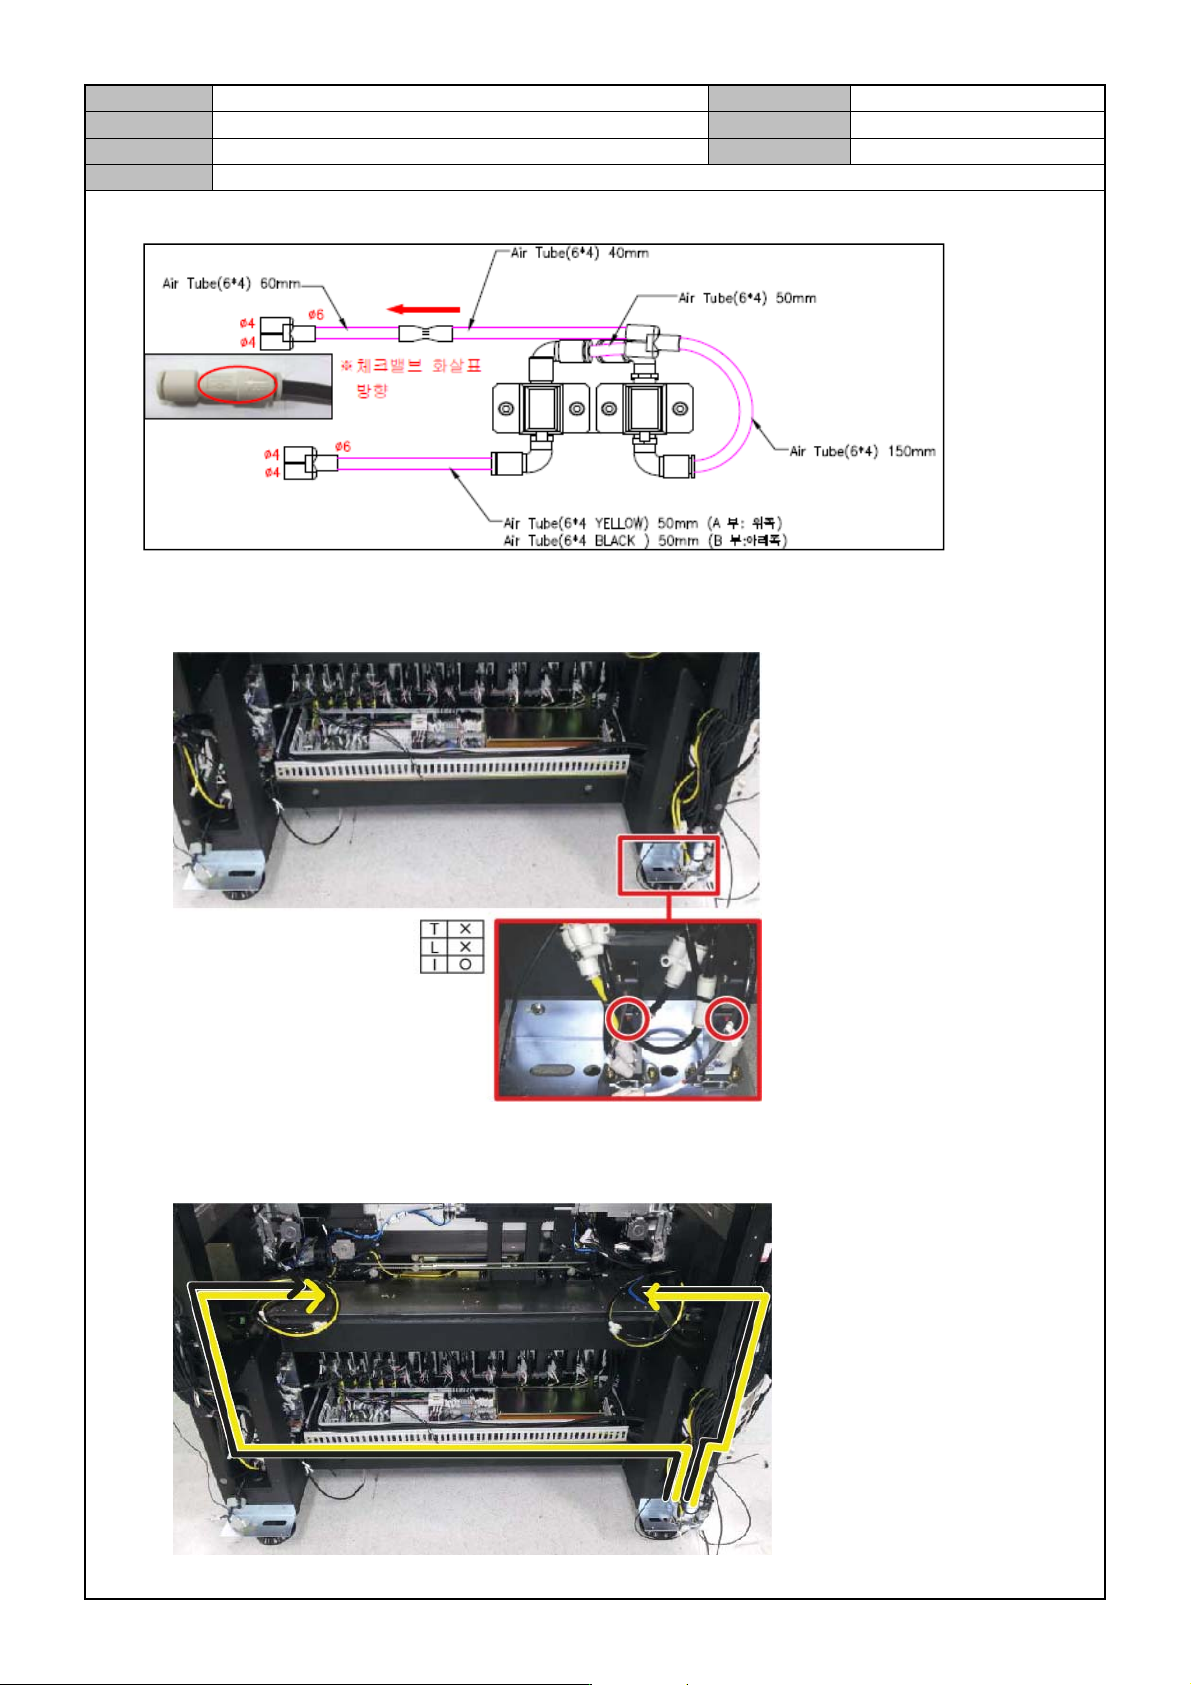
Sol Valve Assy 1,2 Air Pressure Tube Connection Diagram
Sol Valve Assy 1,2 Assembly into the Base Frame
Assemble it into the Cover Frame in the bottom rear right of equipment.
When assemble it, make sure that the cable and the operation switch face out.
Sol Valve Assy Air Tube Path
Right : 6 Yellow 1700mm, 6 Black 1700mm, 4 Black 1700mm
Left : 6 Yellow 3200mm, 6 Black 3200mm, 4 Black 3200mm
Model
DECAN Series
Company
SAMSUNG TECHWIN
Module
3.18 VACUUM DEVICE
Version
01
Title
VACUUM PUMP & AIR PRESSURE CHECK
Page
3-18-9
Note
[VACUUM PUMP & AIR PRESSURE CHECK]
Run a Running Test to check everything.(Error Log File check)
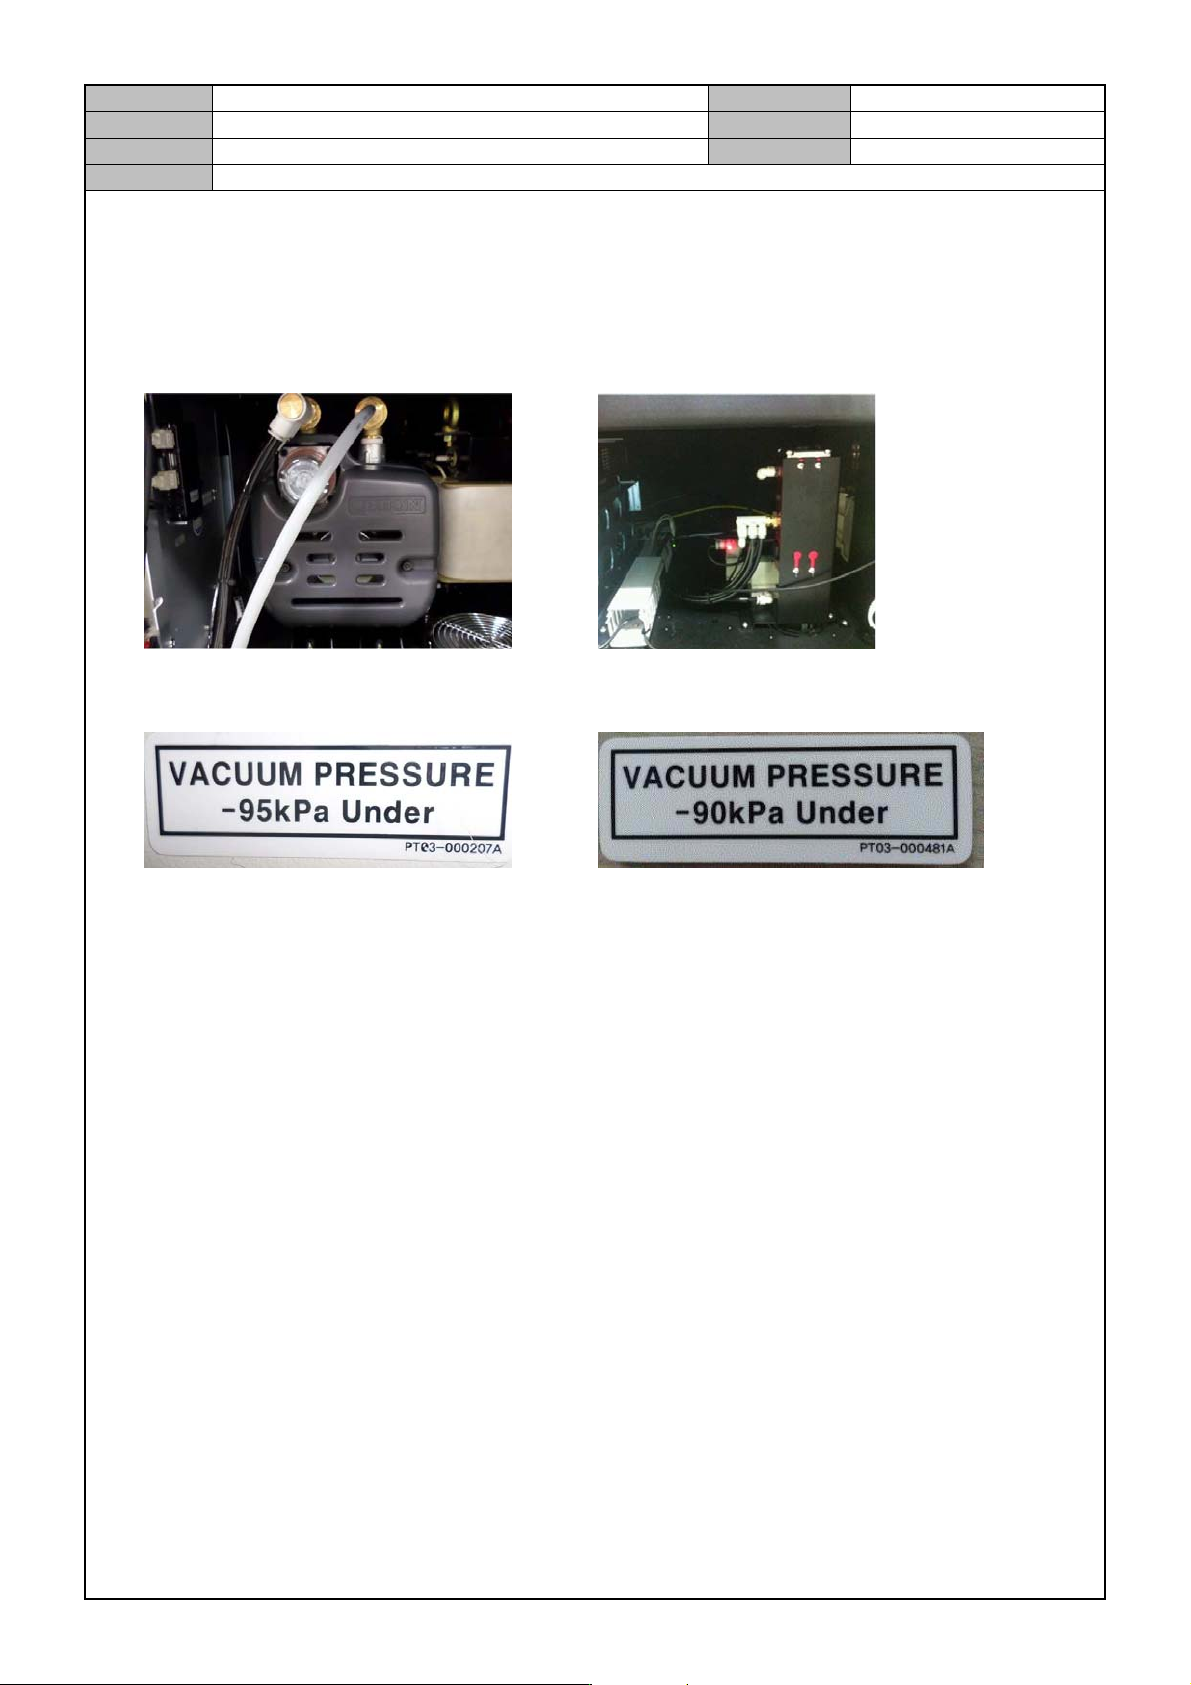
Separate the cover from the front bottom of the equipment and check the type of vacuum pump.
Pump Type Generator(Ejector) Type
See if the Vacuum Pressure sticker attached to the front is same as the Vacuum Pump Type.
Pump Type Generator(Ejector) Type
In the MMI, select <Diagnosis> → <F5(Vacuum)> and check the Vacuum Level / Blow level.
Inspection criteria
Vacuum Level "0" point check : Current Level value -9 ~ 9 mmHg or less.
When the Nozzle is not mounted, check the vacuum level for each head: For each head, 60 ~ 120 mmHg.
When the CN040 Nozzle is mounted, check the vacuum level: For each head, 480 mmHg or greater.
When the Nozzle is blocked, 600mmHg or greater.
When the CN040 Nozzle is mounted, check the amount of blow : -90 ~ -70 mmHg.
Repeat the Sol Valve Check 30 times and see if the Red Lamp is lit.
Model
DECAN Series
Company
SAMSUNG TECHWIN
Module
3.18 VACUUM DEVICE
Version
01
Title
MAIN AIR REGULATOR REPLACEMENT
Page
3-18-10
Note
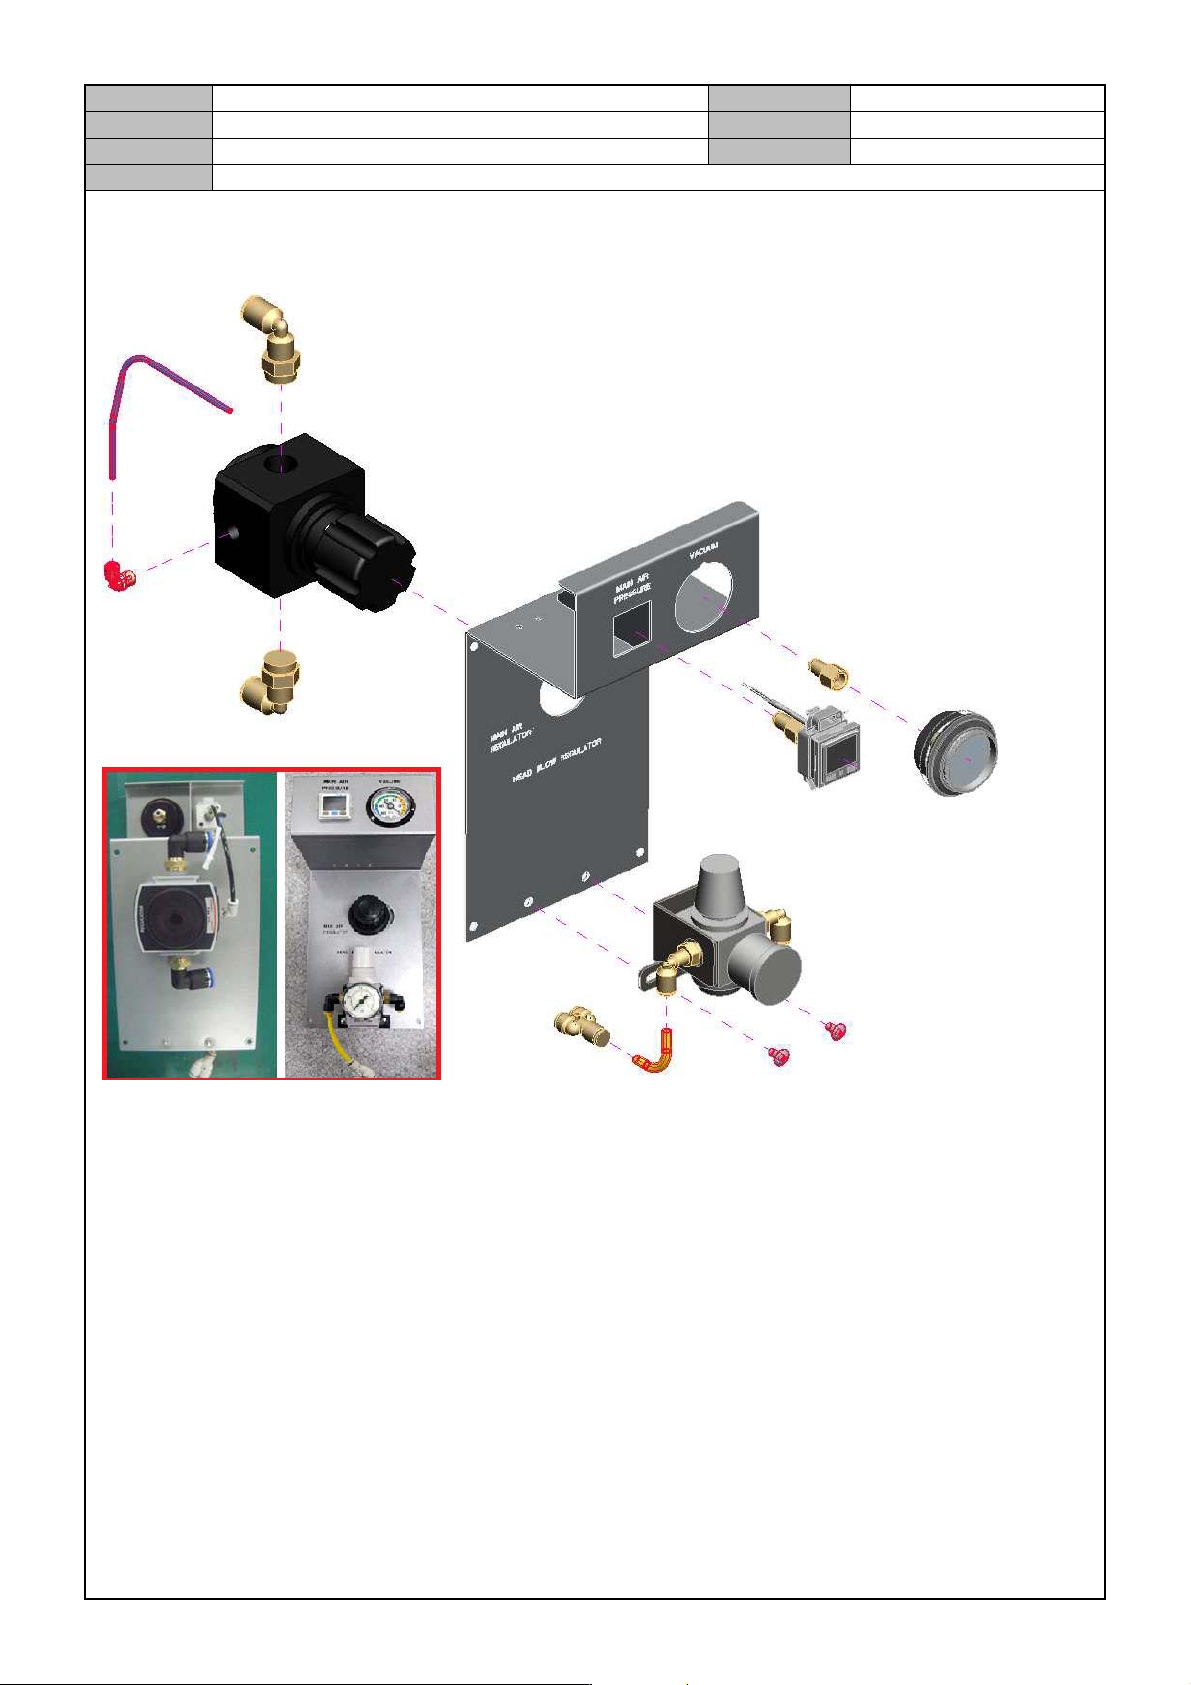
[MAIN AIR REGULATOR REPLACEMENT]