EN 3.pdf - 第327页
Model DECAN Series Company SAMSUNG TECHWIN Module 3.19 ELECTRIC DEVICE T otal Pages 29 T able of Contents [FRONT POWER PANEL SUB ASSEMBL Y] ...................................................... 2 [REAR POWER PANEL SUB A…
Model
DECAN Series
Company
SAMSUNG TECHWIN
Module
3.18 VACUUM DEVICE
Version
01
Title
SOLENOIDE VALVE CHECK
Page
3-18-18
Note
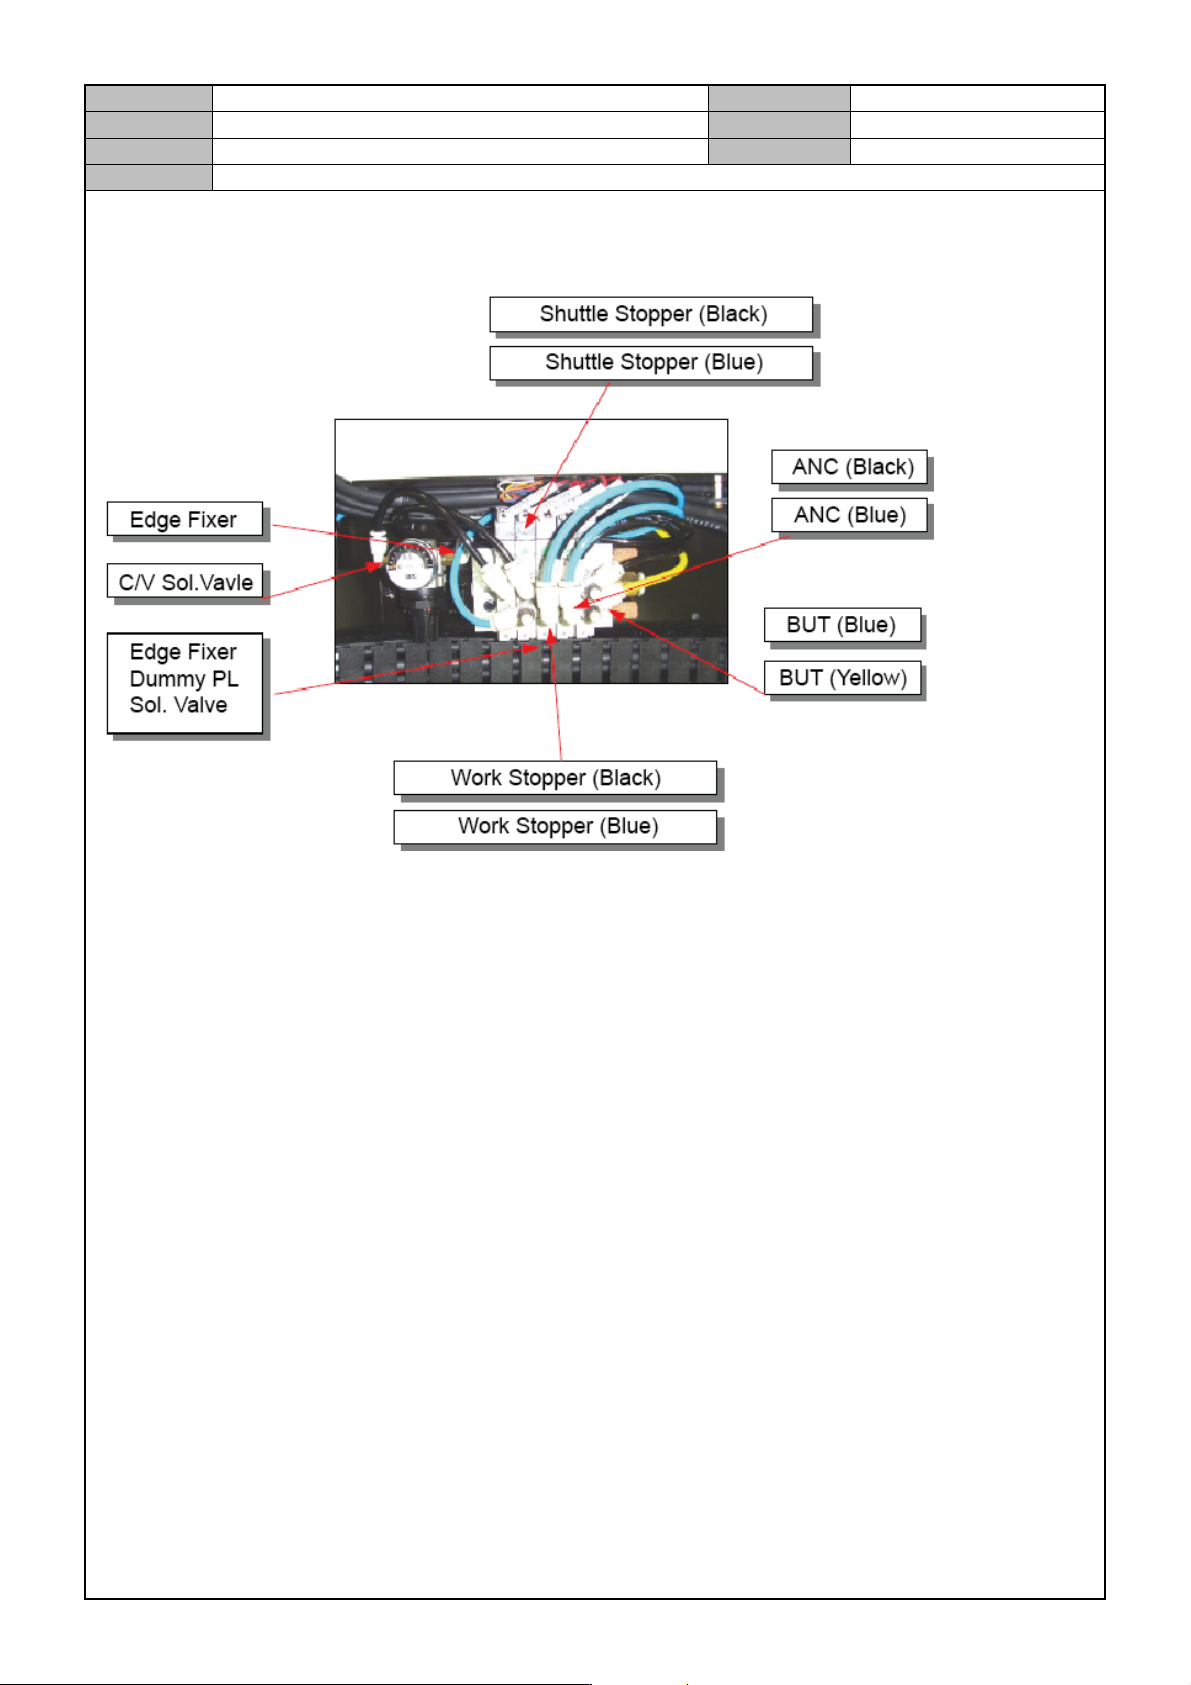
[SOLENOIDE VA LVE CHECK]
Check the fitting connected to the Solenoid Valve.
Reassemble the fitting connected to the Solenoid Valve.
Check the air pressure tube connected to the Solenoid Valve.

Model
DECAN Series
Company
SAMSUNG TECHWIN
Module
3.19 ELECTRIC DEVICE
Total Pages
29
Table of Contents
[FRONT POWER PANEL SUB ASSEMBLY] ...................................................... 2
[REAR POWER PANEL SUB ASSEMBLY] ......................................................... 4
[MAIN POWER SHORT TEST]............................................................................ 6
[DC POWER SHORT CHECK] .......................................................................... 10
[VOLTAGE CHECK TEST] ................................................................................ 11
[EQUIPMENT POWER AC380V CHANGE] ...................................................... 21
[GROUND RESISTANCE MEASUREMENT] .................................................... 22
[POWER SUPPLY REPLACEMENT] ................................................................ 23
[MOTOR DRIVER ASSEMBLY]......................................................................... 25
[SMEMA CHECK] .............................................................................................. 27
[OTHER ACCESSORIES ASSEMBLY] ............................................................. 28
[MOTOR DRIVER CABLE RECONNECTION] .................................................. 29
Model
DECAN Series
Company
SAMSUNG TECHWIN
Module
3.19 ELECTRIC DEVICE
Version
01
Title
FRONT POWER PANEL SUB ASSEMBLY
Page
3-19-2
Note
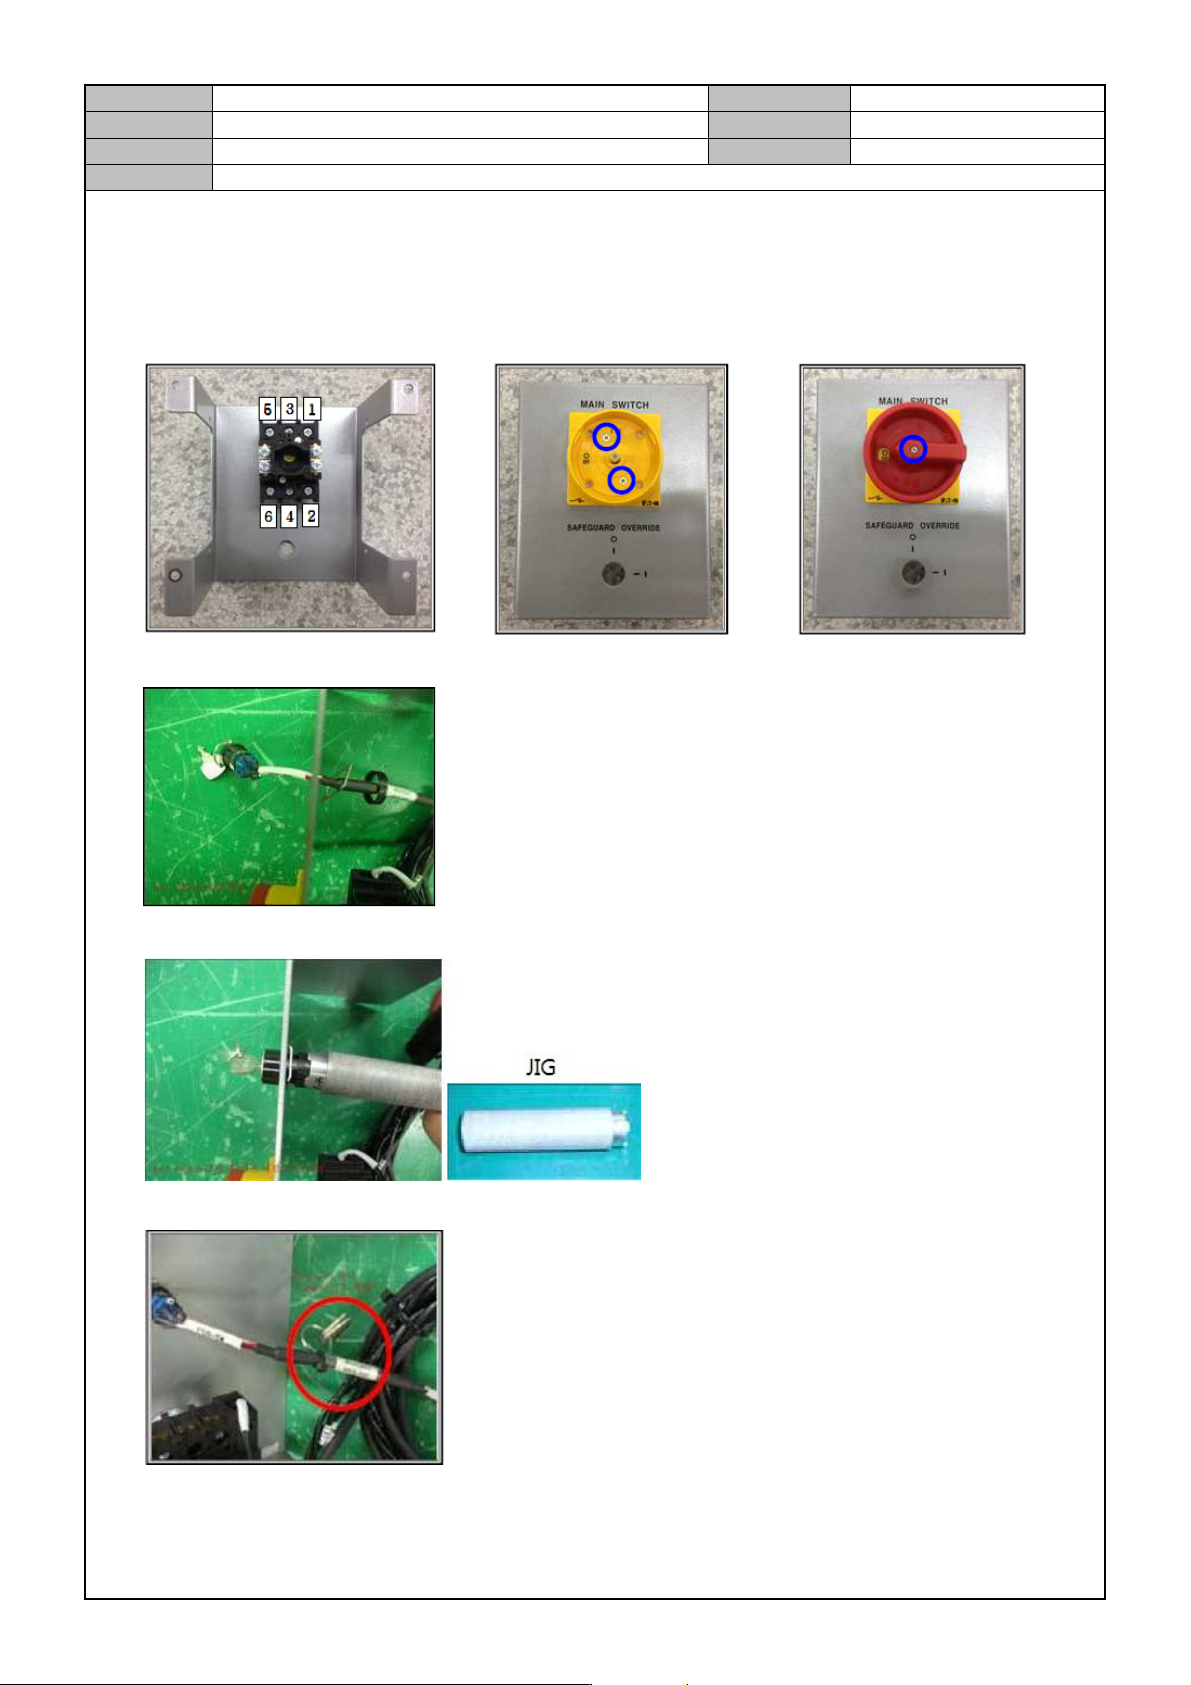
[FRONT POWER PA NEL SUB ASSEMBLY]
1. While paying attention to the direction of switch, assemble the Load Switch into the Panel.
2. Fix the Load Switch assembled into the Panel.
3. Insert the Safeguard Override key into the Panel.
4. Fix the Switch with a tool and assemble the Safeguard Override key.
5. Fix the Key to the Cable.