LBO 27 Zoll.pdf - 第85页
LBO 27" 2 Assembly instructions LBO 27" SIPLACE X4 09/2007 Edition 85 2.7.3 Settings in the conveyor firmware via Hyperterminal – adjustment of the run- time delay in the conveyor control For changing the setti…
2 Assembly instructions LBO 27" SIPLACE X4 LBO 27"
09/2007 Edition
84
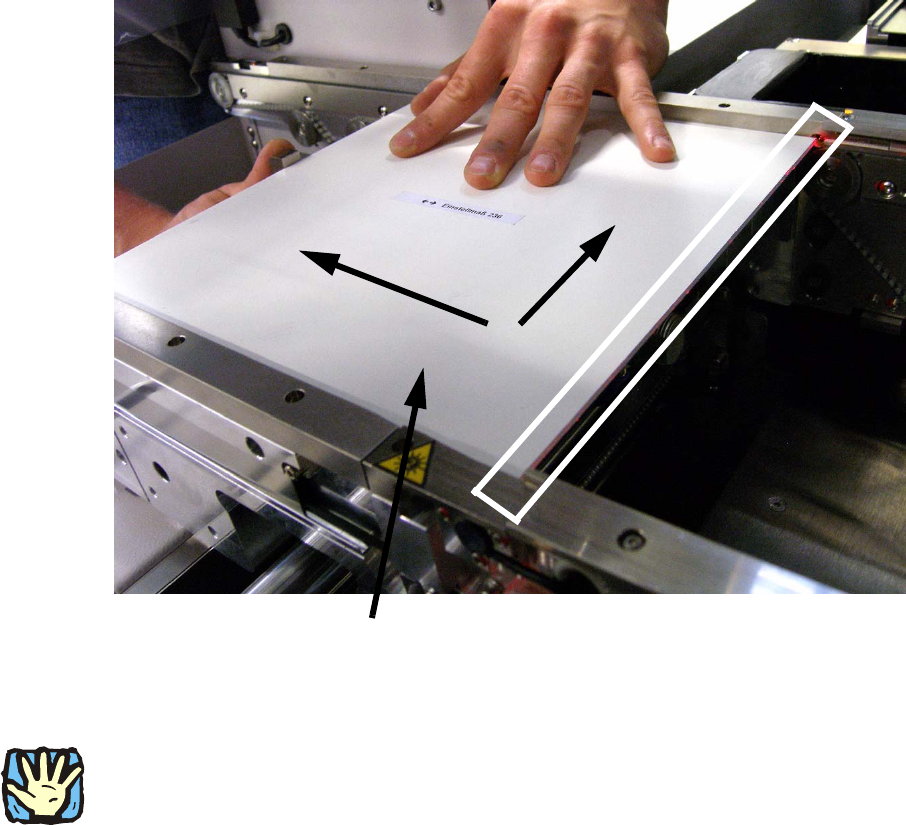
: With activated laser, the calibration board has to be pushed to the stopper. Push the board onto
the stopper and the fixed edge of the machine and move the stopper into the correct position.
In the correct position, the laser is visible on the whole edge of the calibration board. See pic-
ture below.
: If the stopper is at the correct position, remove the board carefully and fasten the two before
loosen screws. Then check the stopper position again by using the calibration board. Use
threadlocker to prevent a loosening of the screws.
2
2
2
CAUTION:
Deactivate the laser light barriers immediately after the successful adjustment of the stoppers and
deactivate the “safety mode (low speed)” in the run options. 2
2
2
Push the calibration board in this two directions
LBO 27" 2 Assembly instructions LBO 27" SIPLACE X4
09/2007 Edition
85
2.7.3 Settings in the conveyor firmware via Hyperterminal – adjustment of the run-
time delay in the conveyor control
For changing the settings of the conveyor firmware via Hyperterminal, it is necessary to connect
the conveyor control unit to an external computer.
Use a seriell connection cable (1:1) and follow the instructions: 2
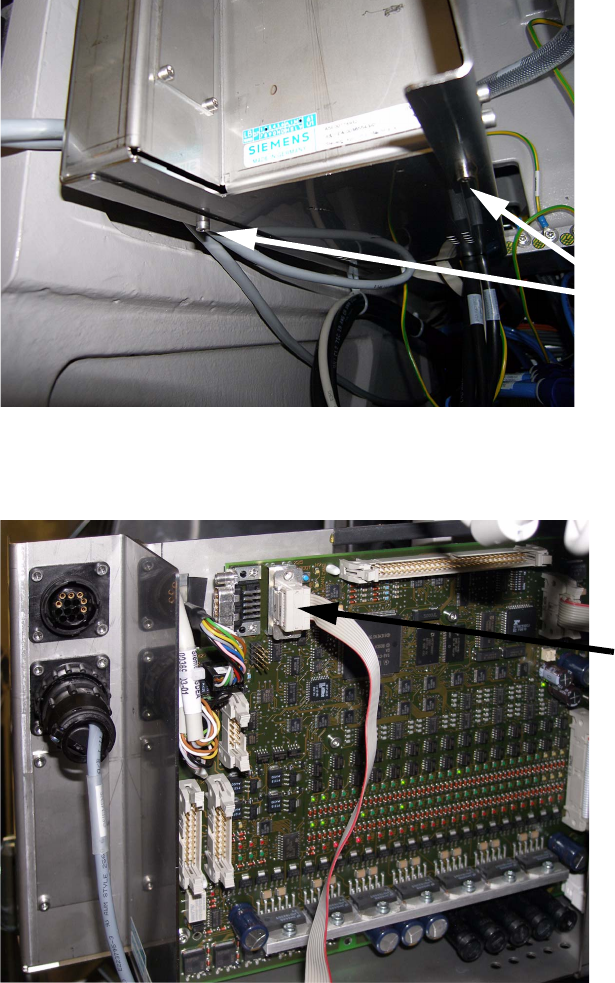
: The transport control is located over the main pneumatic unit of the machine.
Remove the two marked screws to pull out the control unit.
2
: Connect the transport control unit with the external computer by using the seriell connection
cable.
2
2 screws
Serial connection cable
2 Assembly instructions LBO 27" SIPLACE X4 LBO 27"
09/2007 Edition
86
: Start the program “lp-transport.ht” on the delivered CD by double click.
2
Hauptmenue Transport Siplace HF 2
Trace-Meldungen aus: 'Strg'+'A', ein: 'Strg'+'E' 2
1 - Bug-Report 2
2 - Transport Info 2
3 - Einstellen Meldungen 2
4 - Steuerplatine 2
5 - Einzelkomponenten 2
6 - Dauerlauf 2
7 - Firmware-Test 2
8 - Koppeln Barcode-Schnittstelle 2
9 – parameter 2
2
{Choose 9} 2
2
parameter track 1 (and common parameter) 2
1 - list parameter 2
2 - modify parameter 2
3 - save to EEPROM 2
t - change track 2
0 – quit 2
2
{Choose 1} 2
2
parameter track 1 2
1, 6, // version 2
10, 500, // [mm/s] maximum velocity conveyor 2
11, 350, // [mm/s] velocity drive-in machine 2
12, 350, // [mm/s] velocity drive-out machine 2
13, 50, // [0.1m/s²] maximum acceleration 2
14, 60, // [mm/s] velocity laser-light barrier 2
15, 25, // [0.1m/s²] deceler.laser-light barrier 2
16, 350, // [mm/s] velocity sensor laser-light 2
20, 0, // barcode scanner 2
21, 0, // ceramic centering unit 2
22, 0, // optional stopper 2