2OM-1088-002.pdf - 第380页
Tg0699-PM-D2 (10) Wipe out solder paste attached inside the cleaning nozzle, on the cleaning panel and cleaning rubber squeegee, with a cloth soaked in alcohol. If the cleaning rubber squeegee is worn out, replace it by …
Tg0699-PM-D2
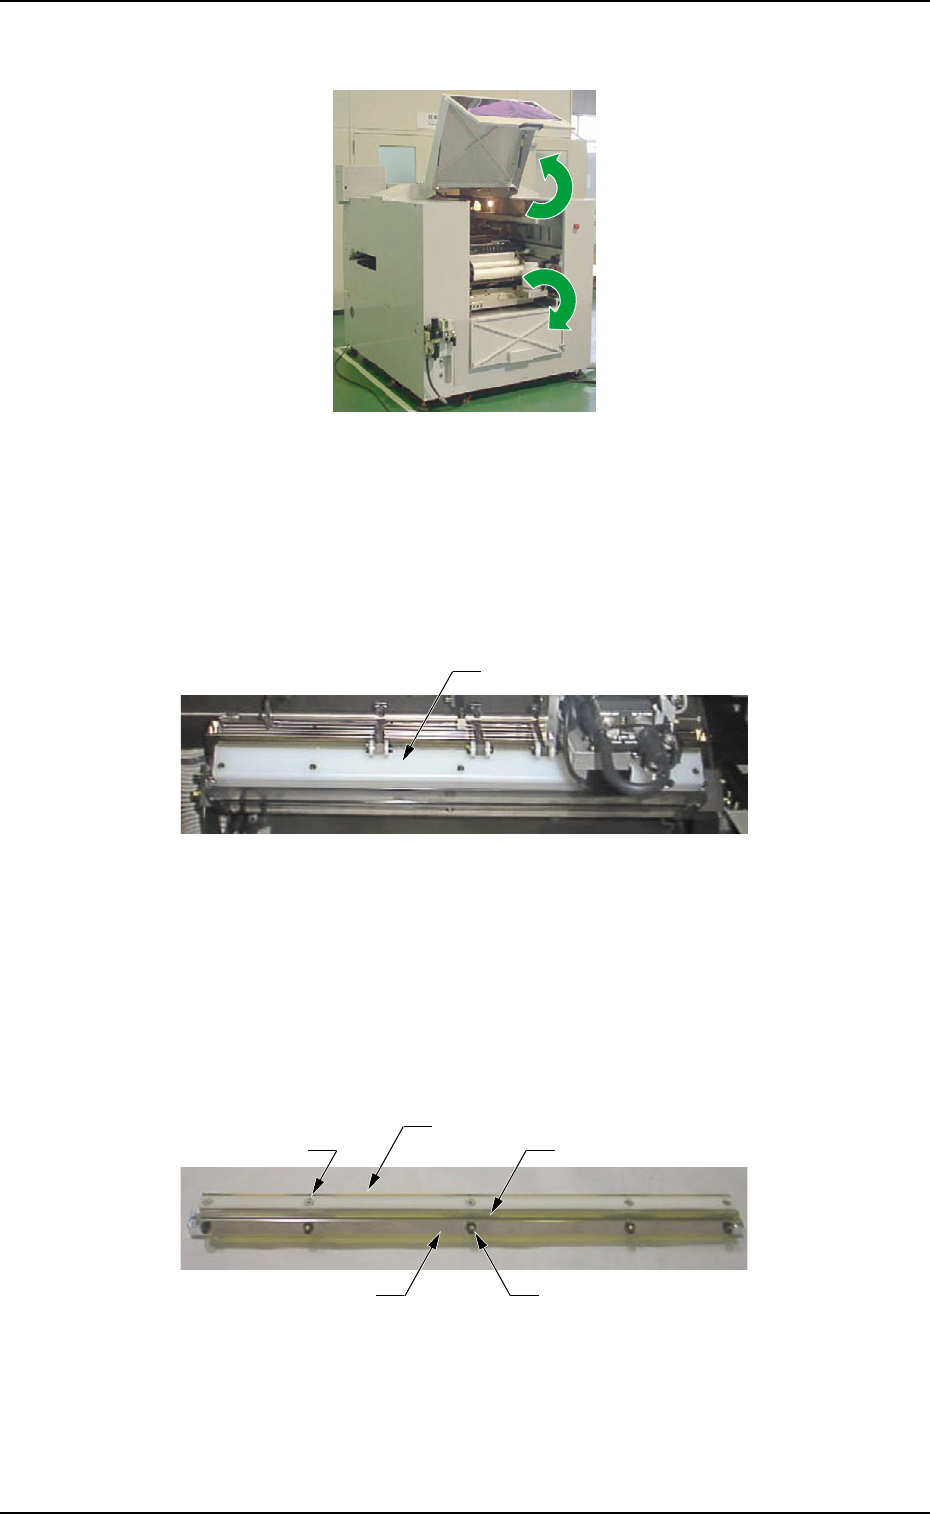
(6) Open the two safety doors on the rear side of the machine.
Fig. 5A89
(7) Pull the cleaning unit out.
(8) Loosen the two cleaning nozzle set bolts and remove the clean-
ing nozzle.
Fig. 5A90
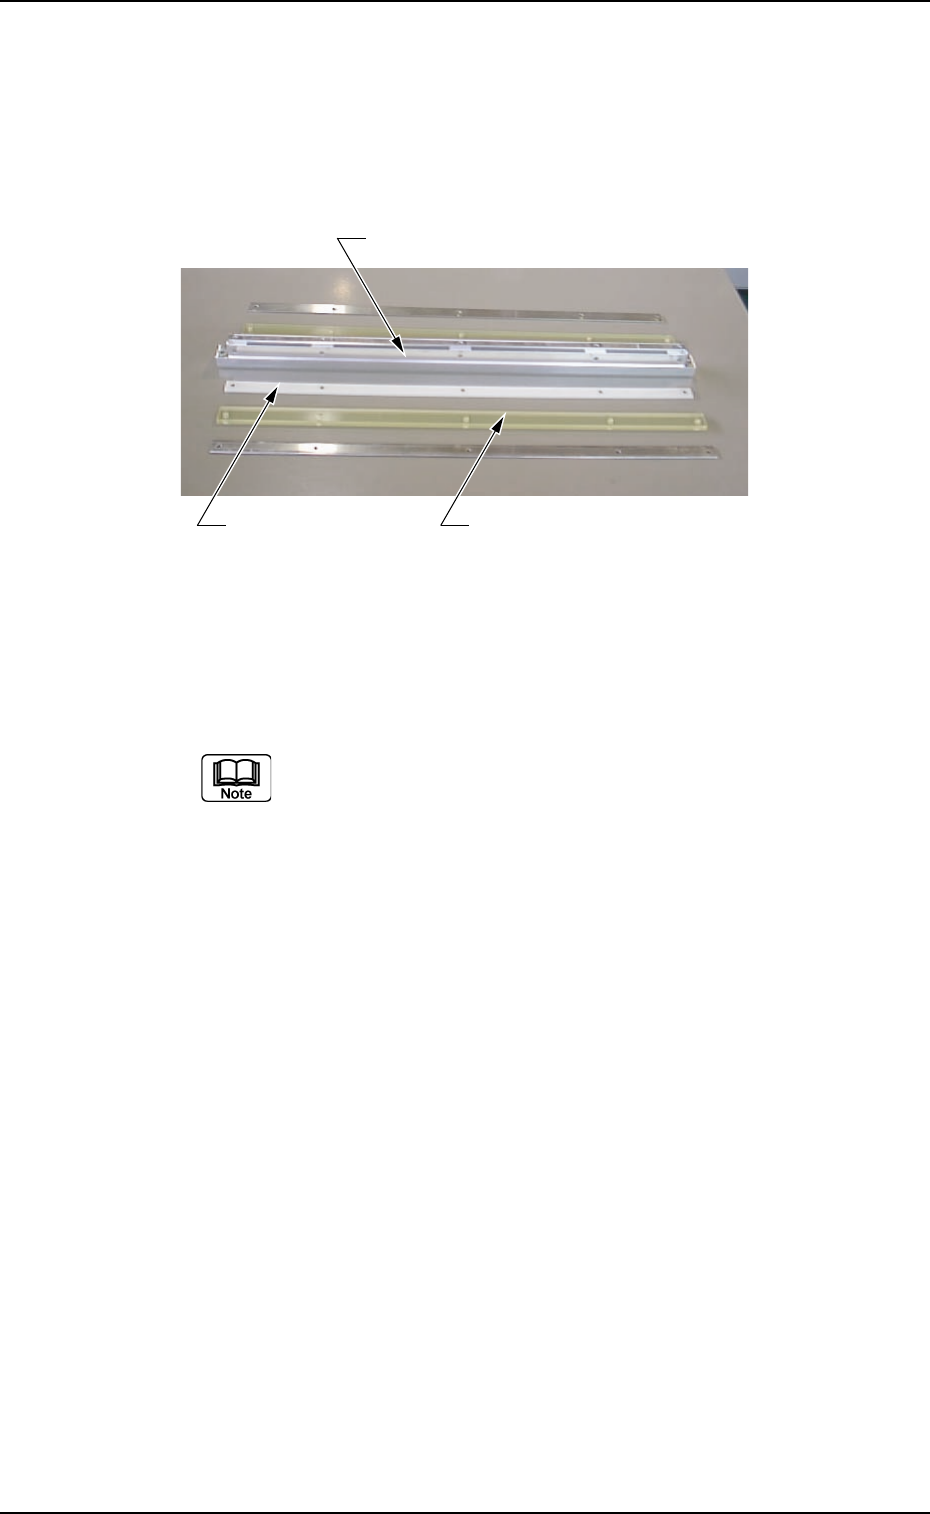
(9) Loosen the five cleaning rubber squeegee set bolts and five
cleaning plate set bolts and remove the cleaning rubber squee-
gee, cleaning rubber squeegee mounting plate and cleaning
plate.
Fig. 5A91
13. Cleaning Unit Cleaning Procedure
0207-001 Chapter 3 1-58
Cleaning Nozzle
Cleaning Plate Set Bolt
Cleaning Rubber Squeegee
Cleaning Plate
Cleaning Rubber Squeegee Set Bolt
Cleaning Rubber Squeegee
Mounting Plate
Tg0699-PM-D2
(10) Wipe out solder paste attached inside the cleaning nozzle, on
the cleaning panel and cleaning rubber squeegee, with a cloth
soaked in alcohol.
If the cleaning rubber squeegee is worn out, replace it by new
one.
Fig. 5A92
(11) Attach the cleaning rubber squeegee, cleaning rubber squeegee
mounting plate and cleaning plate with the five cleaning rubber
squeegee set bolts and five cleaning plate set bolts.
Attach them with the cleaning rubber squeegee pressed
against flat plate
such as a ruler so that the cleaning paper surface is
contacted evenly.
Fastening Torque for Set Bolts
Bolts at the Both Ends : Approx. 10 kgf/m
Other Bolts : Approx. 15 Kgf/m
(12) Attach the cleaning nozzle with the cleaning nozzle set bolts.
13. Cleaning Unit Cleaning Procedure
0207-001 Chapter 3 1-59
Cleaning Plate
Cleaning Rubber Squeegee
Cleaning

Tg0699-PM-D2
0207-001 Chapter 3 1-60