00191369-01.pdf - 第236页
6 Vision functions User Manual HS-50 6.5 Teach Fiducial Software-V ersion 5.01 E dition 01/99 234 3&% WR 3URFHVVLQJ&RQYH\RU2SWLRQ Click on the 3&%WRSURFHVVLQJ FRQYH \RU button a nd the fo llo…
User Manual HS-50 6 Vision functions
Software-Version 5.01Edition 01/99 6.5 Teach Fiducial
233
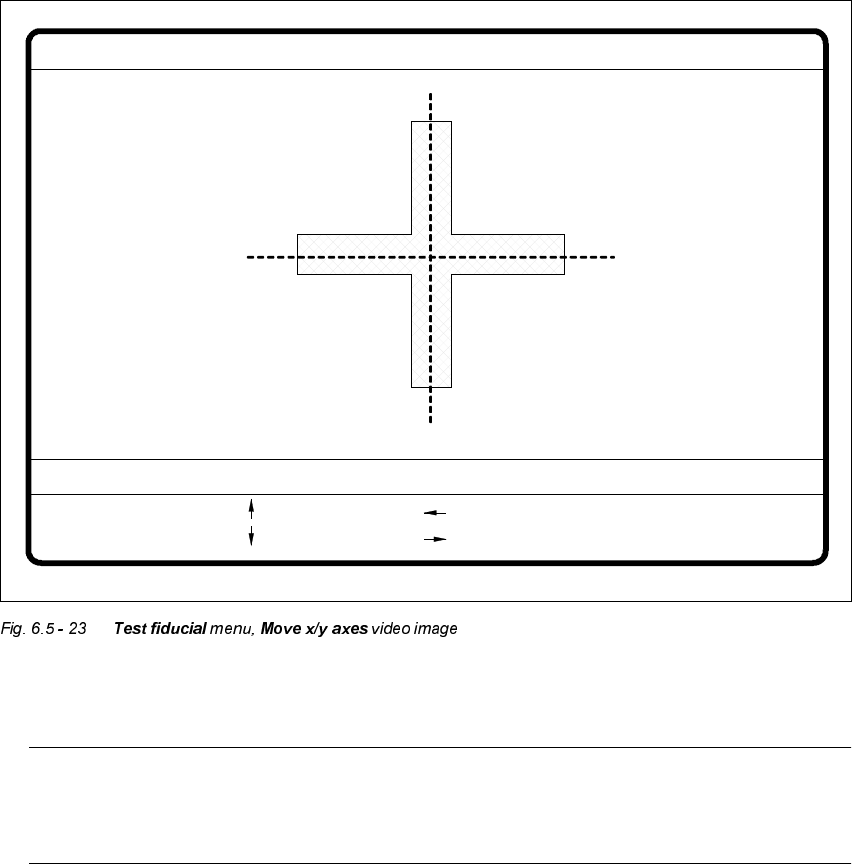
Å After selecting the step width (by choosing a number between 1 and 6) you can use the arrow
keys to change the camera position of gantry 1.
NOTE
The default teaching gantry is always Gantry 1. You can, however, select Gantry 2, 3, or 4,
for this by using the 6HOHFWJDQWU\option (see Section 6.5.3.1 on page 6 - 212).
Å With (VF you can quit the option. The 7HVWILGXFLDO menu will be displayed again.
: x axis +
: x axis -
: y axis +
: y axis -
1..6: x/y step
x pos. cam = y pos. cam =
Move x/y axes
x/y step width =

6 Vision functions User Manual HS-50
6.5 Teach Fiducial Software-Version 5.01 Edition 01/99
234
3&% WR3URFHVVLQJ&RQYH\RU2SWLRQ
Click on the 3&%WRSURFHVVLQJFRQYH \RU button and the following actions will be executed:
(1) There is a board on the input conveyor.
– The conveyor belt starts and conveys the board as far as the stopper.
– The board will be clamped.
(2) There is no board on the input conveyor.
– The message appears: ’No PCB on the input conveyor’.
– Insert a board.
– Click on the 3&%WRSURFHVVLQJFRQYH\RU button.
– The conveyor belt starts and conveys the board as far as the stopper.
– The board will be clamped.
NOTE
If there is already a board on the processing conveyor, this function will be blocked. You will
then see a message informing you that there is already a board on the processing conveyor.
NOTE
If a twin conveyor is installed you can use the buttons in the option box ’Conv. selection’ to
select conveyor 1 or conveyor 2.
3&%WR2XWSXW&RQYH\RU2SWLRQ
This function will only be executed when there is a board on the processing conveyor.
NOTE
When you quit the menu, the board will be transported automatically onto the output conveyor.
NOTE
If a twin conveyor is installed, you can use the buttons in the option box ’Conv. selection’ to select
conveyor 1 or conveyor 2.
User Manual HS-50 6 Vision functions
Software-Version 5.01Edition 01/99 6.6 Test Component
235
7HVW&RPS RQHQW
7 HVW&RPSRQHQW)ORZ&KDUW
The 7HVWFRPSRQHQW flow chart shows in graphic form all menu options together with their sub-
functions. The menus are indicated by being bordered with a solid line, while the option boxes use
a dash-dotted line and the input boxes a dotted line.
,QIRUPDWLRQRQWKH7HVW&RPSRQHQW)ORZ&KDUW
0HQXV
The 7HVWFRPSRQHQW option includes the following menus:
– Select package form
– 7HVWFRPSRQHQW
The 6DYHFRPSRQHQW QDPH option box will drop down every time you wish to quit the 7HVWFRP
SRQHQW menu, having previously generated or modified GF data. This gives you the choice of ei-
ther saving or discarding the GF data in question.
You can quit the individual menus by clicking on either the icons of another menu or on the 0DLQ
YLHZicon.
,QSXW%R[HV2SWLRQ%R[HV
For data input, displaying values and initiating actions the system offers the following input boxes:
– Measure mode
– Adjust contrast sensitivity
– Select component type (80F
4
, 80F
4
-6 or 80F
5
machines only)
You can quit the input boxes by clicking on 2., $FFH SW or &DQFHO.
Å Click on 2. or $FFHSW to have the program save the data. The box will then close.
Å Click on the &DQFHO button to discard the data, after which the input box will close.
%XWWRQV
The system provides the following buttons for selecting options:
Å /RDG*)GDWD
Once you have selected the component you want from the lists field, click onto the /RDG*)
GDWD button. The package form parameters will be loaded.