00194705-0102_AI_1WireBus_DE+EN.pdf - 第48页
Retrofit instructions: New 1-wire wiring for the SIPLACE X-series 11/2005 Edition 48 2.7 New 24 V wiring : Connect the white strand of the short cable (s ee photog raph) to the 0V terminal (see photo- graph below). : Fit…
Retrofit instructions: New 1-wire wiring for the SIPLACE X-series
11/2005 Edition
47
2.6 Preparatory work
: Start the SITEST program.
: Load the new firmware for the I/O sub-distributor and main distributor (0.1.03.50 or later).
2
This must be done for both variants. 2
2
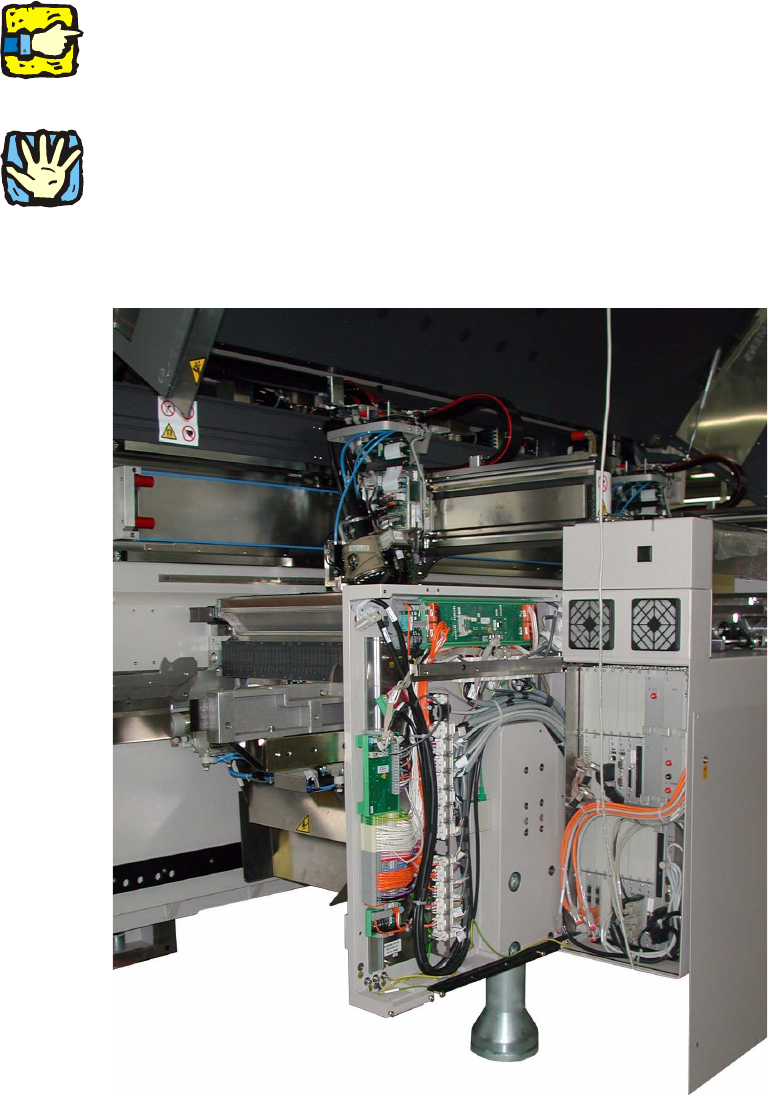
: Switch the placement machine off at the main switch.
2
This is essential as you are working on electrical components. 2
2
: Remove the outer side panels at the relevant location and the door to the computer unit at lo-
cation 4 and the door at location 2..
2
Retrofit instructions: New 1-wire wiring for the SIPLACE X-series
11/2005 Edition
48
2.7 New 24 V wiring
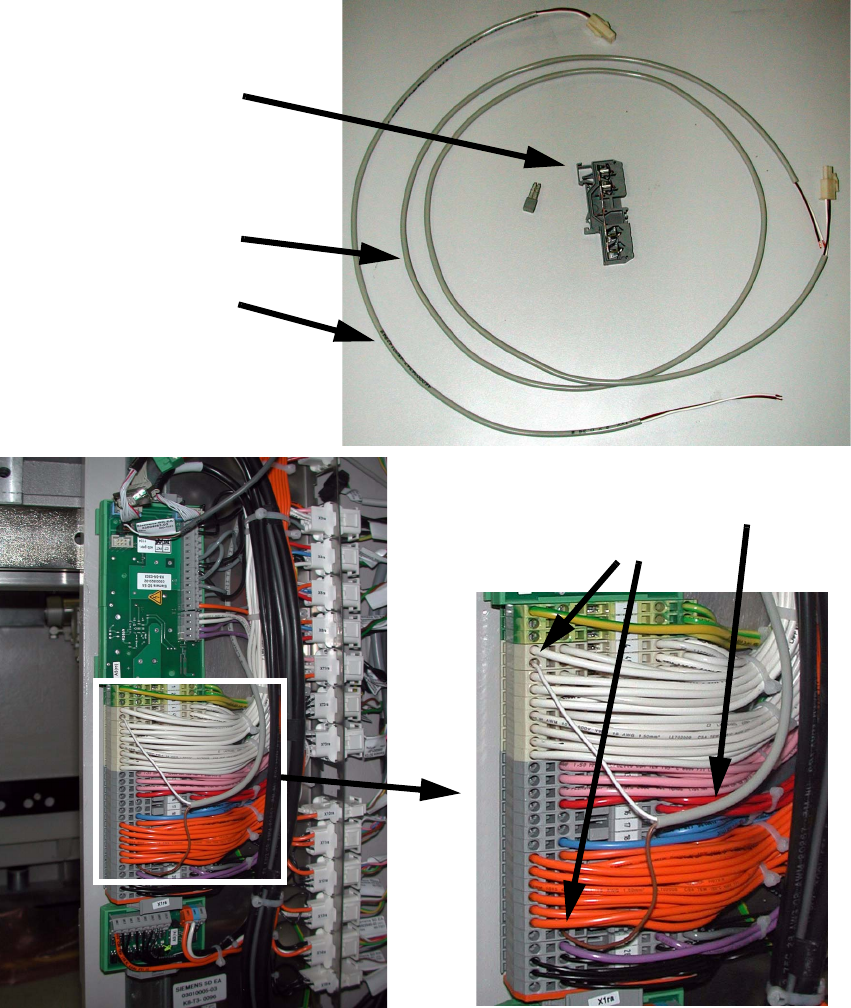
: Connect the white strand of the short cable (see photograph) to the 0V terminal (see photo-
graph below).
: Fit the additional terminal and connect it with a jumper. Connect the brown cable (24 V) to this
terminal (see photograph below).
2
Short cable
Long cable
Additional terminal
Connectors
Connecting cable
Retrofit instructions: New 1-wire wiring for the SIPLACE X-series
11/2005 Edition
49
: Connect the long cable to the short cable and pull the other end into the middle of the machine
frame.
2
2
2
2
2
2
2
2
2
2
2
2
2
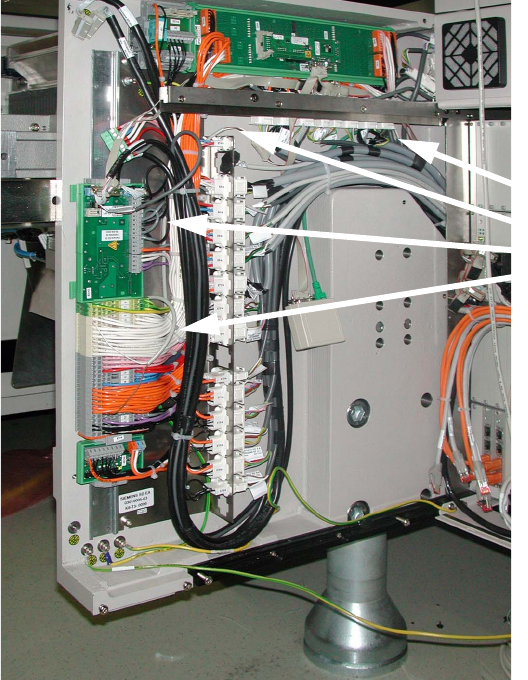
Running the cables