00194705-0102_AI_1WireBus_DE+EN.pdf - 第55页
Retrofit instructions: New 1-wire wiring for the SIPLACE X-series 11/2005 Edition 55 : Modify the cable run for the FCU. Run the cable under the met al cover on the pneumatic valve (see photog raph below). : Run the now …
Retrofit instructions: New 1-wire wiring for the SIPLACE X-series
11/2005 Edition
54
2.8.2 Fitting the 1-wire-hub
: Fit the new 1-wire hub on the nozzle changer.
Run the connecting cable to the 1-wire CAT5 splitter.
2
2
: Connect the cable to the 1-wire CAT5 splitter according to the location.
2
2
2
2
2
2
2
2
2
2
2
New nozzle changer hub
Connecting cable for hub
Retrofit instructions: New 1-wire wiring for the SIPLACE X-series
11/2005 Edition
55
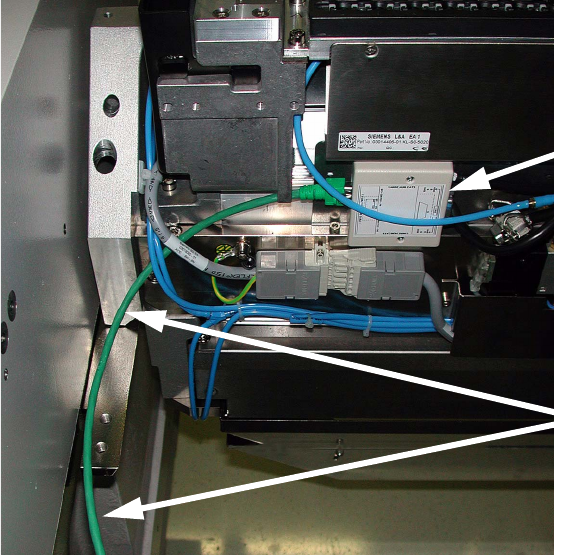
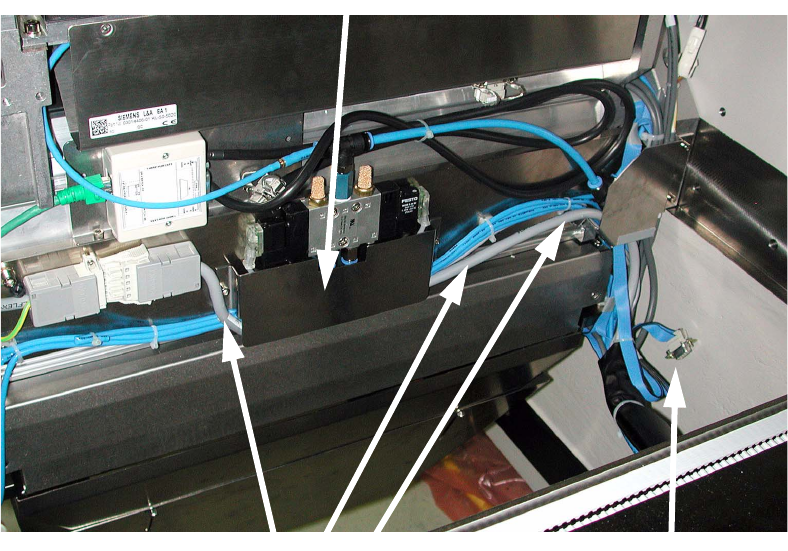
: Modify the cable run for the FCU.
Run the cable under the metal cover on the pneumatic valve (see photograph below).
: Run the now unused machine-CAN bus cable on the wiring harness towards the machine
frame and fix it in place with a cable tie.
2
2
2
2
2
2
2
2
2
2
2
Metal cover
Now unused
machine-CAN bus cable
FCU cable
Retrofit instructions: New 1-wire wiring for the SIPLACE X-series
11/2005 Edition
56
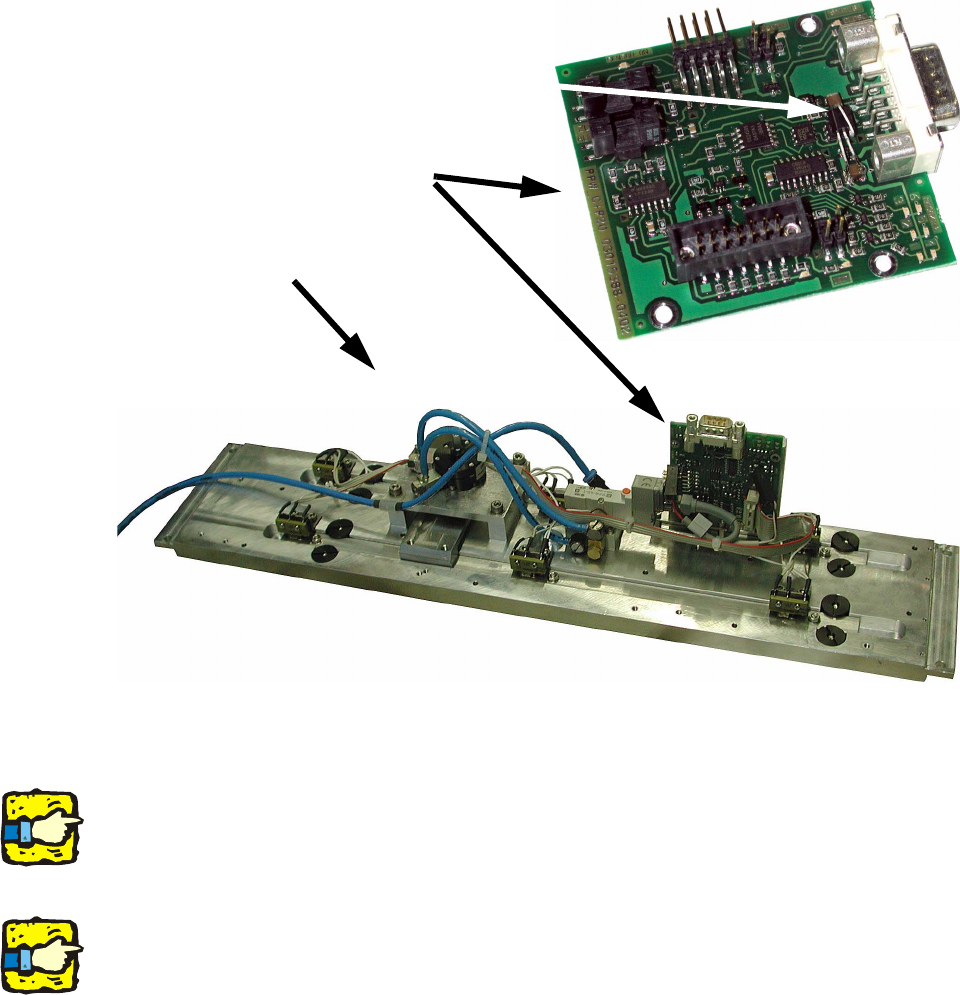
2.8.3 Replacing the nozzle changer control board for the C&P 20
: Loosen the screws on the nozzle changer and lift it out of the placement machine. Replace the
control board on the underside of the nozzle changer with the new control board. This has an
additional voltage regulator.
2
2
: Insert the nozzle changer once more and screw it in place.
2
Note the installation height: 150.0 ± 0.2 mm. 2
2
2
2
Check the nozzle changer C&P 20 functional release. 2
It should be > 03. Replace it if this is not the case. 2
2
2
Nozzle changer control board
Nozzle changer
Voltage regulator