00197787-02_SI_SIPLACE_HeadVerification_EN.pdf - 第11页
3 Head verification principles 3.1 Starting the offline head verification Software Manual SIPLACE Head Verification 03/2018 11 3 Head verification principles 3.1 Starting the offline head verification NOTICE Log in as „M…

2 Safety
10 Software Manual SIPLACE Head Verification 03/2018
3 Head verification principles
3.1 Starting the offline head verification
Software Manual SIPLACE Head Verification 03/2018 11
3 Head verification principles
3.1 Starting the offline head verification
NOTICE
Log in as „Machine service”
To enable the standard service functions, it is recommended to log in as Machine service.
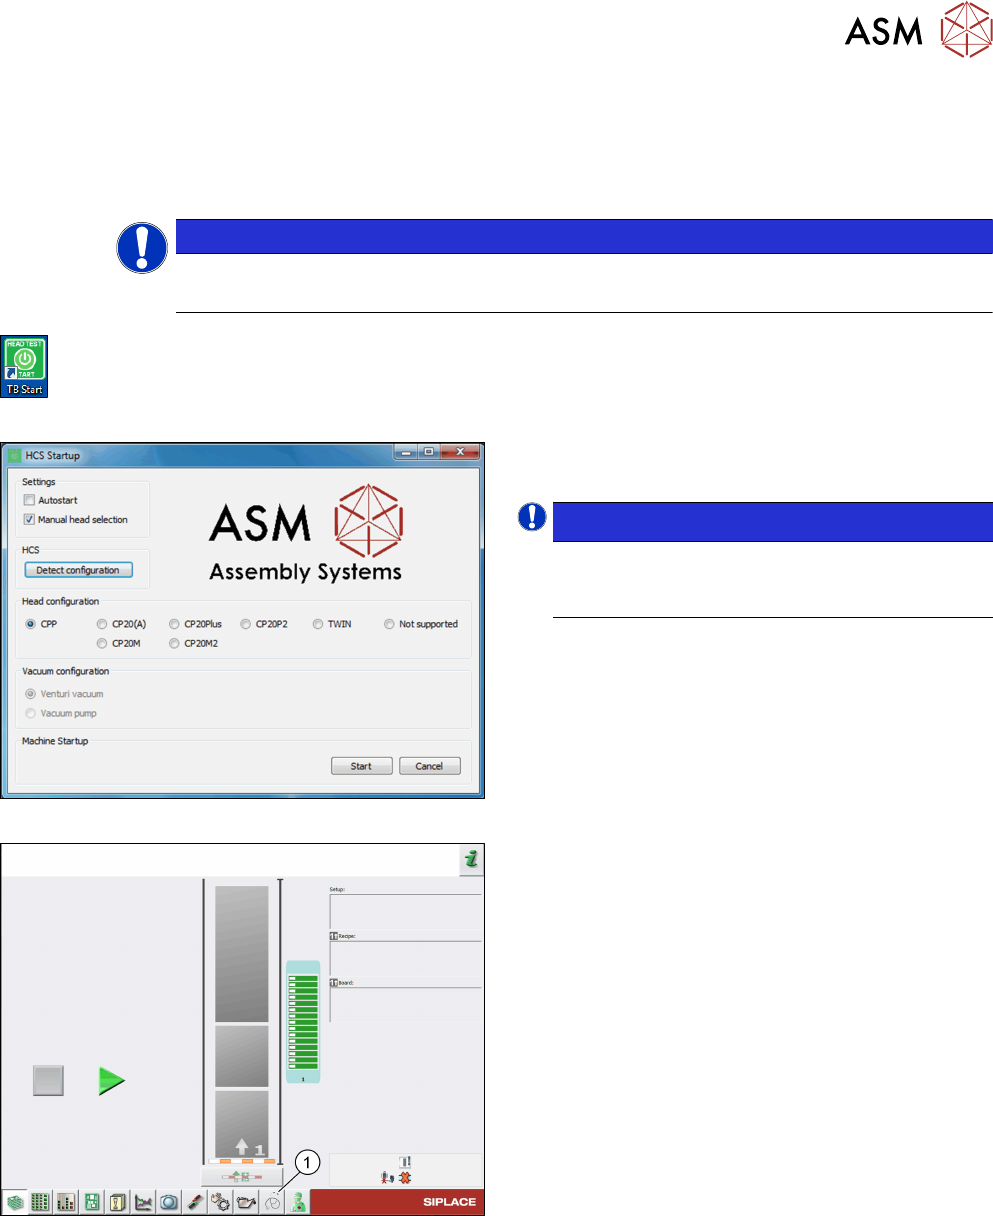
Fig.1: TB Start icon
► On the desktop, double-click the TB Start icon to
start the verification software.
Fig.2: HCS Startup screen
► On the HCS Startup screen, select the head and
vacuum configuration, if necessary.
NOTICE!
If the head was initialized correctly, the head
is automatically detected and selected under
Head configuration.
.
Fig.3: Test bench inspection icon selection
► Click the Test bench inspection icon(1) to start
the head verification workflow.
3 Head verification principles
3.1 Starting the offline head verification
12 Software Manual SIPLACE Head Verification 03/2018
3.1.1 First start of software
The vacuum system and the CAN-Bus setup might not be automatically detected. If this is the
case, both need to be configured manually.
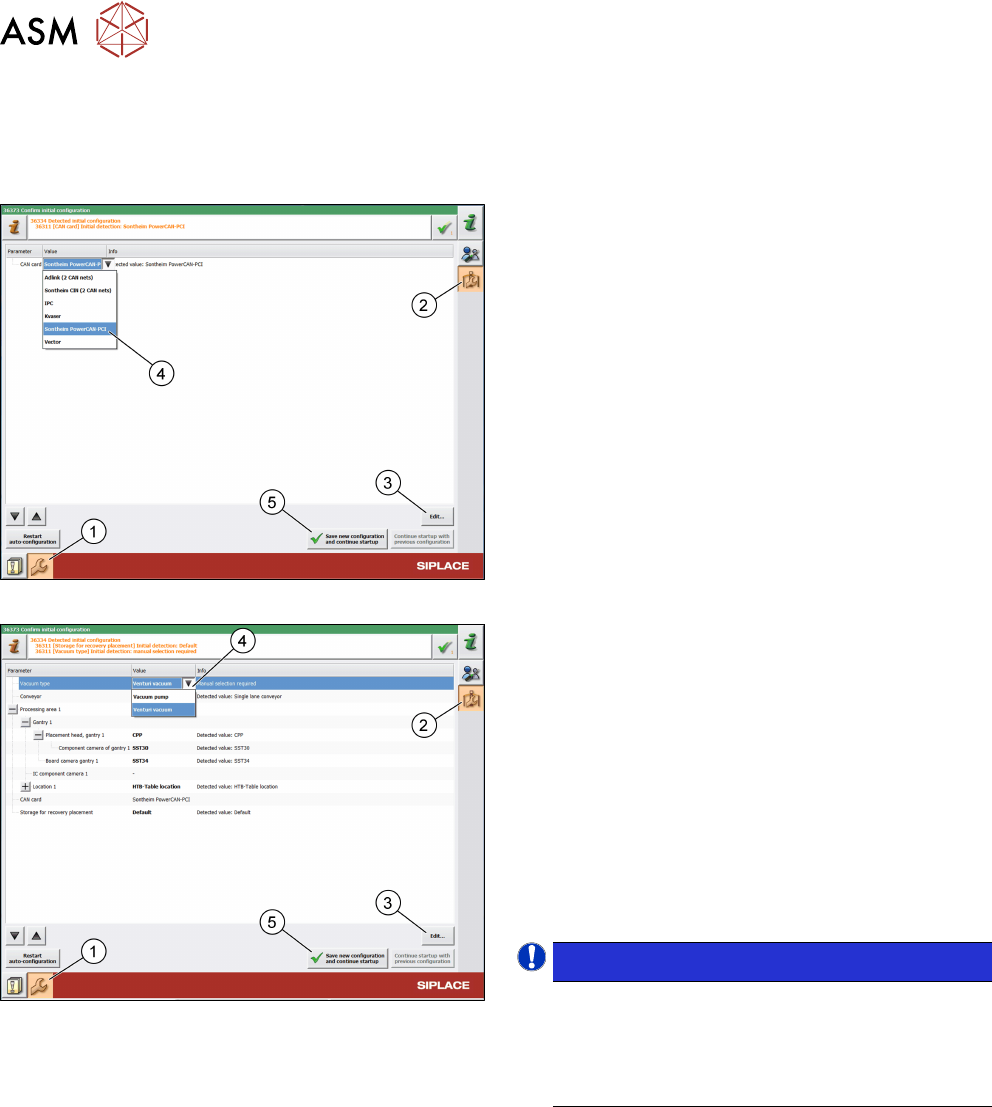
Fig.4:
CAN card configuration
Configure the CAN card:
► Click the Automatically update and configure
the machine icon(1).
► Click the Confirm automatically detected
machine configuration like camera type, con-
veyor type… icon(2).
► Click Edit…(3).
► Select Sontheim PowerCAN PCI(4).
► Click Save new configuration and continue
startup(5).
Fig.5: Vacuum type configuration
Configure the vacuum type:
► Click the Automatically update and configure
the machine icon(1).
► Log on as machine service.
► Click the Confirm automatically detected
machine configuration like camera type, con-
veyor type… icon(2).
► Click Edit…(3).
► Select Vacuum pump or Venturi vacuum(4).
► Click Save new configuration and continue
startup(5).
NOTICE!
Wrong vacuum values.
The selection applies the vacuum limits to be
used for the verification. If the vacuum type does
not match the connected vacuum supply, wrong
results will be provided.
.