00197787-02_SI_SIPLACE_HeadVerification_EN.pdf - 第19页
3 Head verification principles 3.3 Head verification software Software Manual SIPLACE Head Verification 03/2018 19 3.3.3 Starting the head verification The Progress tab shows the previously selected measurements and the …

3 Head verification principles
3.3 Head verification software
18 Software Manual SIPLACE Head Verification 03/2018
3.3 Head verification software
3.3.1 Meta data
Meta data are required to identify the verified head and the person who performed the verification.
All entered data are shown in the protocol that is generated when the head verification is finished.
Fig.18: Meta data tab
► Click the Test bench inspection icon(1).
► Enter or select(2) the person performing the veri-
fication.
► All head information(3) is read out from the head
EPROM. Verify if the Head material number
corresponds to the information written on the
head label and modify it if applicable.
► The Test bench ID(4) is entered during the in-
stallation of the HCS software. For information on
how to modify the Test Bench ID, see 3.1.3.2
"Modifying the test bench configuration" [}14].
► Enter a comment(5), if necessary.
► Select the Test mode(6) to be used:
- Automatic: All tests must be performed.
- Analyze: Individual tests to be performed can
be configured.
► Click Next(7).
3.3.2 Selection of measurements
The Selection of measurements tab shows all tests that are available for the head to be verified.
NOTICE
Selection of measurements
Tests can only be selected in the Analysis mode and are indicated by a green tick. In the
Automatic mode, all tests are preselected and greyed out.
Fig.19: Selection of measurements tab – Analysis mode
► Manually select and/or deselect tests. You can
also click the Select all(1) button to select all
tests at once or click the Deselect all(2) button
to deselect all tests at once.
► Click Next(3).
NOTICE
To gain a reliable overview about the head condition, it is recommended to run a full head
verification including all available tests. The order in which the tests are performed is line-
wise starting from the top left test to the bottom right test.
3 Head verification principles
3.3 Head verification software
Software Manual SIPLACE Head Verification 03/2018 19
3.3.3 Starting the head verification
The Progress tab shows the previously selected measurements and the status of the individual
tests.
NOTICE
Previous settings still available
All previous settings are still available and can be changed any time before the head verific-
ation has been started.
► Click the Previous button to return to the previous page.
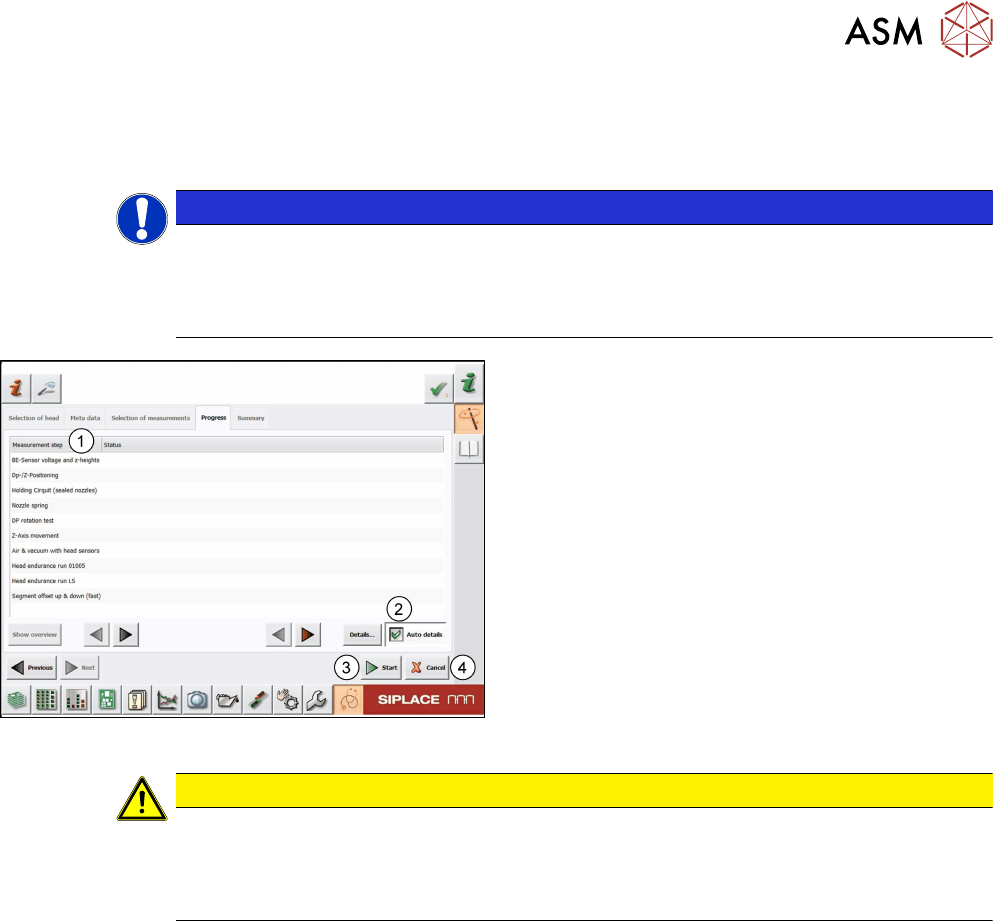
Fig.20: Progress tab
► Enable the Auto details check box(2) so that
the detailed test result is automatically displayed
whenever new measurement values are avail-
able.
► Click the Start button(3) to start the head verific-
ation.
ð The status of the ongoing verification is dis-
played in the Status column(1). See 3.3.4
"Measurement progress" [}20].
ð When all tests are finished, the Summary tab
is displayed. See 3.3.6 "End of measurement
– Summary" [}22].
CAUTION
Loss of verification data
Clicking the Cancel button(4) aborts the whole test and looses all previous settings. The
verification process then needs to be started from the beginning.
► Only click Cancel if you are sure to discard all results.
3 Head verification principles
3.3 Head verification software
20 Software Manual SIPLACE Head Verification 03/2018
3.3.4 Measurement progress
After starting the head verification process, the software runs all measurements consecutively. The
process is only interrupted whenever a user interaction is required or if an error occurs.
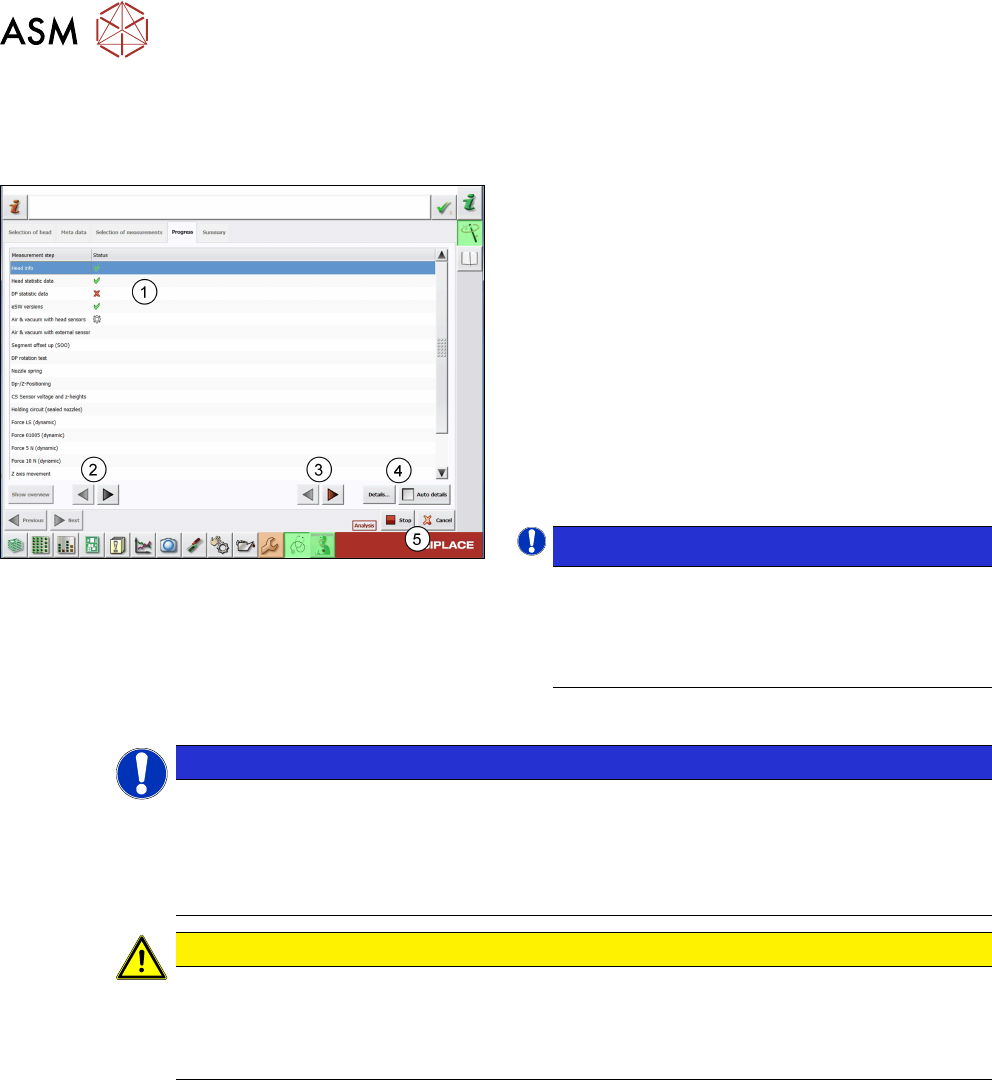
Fig.21: Measurement progress
The Status column(1) shows the verification status:
●
Gear = measurement in progress.
●
Green tick = measurement successful
●
Red cross = measurement failed
► Click the arrow buttons(2) to navigate through in-
dividual measurements.
► Click the red arrow buttons(3) to navigate
through the failed measurements. The buttons
are deactivated if no error occurred.
► For more information, double-click a measuring
step(1), or select a step and click the Details…
button(4).
NOTICE!
If the arrow keys are to be used, it is recommen-
ded to switch off the Auto detailsfunction. Oth-
erwise, the detailed information screen opens for
the currently running test whenever new data is
available.
.
► Stop / Cancel buttons(5)
NOTICE
Stop aborts the current measurement
Clicking the Stop button interrupts the current measurement and unlocks the door. You can
only restart the measurement from the beginning, not from the point where it was interrup-
ted.
► To restart the measurement, close the door and click Continue.
CAUTION
Cancel aborts the whole verification
Clicking the Cancel button aborts the whole test and looses all previous settings. The veri-
fication process then needs to be started from the beginning.
► Only click Cancel if you are sure to discard all results.