Printer 710_810 v8 High Throughput Conveyor Module.pdf - 第31页
HIGH THROUG HPUT CONVE YOR (HTC ) MODULE REPLACEMENT PROCEDURES Chapter Issue 3 Oct 06 Technical Reference Manual 17.31 REPLACEMENT PROCEDURES Board Clamp Repl acement WARNING BOARD CLAMPS. EXTREME CAR E MUST BE EXERCISE…
HIGH THROUGHPUT CONVEYOR (HTC) MODULE
ADJUSTMENTS AND SETTINGS
17.30 Technical Reference Manual Chapter Issue 3 Oct 06
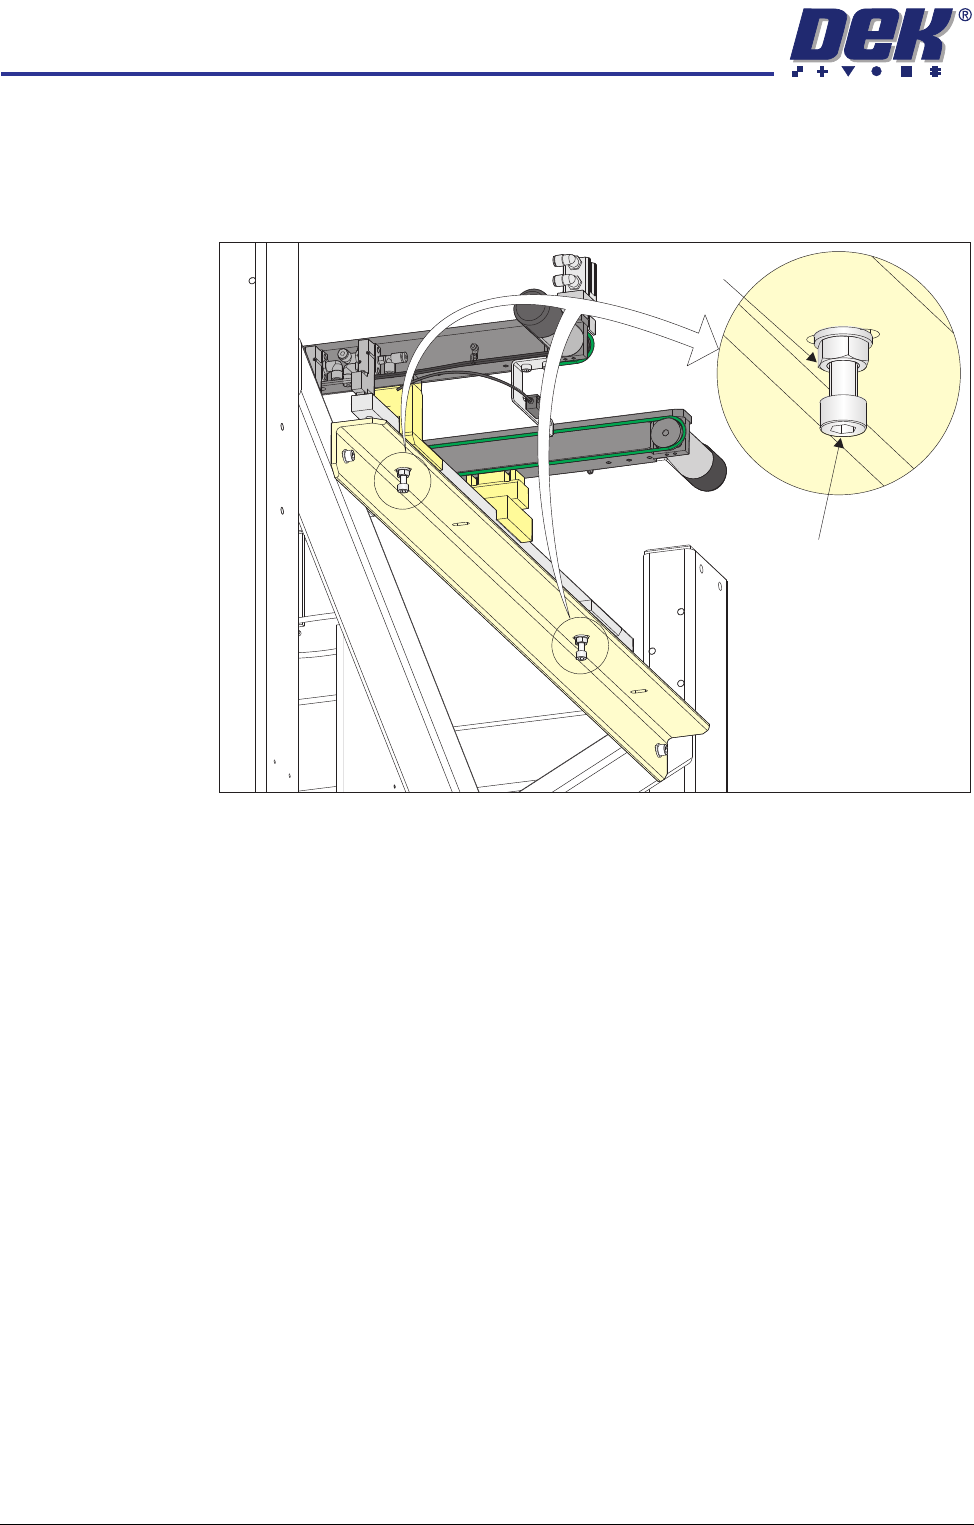
5. Using a spirit level, place across both setting plates and check the plates
are level.
6. If adjustment is required, loosen the two locking nuts on the auxiliary
conveyor height adjustment bolts.
7. To alter the height of the conveyor carefully adjust both height adjustment
bolts.
8. Carefully adjust the height of the conveyor rails until they match the print
station rails.
9. Re-tighten the locking nuts loosened in Step 6 and repeat the check.
10. If adjustment has occurred, carry out Auxiliary Conveyor Levelling check.
Auxiliary Conveyor
Height Adjustment
Bolt
Locking Nut
HIGH THROUGHPUT CONVEYOR (HTC) MODULE
REPLACEMENT PROCEDURES
Chapter Issue 3 Oct 06 Technical Reference Manual 17.31
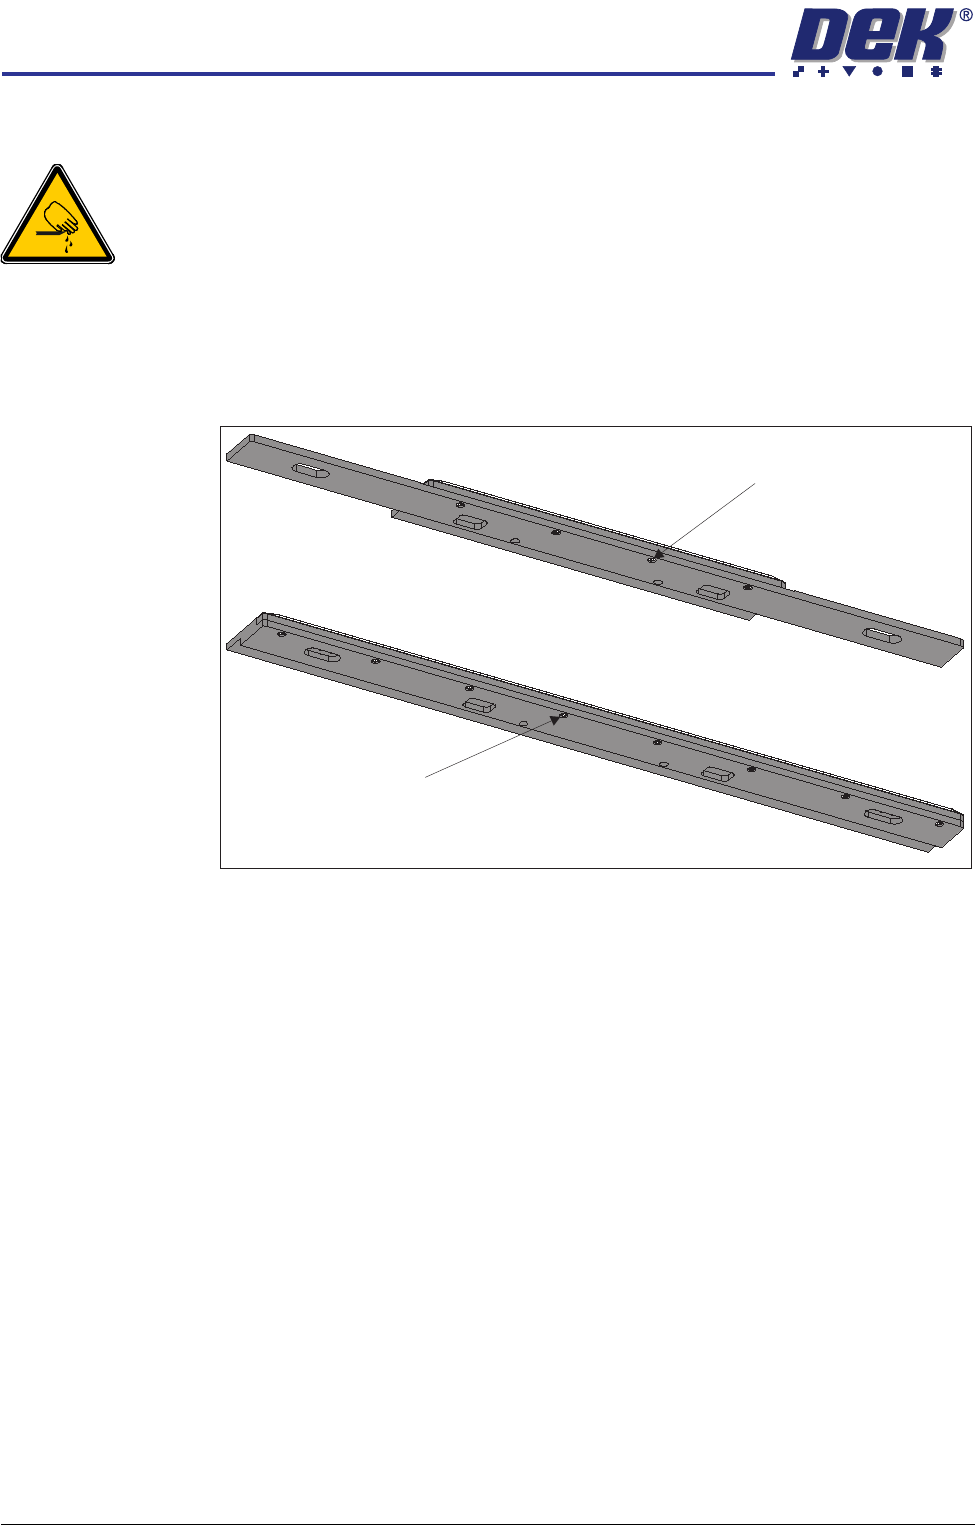
REPLACEMENT PROCEDURES
Board Clamp Replacement
WARNING
BOARD CLAMPS. EXTREME CARE MUST BE EXERCISED WHEN WORKING IN
THE TOOLING AREA OF THE MACHINE TO AVOID INJURY. THE FOILS ON THE
FRONT AND REAR BOARD CLAMPS ARE VERY SHARP.
1. Remove the board clamp securing screws and remove the board clamp.
Retain the screws.
2. Place the new board clamp in position on the location plates.
3. Secure the board clamp in position with the screws removed in Step 1.
NOTE
The Board Clamp Setting procedure is not required after board clamp
replacement.
500mm Board Clamp Mechanism
Board Clamp Securing Screws
250mm Board Clamp Mechanism
Board Clamp Securing Screws
HIGH THROUGHPUT CONVEYOR (HTC) MODULE
REPLACEMENT PROCEDURES
17.32 Technical Reference Manual Chapter Issue 3 Oct 06
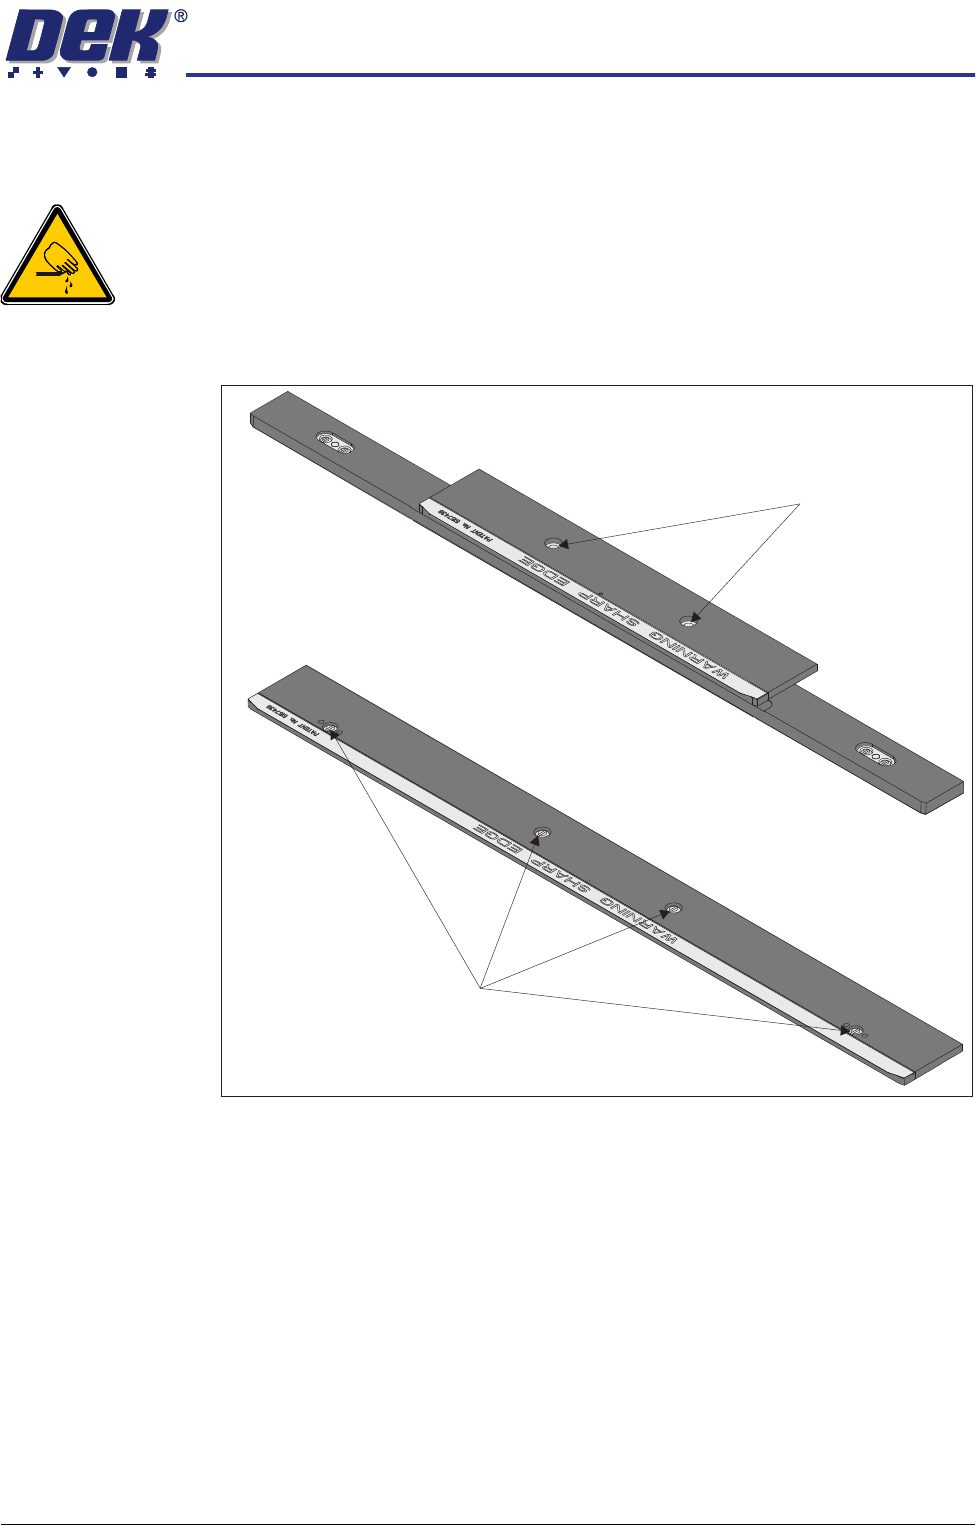
Board Clamp Foil Replacement
WARNING
BOARD CLAMPS. EXTREME CARE MUST BE EXERCISED WHEN WORKING IN
THE TOOLING AREA OF THE MACHINE TO AVOID INJURY. THE FOILS ON THE
FRONT AND REAR BOARD CLAMPS ARE VERY SHARP.
If the board clamp is fitted to the machine, use the Board Clamp Replacement
procedure to remove and refit the board clamps.
1. Remove the M2.5 x 6mm pan headed slotted screws securing the foil to the
board clamp. Discard the foil and retain the screws.
2. Fit the new foil with the screws removed in Step 1.
Board Clamp Foil Securing Screw (in 4 positions)
Board Clamp Foil Securing Screw (in 8 positions)
View on Underside of
250mm Board Clamp Mechanism
View on Underside of
500mm Board Clamp Mechanism