1_H24维修手册.pdf - 第111页
E d i ti o n 5 .0 H 24 H ea d R e p a i r T r a i n i n g T e x t fo r S e r v i c e E n g i n e e r s R e p l a c i n g th e b a tte r y a n d r e s e tti n g th e s e r v o m o to r o r i g i n s 6. D ou bl e - c l i c…
Edition 5.0 H24 Head Repair Training Text for Service Engineers
Replacing the battery and resetting the servo motor origins
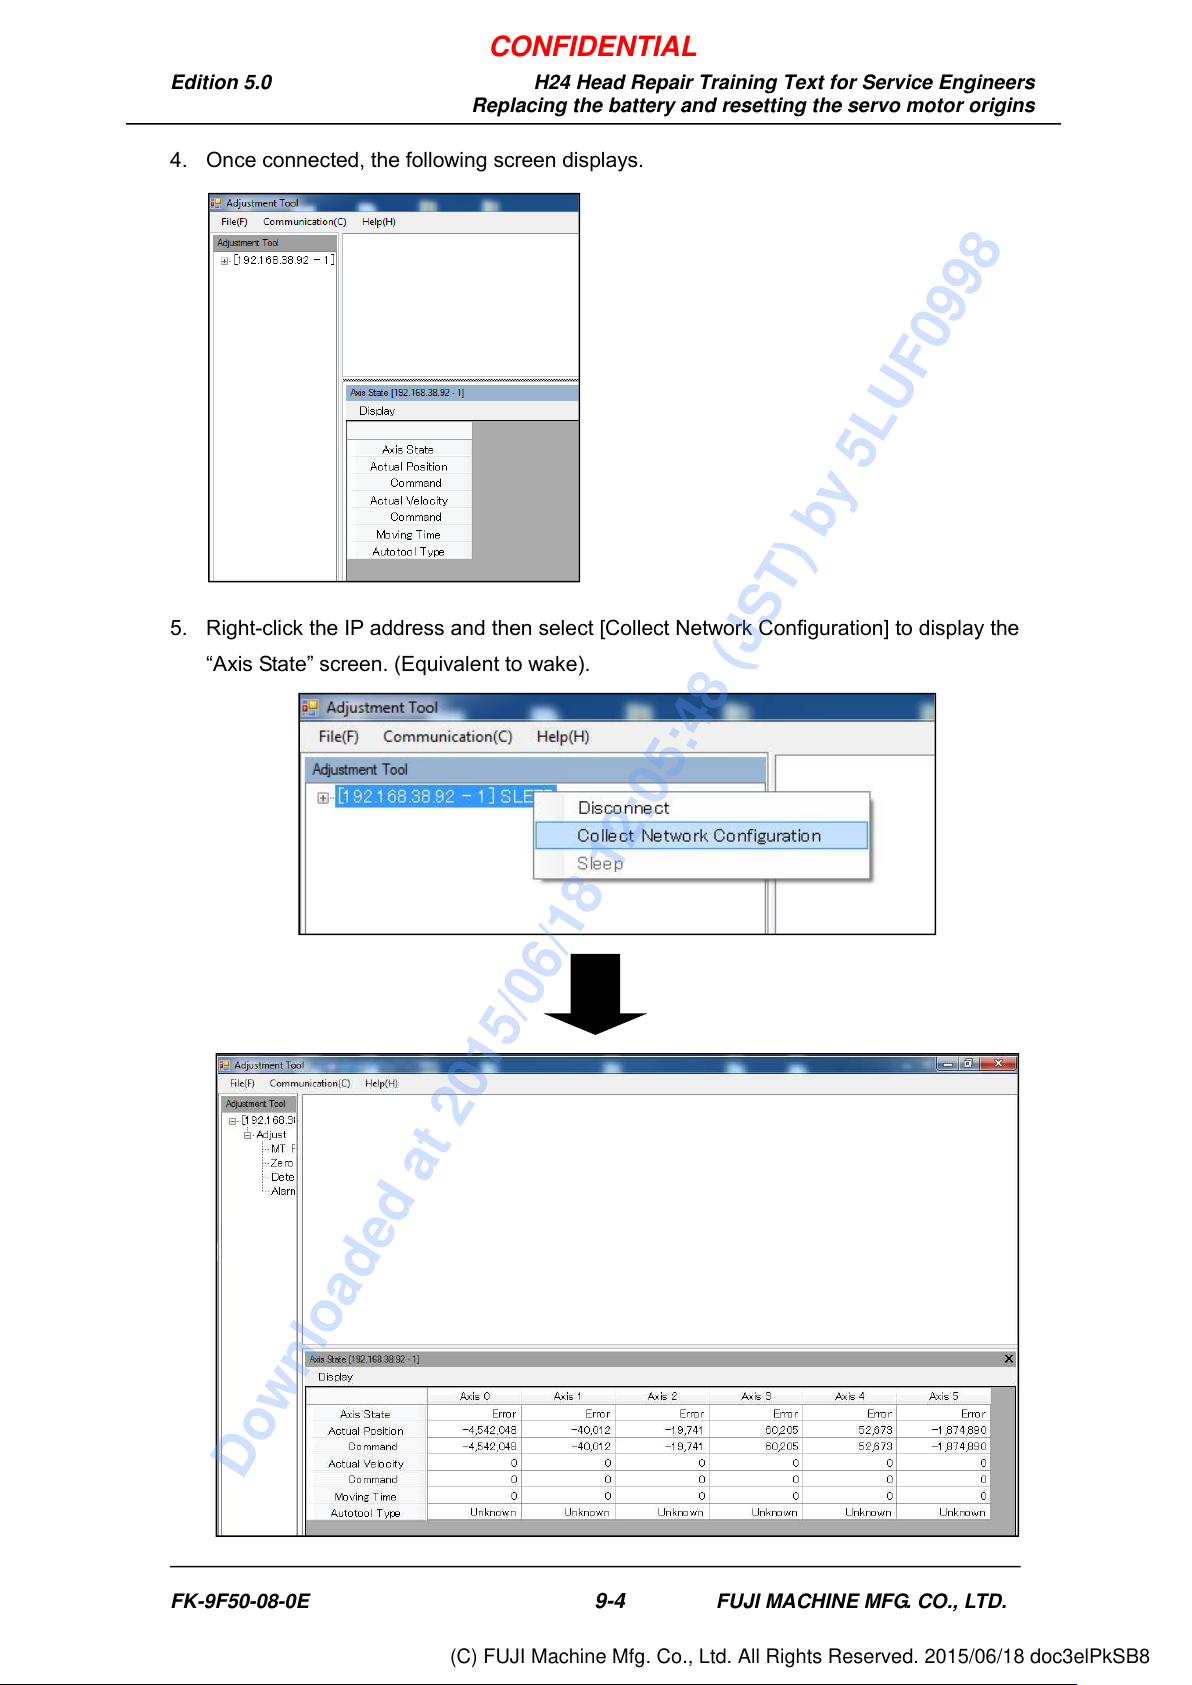
4. Once connected, the following screen displays.
5. Right-click the IP address and then select [Collect Network Configuration] to display the
“Axis State” screen. (Equivalent to wake).
FK-9F50-08-0E
9-4
FUJI MACHINE MFG. CO., LTD.
CONFIDENTIAL
Downloaded at 2015/06/18 12:05:48 (JST) by 5LUF0998
(C) FUJI Machine Mfg. Co., Ltd. All Rights Reserved. 2015/06/18 doc3elPkSB8
Edition 5.0 H24 Head Repair Training Text for Service Engineers
Replacing the battery and resetting the servo motor origins
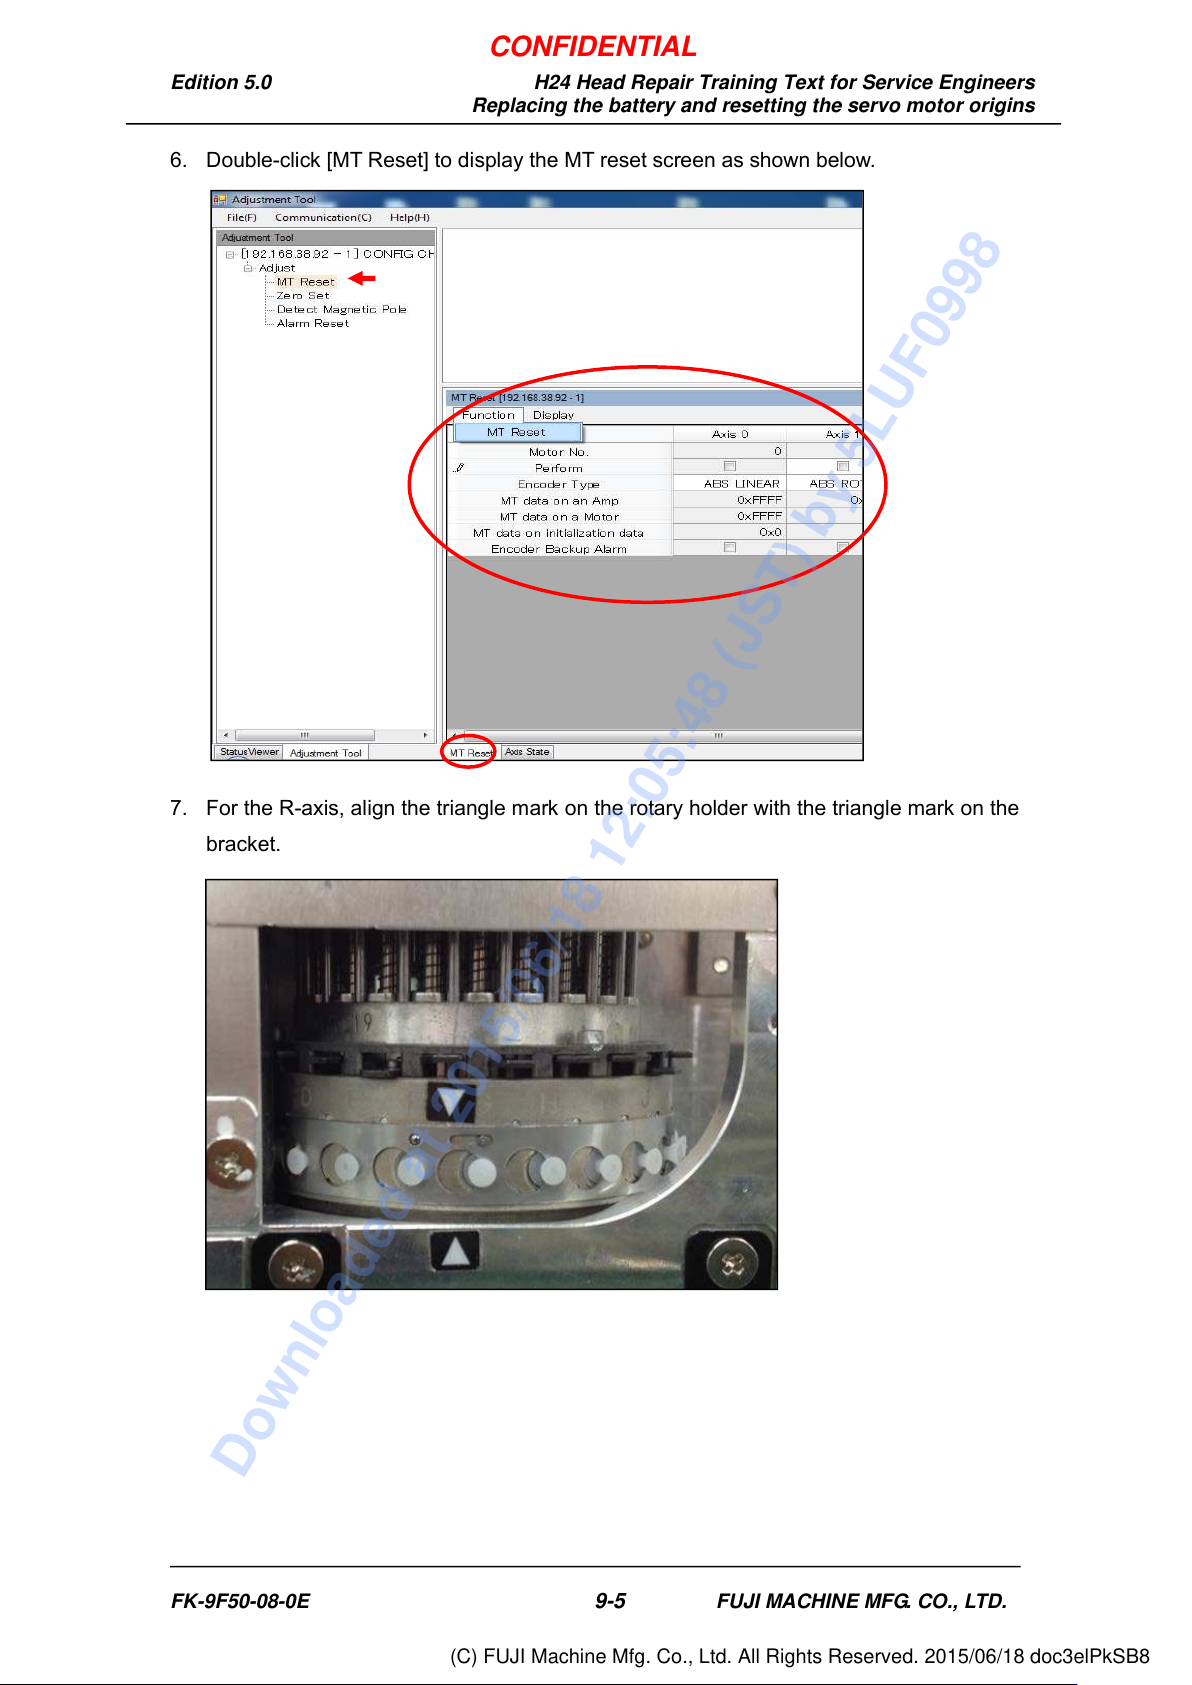
6. Double-click [MT Reset] to display the MT reset screen as shown below.
7. For the R-axis, align the triangle mark on the rotary holder with the triangle mark on the
bracket.
FK-9F50-08-0E
9-5
FUJI MACHINE MFG. CO., LTD.
CONFIDENTIAL
Downloaded at 2015/06/18 12:05:48 (JST) by 5LUF0998
(C) FUJI Machine Mfg. Co., Ltd. All Rights Reserved. 2015/06/18 doc3elPkSB8
Edition 5.0 H24 Head Repair Training Text for Service Engineers
Replacing the battery and resetting the servo motor origins
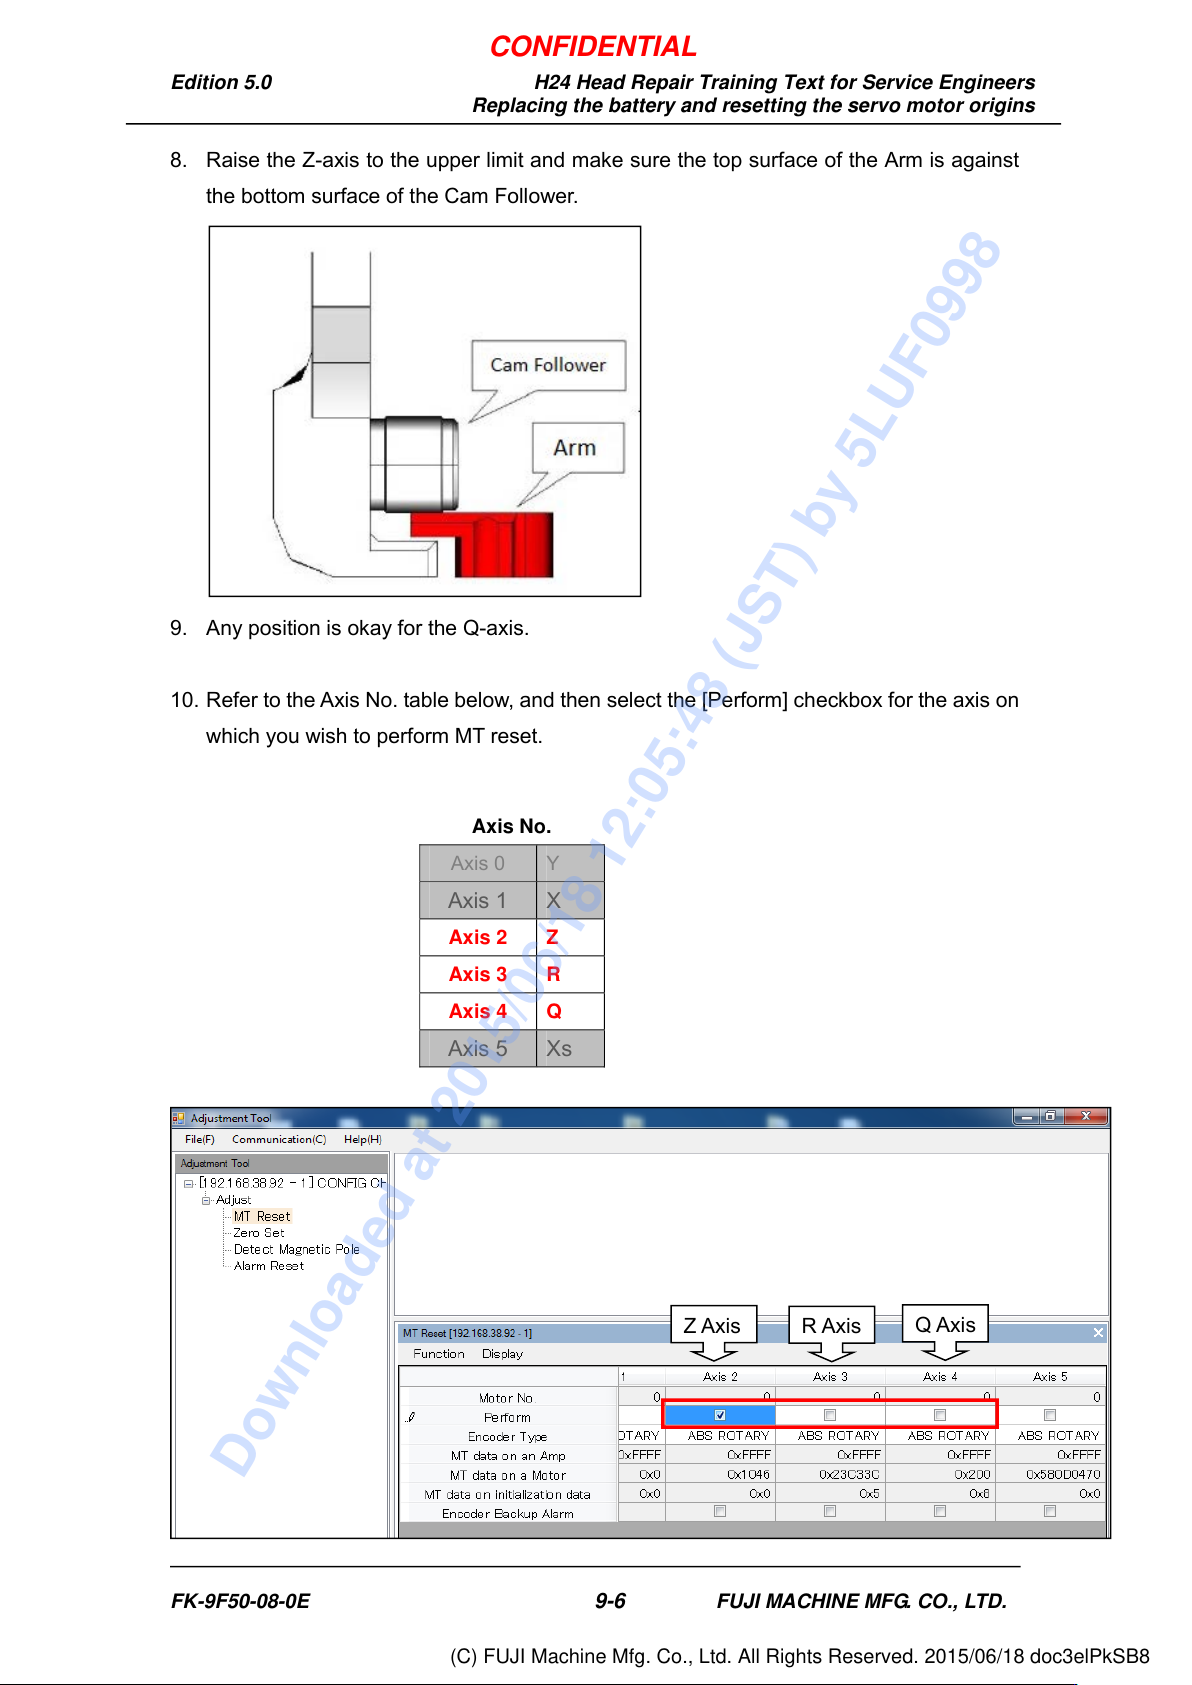
8. Raise the Z-axis to the upper limit and make sure the top surface of the Arm is against
the bottom surface of the Cam Follower.
9. Any position is okay for the Q-axis.
10. Refer to the Axis No. table below, and then select the [Perform] checkbox for the axis on
which you wish to perform MT reset.
Axis No.
Axis 0 Y
Axis 1 X
Axis 2 Z
Axis 3 R
Axis 4 Q
Axis 5 Xs
Z Axis
R Axis
Q Axis
FK-9F50-08-0E
9-6
FUJI MACHINE MFG. CO., LTD.
CONFIDENTIAL
Downloaded at 2015/06/18 12:05:48 (JST) by 5LUF0998
(C) FUJI Machine Mfg. Co., Ltd. All Rights Reserved. 2015/06/18 doc3elPkSB8