1_H24维修手册.pdf - 第156页
Edition 5.0 H24 Head Re pair T raining T ext for Ser v ice Enginee rs Camer a posi t ion adjus t ment, curr ent value (gr ays cale value ) a djustmen t a nd area ch ec k FK -9F50- 08-0E 1 1 -16 FU JI MACHINE MFG . CO., L…
Edition 5.0 H24 Head Repair Training Text for Service Engineers
Camera position adjustment, current value (grayscale value) adjustment and area check
FK-9F50-08-0E 11-15 FUJI MACHINE MFG. CO., LTD.
【
adjust the R CURRENT and L CURRENT separately (IPS version 1.21 or later)
】
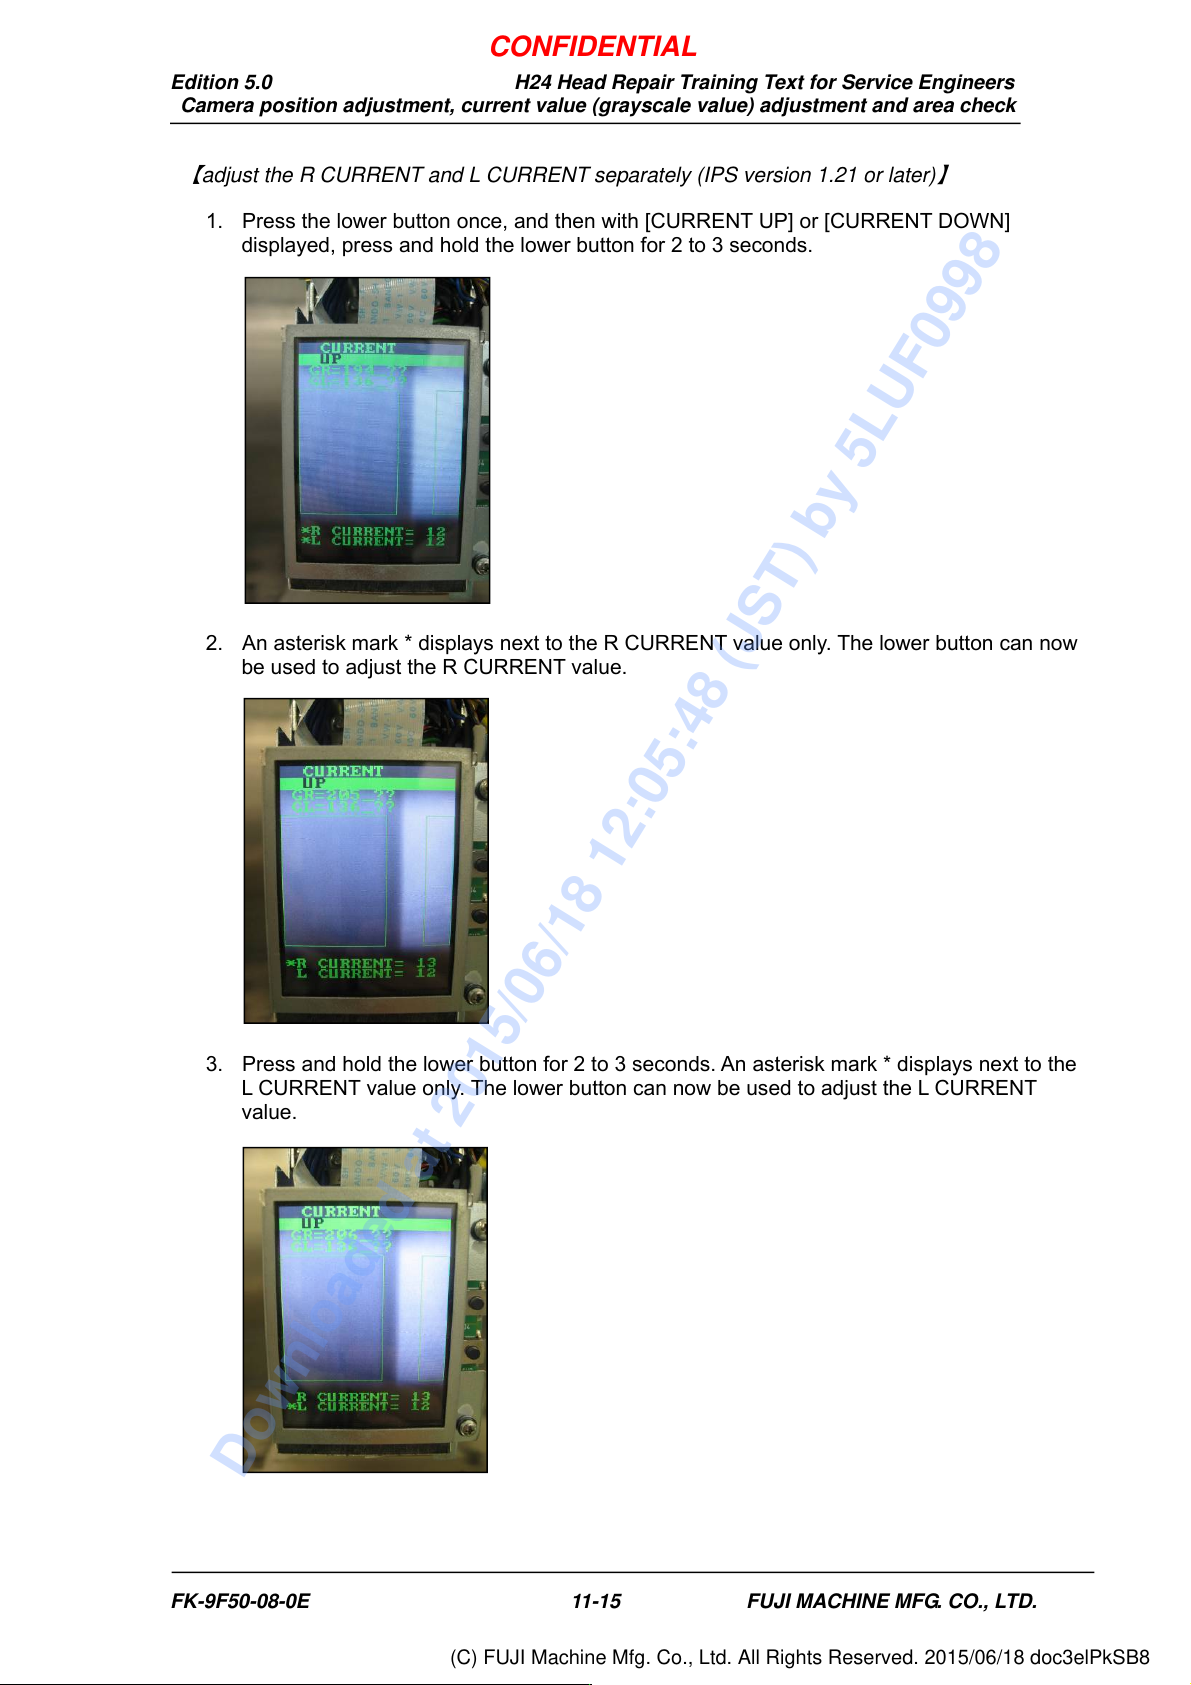
1. Press the lower button once, and then with [CURRENT UP] or [CURRENT DOWN]
displayed, press and hold the lower button for 2 to 3 seconds.
2. An asterisk mark * displays next to the R CURRENT value only. The lower button can now
be used to adjust the R CURRENT value.
3. Press and hold the lower button for 2 to 3 seconds. An asterisk mark * displays next to the
L CURRENT value only. The lower button can now be used to adjust the L CURRENT
value.
CONFIDENTIAL
Downloaded at 2015/06/18 12:05:48 (JST) by 5LUF0998
(C) FUJI Machine Mfg. Co., Ltd. All Rights Reserved. 2015/06/18 doc3elPkSB8
Edition 5.0 H24 Head Repair Training Text for Service Engineers
Camera position adjustment, current value (grayscale value) adjustment and area check
FK-9F50-08-0E 11-16 FUJI MACHINE MFG. CO., LTD.
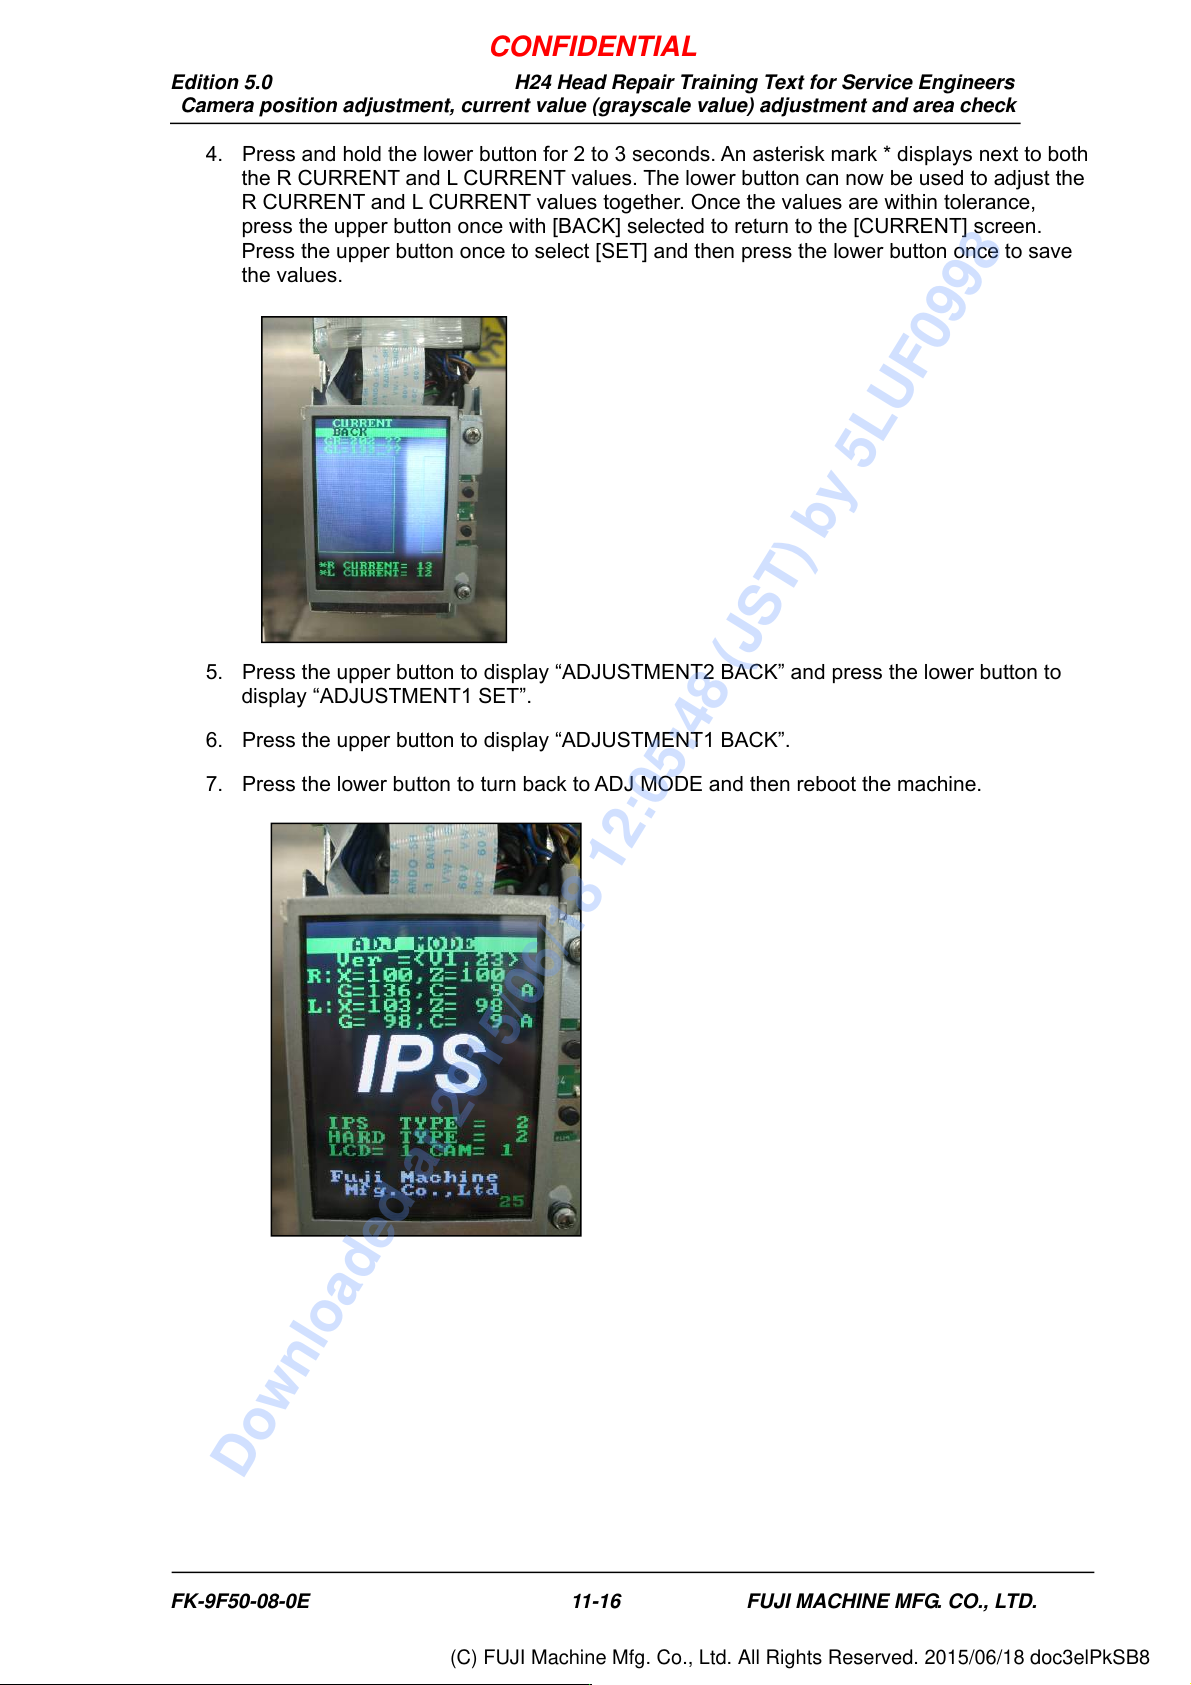
4. Press and hold the lower button for 2 to 3 seconds. An asterisk mark * displays next to both
the R CURRENT and L CURRENT values. The lower button can now be used to adjust the
R CURRENT and L CURRENT values together. Once the values are within tolerance,
press the upper button once with [BACK] selected to return to the [CURRENT] screen.
Press the upper button once to select [SET] and then press the lower button once to save
the values.
5. Press the upper button to display “ADJUSTMENT2 BACK” and press the lower button to
display “ADJUSTMENT1 SET”.
6. Press the upper button to display “ADJUSTMENT1 BACK”.
7. Press the lower button to turn back to ADJ MODE and then reboot the machine.
CONFIDENTIAL
Downloaded at 2015/06/18 12:05:48 (JST) by 5LUF0998
(C) FUJI Machine Mfg. Co., Ltd. All Rights Reserved. 2015/06/18 doc3elPkSB8
Edition 5.0 H24 Head Repair Training Text for Service Engineers
Camera position adjustment, current value (grayscale value) adjustment and area check
FK-9F50-08-0E 11-17 FUJI MACHINE MFG. CO., LTD.
11.7 Checking the Field of Vision
External light can influence the results, so be sure to perform the procedure in a shaded area.
1. Attach the jig nozzles (2AGKNJ001500) to syringe B and X.
2. While checking the R-axis servo count in MotionAjustmentTool, move the A holder to the front
of the head.
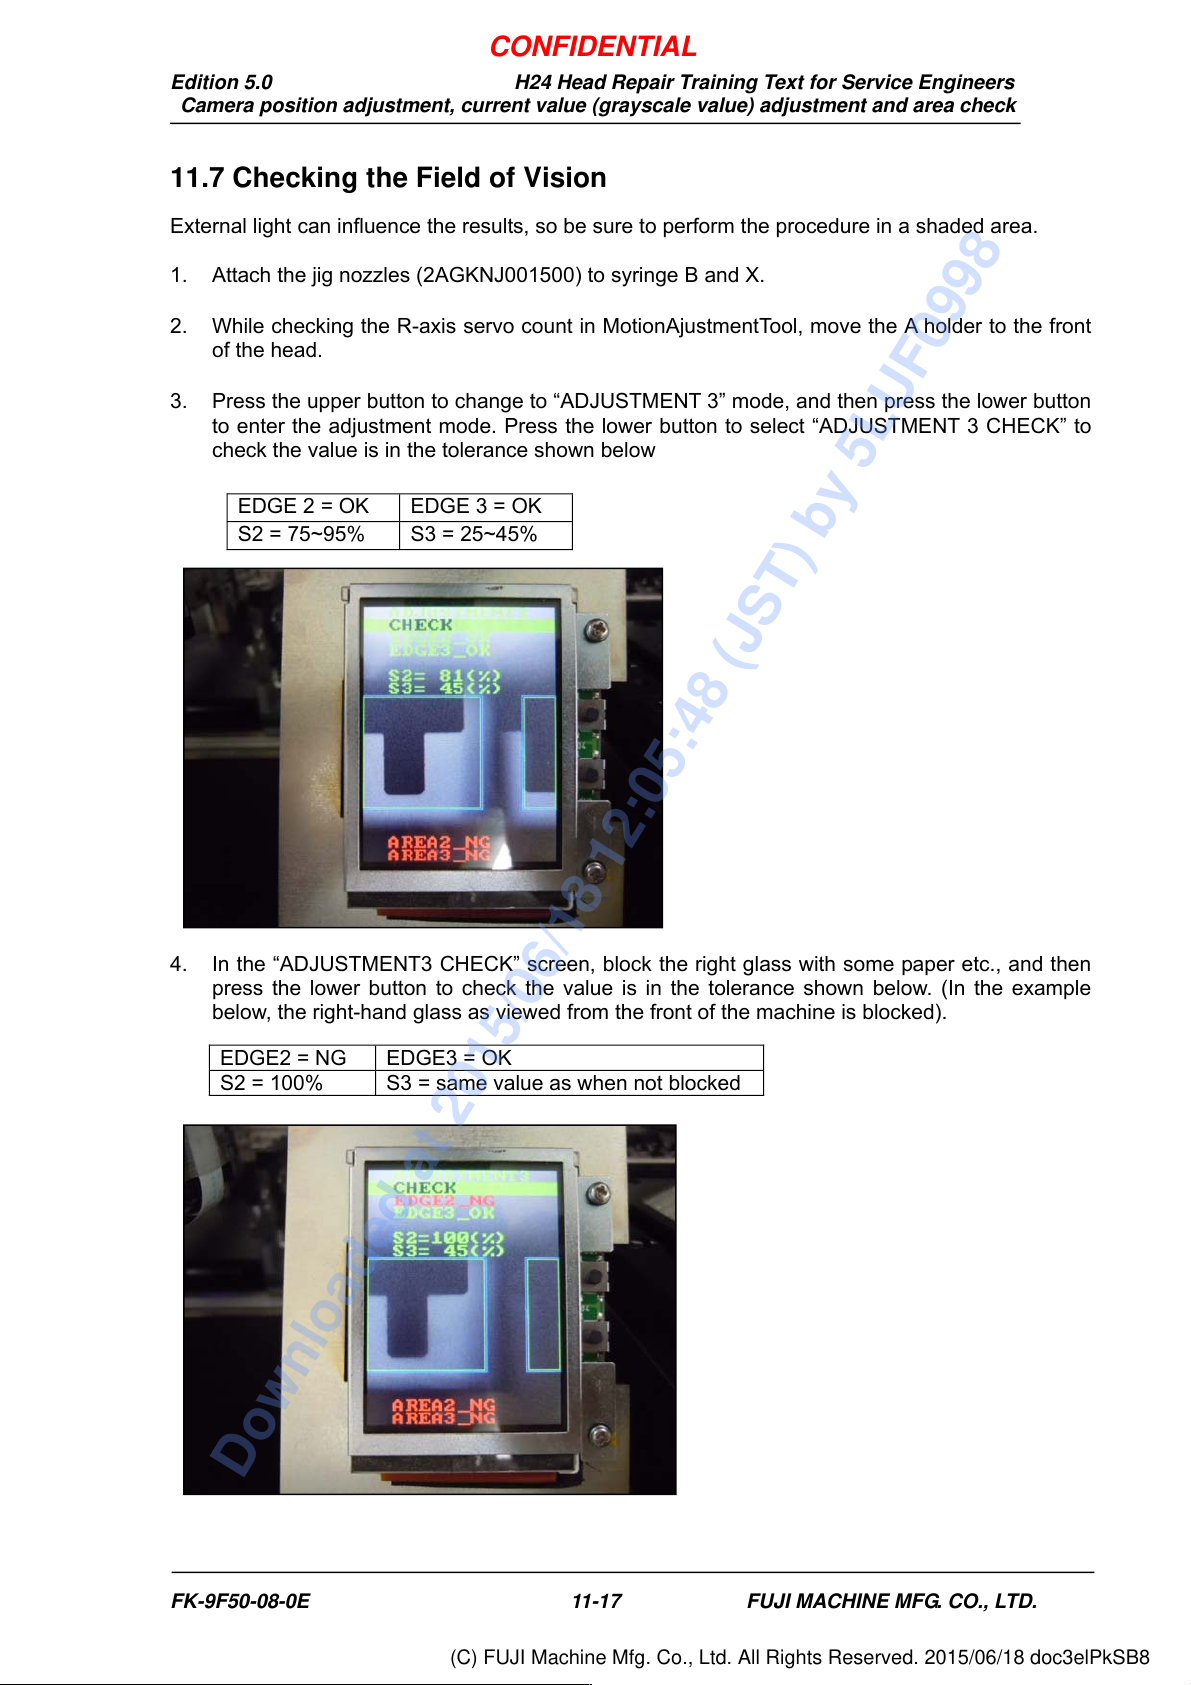
3. Press the upper button to change to “ADJUSTMENT 3” mode, and then press the lower button
to enter the adjustment mode. Press the lower button to select “ADJUSTMENT 3 CHECK” to
check the value is in the tolerance shown below
4. In the “ADJUSTMENT3 CHECK” screen, block the right glass with some paper etc., and then
press the lower button to check the value is in the tolerance shown below. (In the example
below, the right-hand glass as viewed from the front of the machine is blocked).
EDGE 2 = OK EDGE 3 = OK
S2 = 75~95% S3 = 25~45%
EDGE2 = NG EDGE3 = OK
S2 = 100% S3 = same value as when not blocked
CONFIDENTIAL
Downloaded at 2015/06/18 12:05:48 (JST) by 5LUF0998
(C) FUJI Machine Mfg. Co., Ltd. All Rights Reserved. 2015/06/18 doc3elPkSB8