1_H24维修手册.pdf - 第162页
Edition 5.0 H24 Head Re pair T raining T ext for Ser v ice Enginee rs Camer a posi t ion adjus t ment, curr ent value (gr ays cale value ) a djustmen t a nd area ch ec k FK -9F50- 08-0E 1 1 -22 FU JI MACHINE MFG . CO., L…
Edition 5.0 H24 Head Repair Training Text for Service Engineers
Camera position adjustment, current value (grayscale value) adjustment and area check
FK-9F50-08-0E 11-21 FUJI MACHINE MFG. CO., LTD.
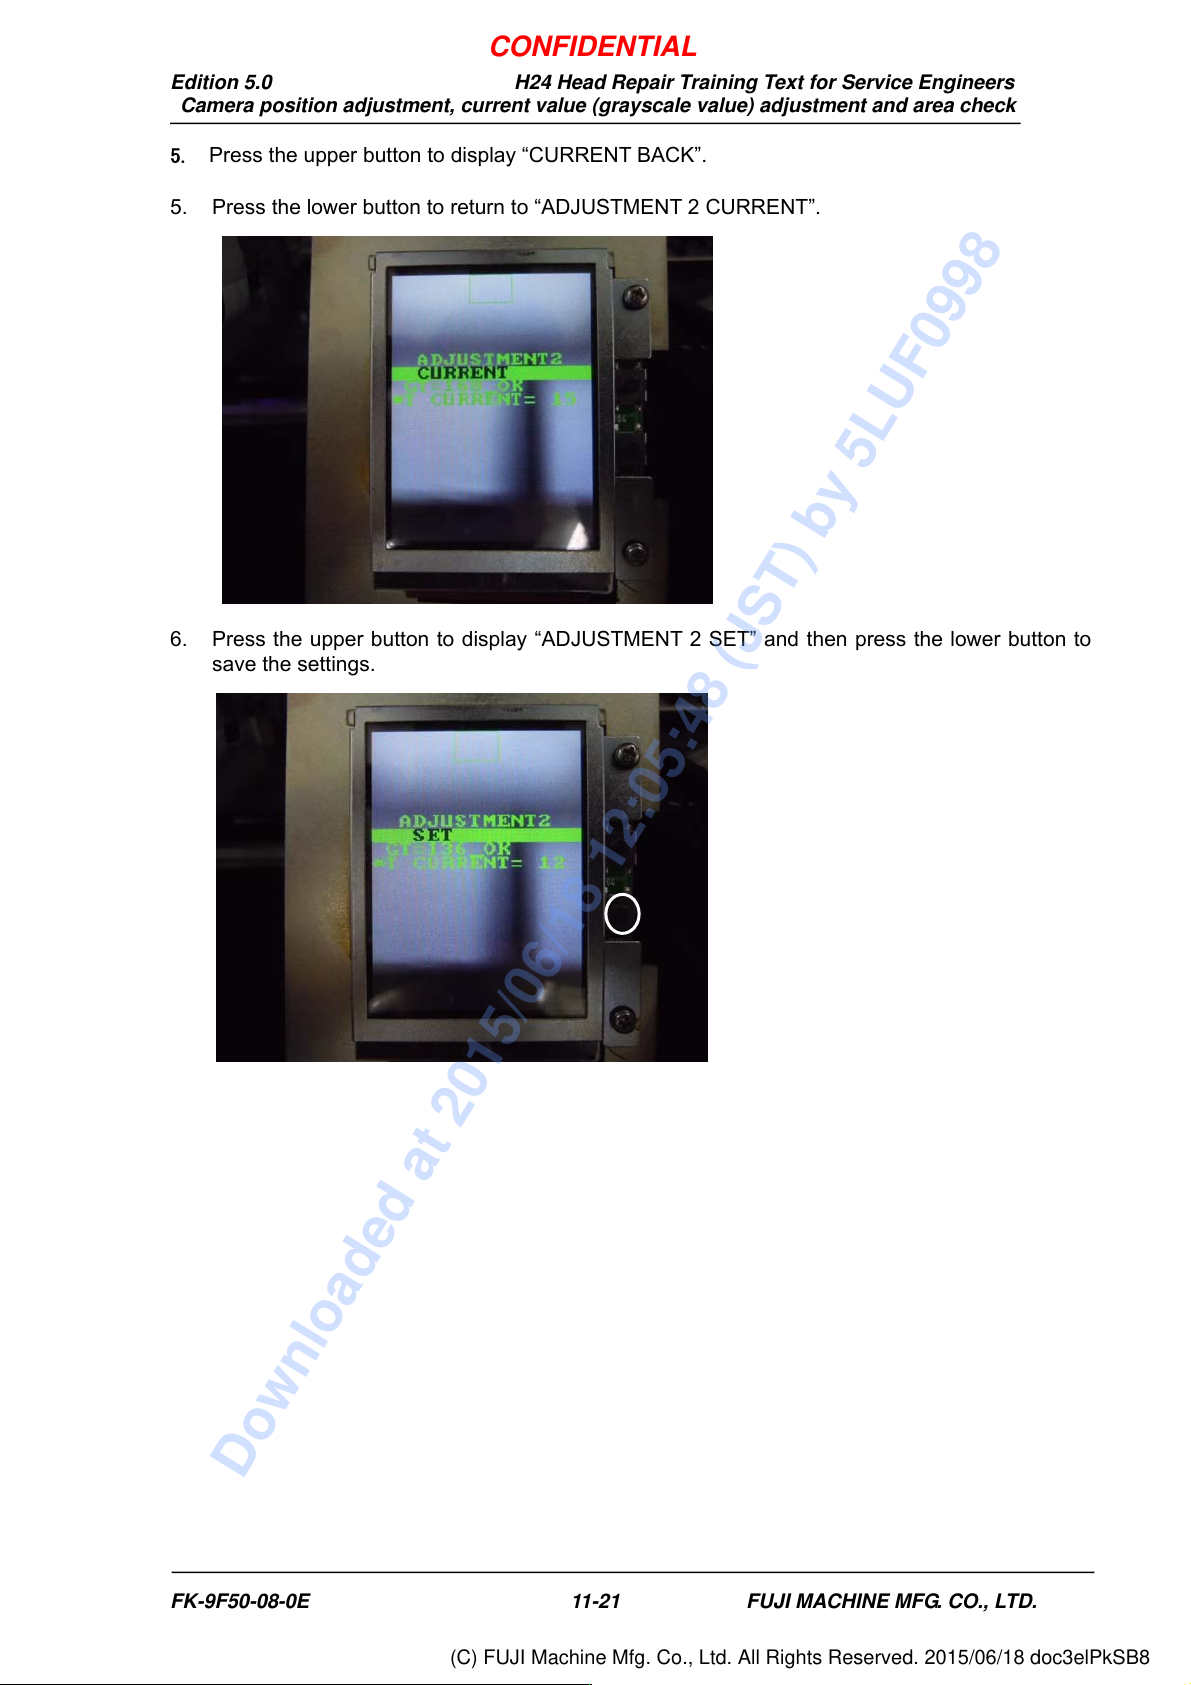
5. Press the upper button to display “CURRENT BACK”.
5. Press the lower button to return to “ADJUSTMENT 2 CURRENT”.
6. Press the upper button to display “ADJUSTMENT 2 SET” and then press the lower button to
save the settings.
CONFIDENTIAL
Downloaded at 2015/06/18 12:05:48 (JST) by 5LUF0998
(C) FUJI Machine Mfg. Co., Ltd. All Rights Reserved. 2015/06/18 doc3elPkSB8
Edition 5.0 H24 Head Repair Training Text for Service Engineers
Camera position adjustment, current value (grayscale value) adjustment and area check
FK-9F50-08-0E 11-22 FUJI MACHINE MFG. CO., LTD.
11.9. Checking the Nozzle Existence Field of Vision
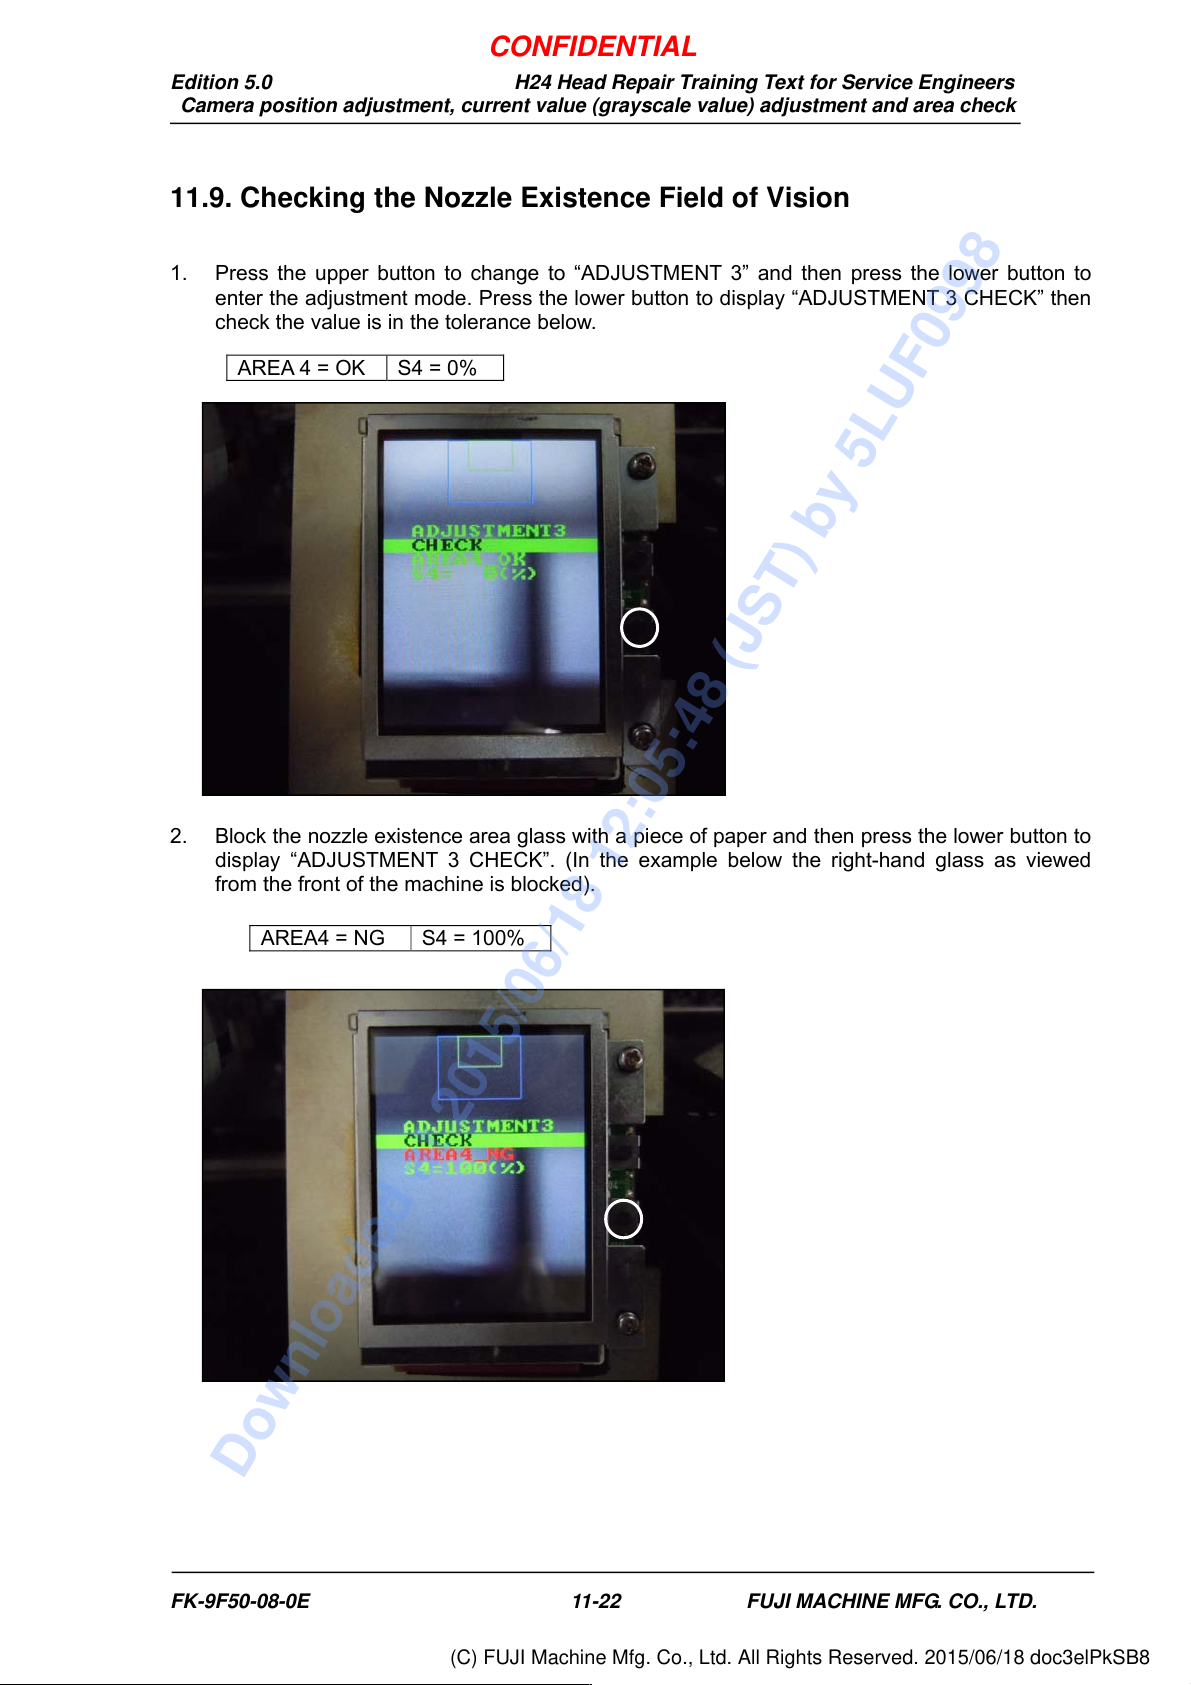
1. Press the upper button to change to “ADJUSTMENT 3” and then press the lower button to
enter the adjustment mode. Press the lower button to display “ADJUSTMENT 3 CHECK” then
check the value is in the tolerance below.
2. Block the nozzle existence area glass with a piece of paper and then press the lower button to
display “ADJUSTMENT 3 CHECK”. (In the example below the right-hand glass as viewed
from the front of the machine is blocked).
AREA 4 = OK S4 = 0%
AREA4 = NG S4 = 100%
CONFIDENTIAL
Downloaded at 2015/06/18 12:05:48 (JST) by 5LUF0998
(C) FUJI Machine Mfg. Co., Ltd. All Rights Reserved. 2015/06/18 doc3elPkSB8
Edition 5.0 H24 Head Repair Training Text for Service Engineers
Camera position adjustment, current value (grayscale value) adjustment and area check
FK-9F50-08-0E 11-23 FUJI MACHINE MFG. CO., LTD.
3. Press the upper button to display “ADJUSTMENT 3 BACK”.
4. Press the lower button to display “ADJUSTMENT 2 CURRENT”.
5. Press the upper button to display “ADJUSTMENT 2 SET”.
6. Press the upper button to display “ADJUSTMENT 2, ADJUSTMENT 3”.
7. Press the upper button to display “ADJUSTMENT 2, BACK”.
8. Press the lower button to display “ADJUSTMENT 1 SET”.
9. Press the upper button to display “ADJUSTMENT 1 ADJUSTMENT 2”.
10. Press the upper button to display “ADJUSTMENT 1 BACK”.
11. Press the lower button to display “ADJ MODE”.
12. The field of vision check is now complete.
13. Turn the machine OFF.
14. Remove the IPS monitor jig.
CONFIDENTIAL
Downloaded at 2015/06/18 12:05:48 (JST) by 5LUF0998
(C) FUJI Machine Mfg. Co., Ltd. All Rights Reserved. 2015/06/18 doc3elPkSB8