1_H24维修手册.pdf - 第171页
E d i ti o n 5 .0 H 24 H ead R ep ai r T r ai n i n g T ext f o r S er vi ce E n g i n ee r s Pr o p e r d at a m e a s u r e m e n t fo r H 2 4 h e a d u s i n g h e a d b e n c h 1 . 1 R - a x i s P r ope r D a t a M e…
Edition 5.0 H24 Head Repair Training Text for Service Engineers
Proper data measurement for H24 head using head bench
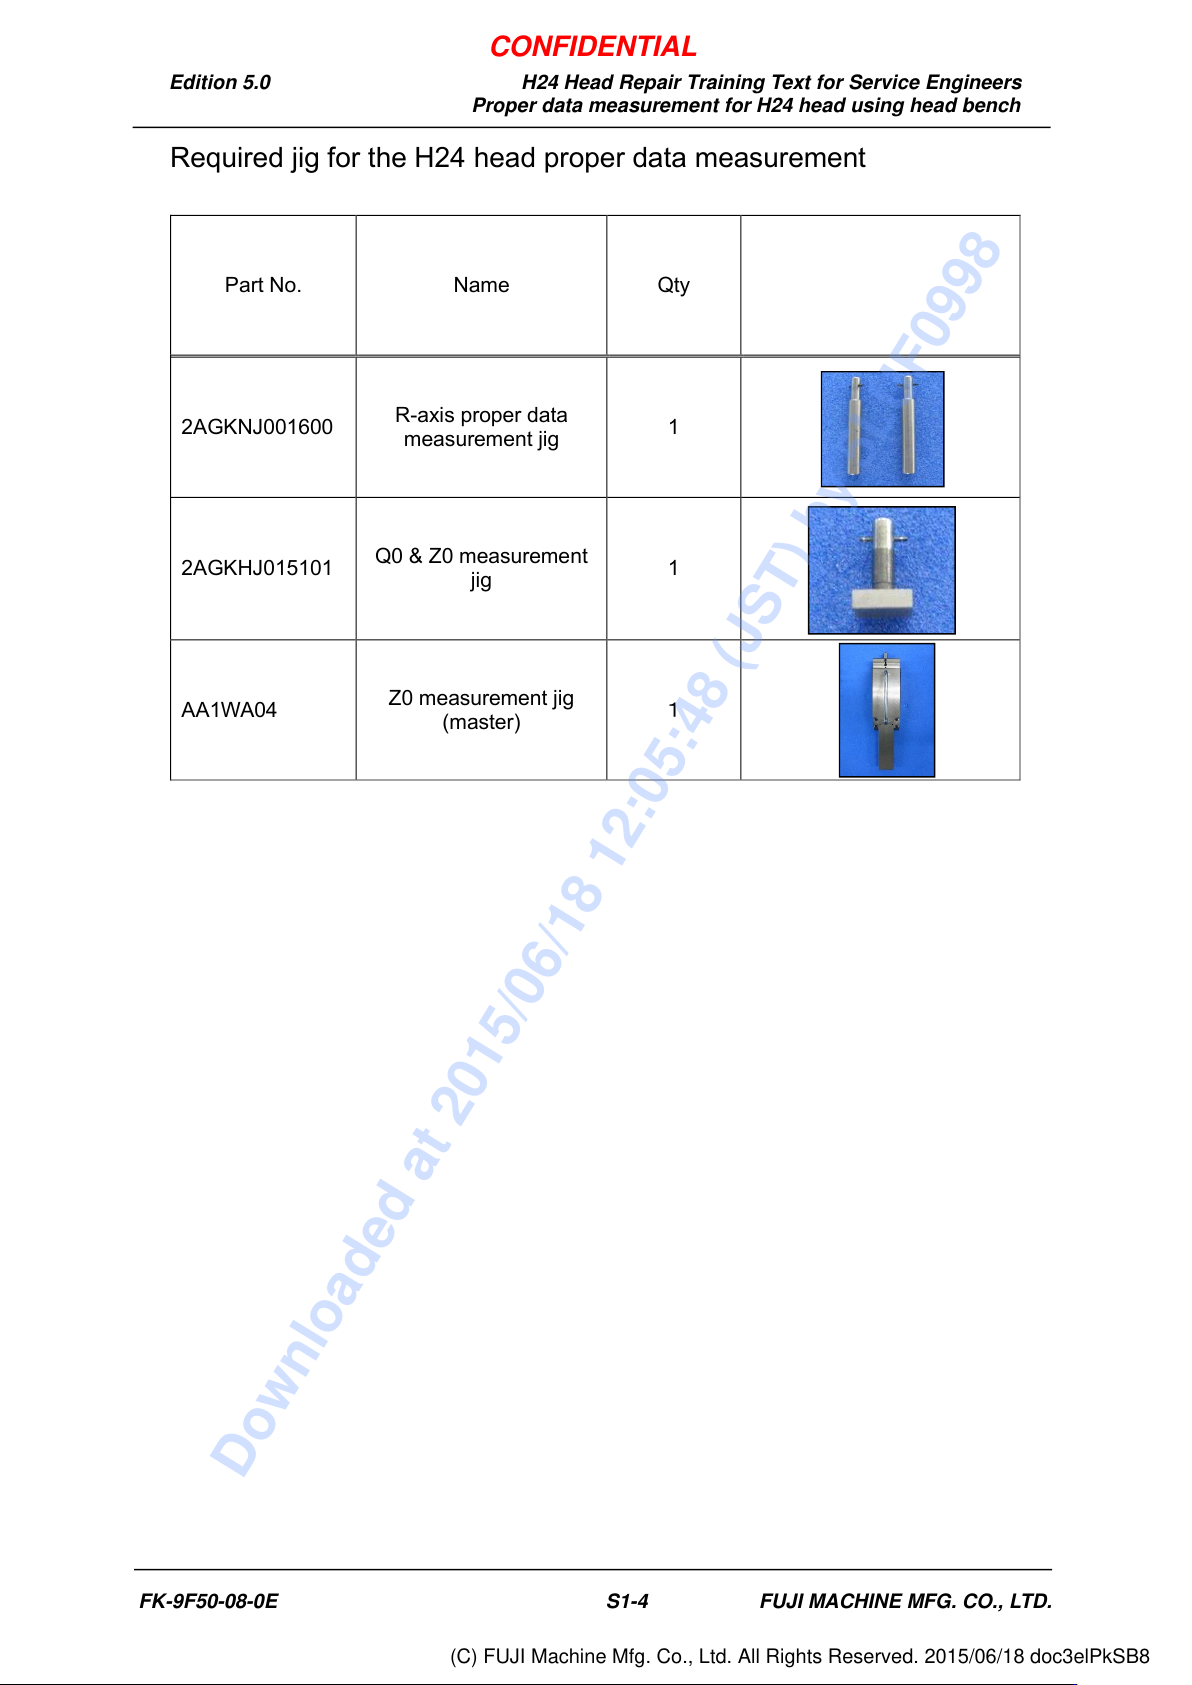
Required jig for the H24 head proper data measurement
Part No. Name Qty
2AGKNJ001600
R-axis proper data
measurement jig
1
2AGKHJ015101
Q0 & Z0 measurement
jig
1
AA1WA04
Z0 measurement jig
(master)
1
FK-9F50-08-0E S1-4 FUJI MACHINE MFG. CO., LTD.
CONFIDENTIAL
Downloaded at 2015/06/18 12:05:48 (JST) by 5LUF0998
(C) FUJI Machine Mfg. Co., Ltd. All Rights Reserved. 2015/06/18 doc3elPkSB8
Edition 5.0 H24 Head Repair Training Text for Service Engineers
Proper data measurement for H24 head using head bench
1.1
R-axis Proper Data Measurement
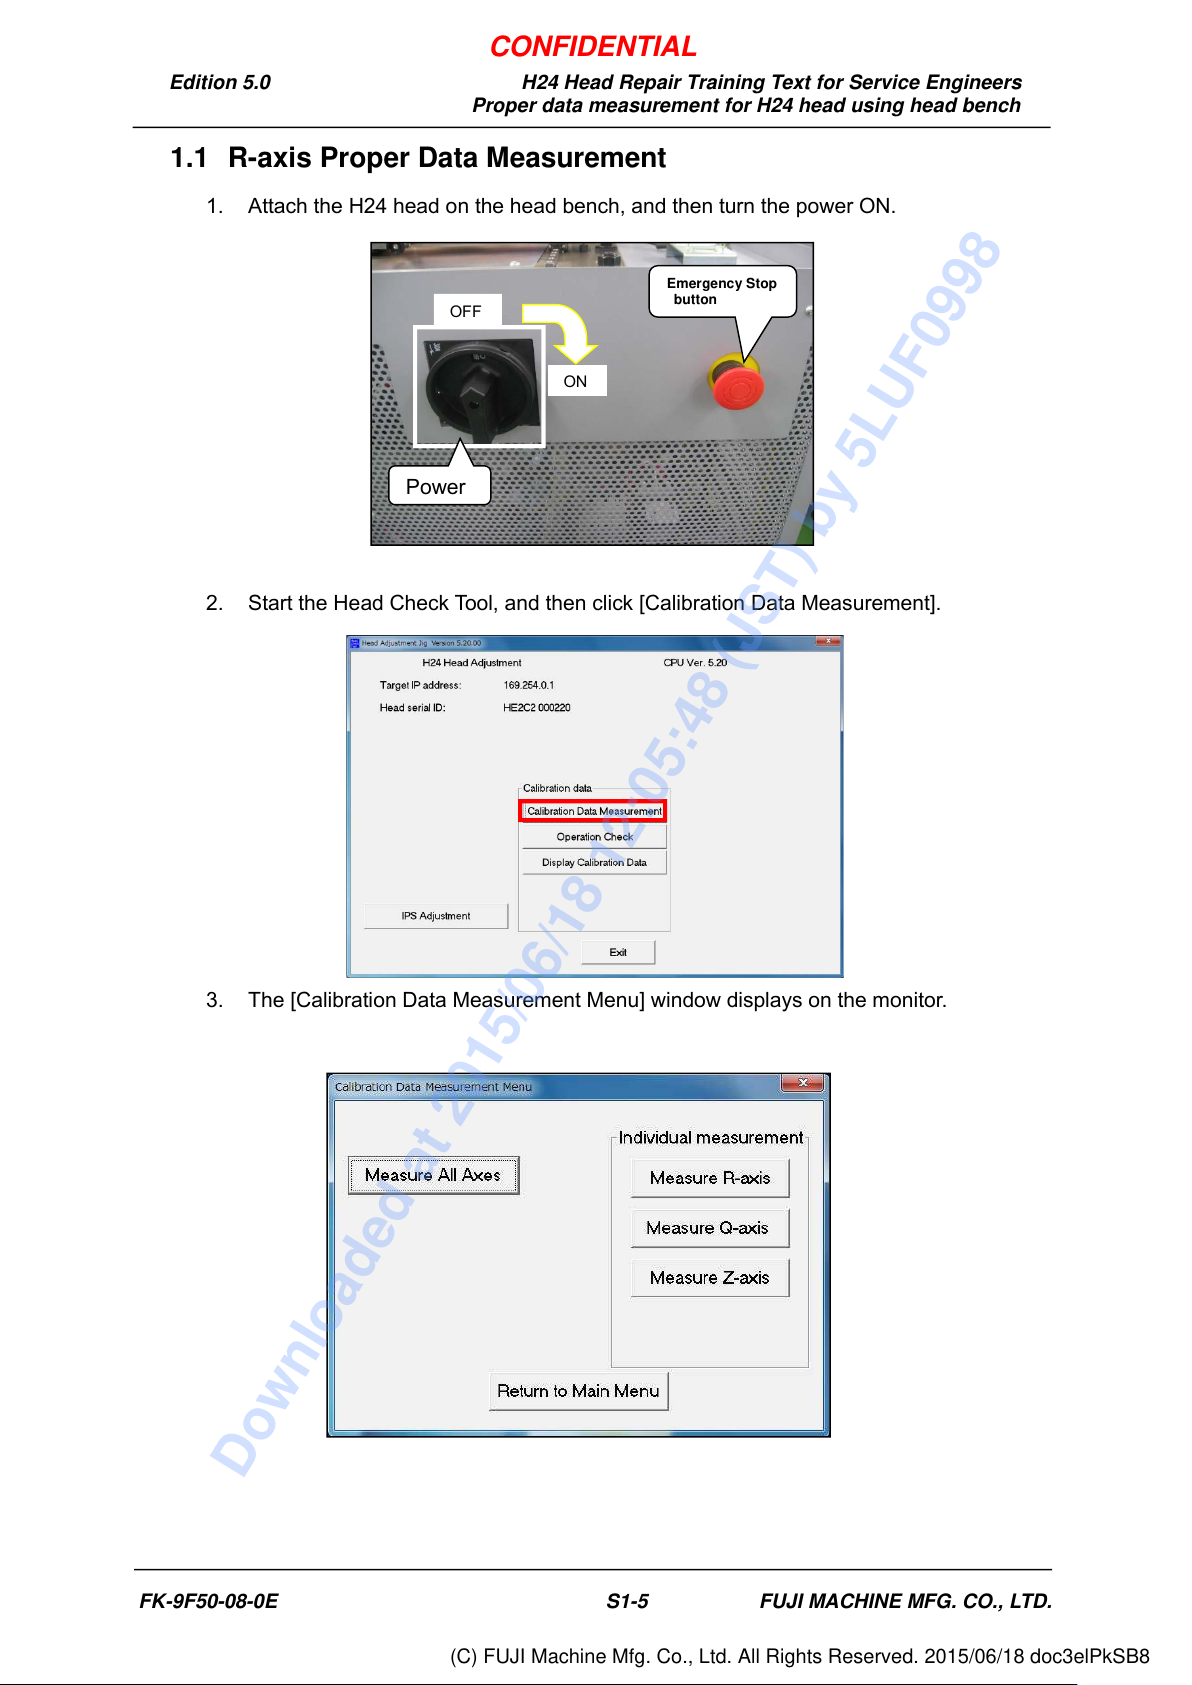
1. Attach the H24 head on the head bench, and then turn the power ON.
2. Start the Head Check Tool, and then click [Calibration Data Measurement].
3. The [Calibration Data Measurement Menu] window displays on the monitor.
OFF
Emergency Stop
button
ON
Power
FK-9F50-08-0E S1-5 FUJI MACHINE MFG. CO., LTD.
CONFIDENTIAL
Downloaded at 2015/06/18 12:05:48 (JST) by 5LUF0998
(C) FUJI Machine Mfg. Co., Ltd. All Rights Reserved. 2015/06/18 doc3elPkSB8
Edition 5.0 H24 Head Repair Training Text for Service Engineers
Proper data measurement for H24 head using head bench
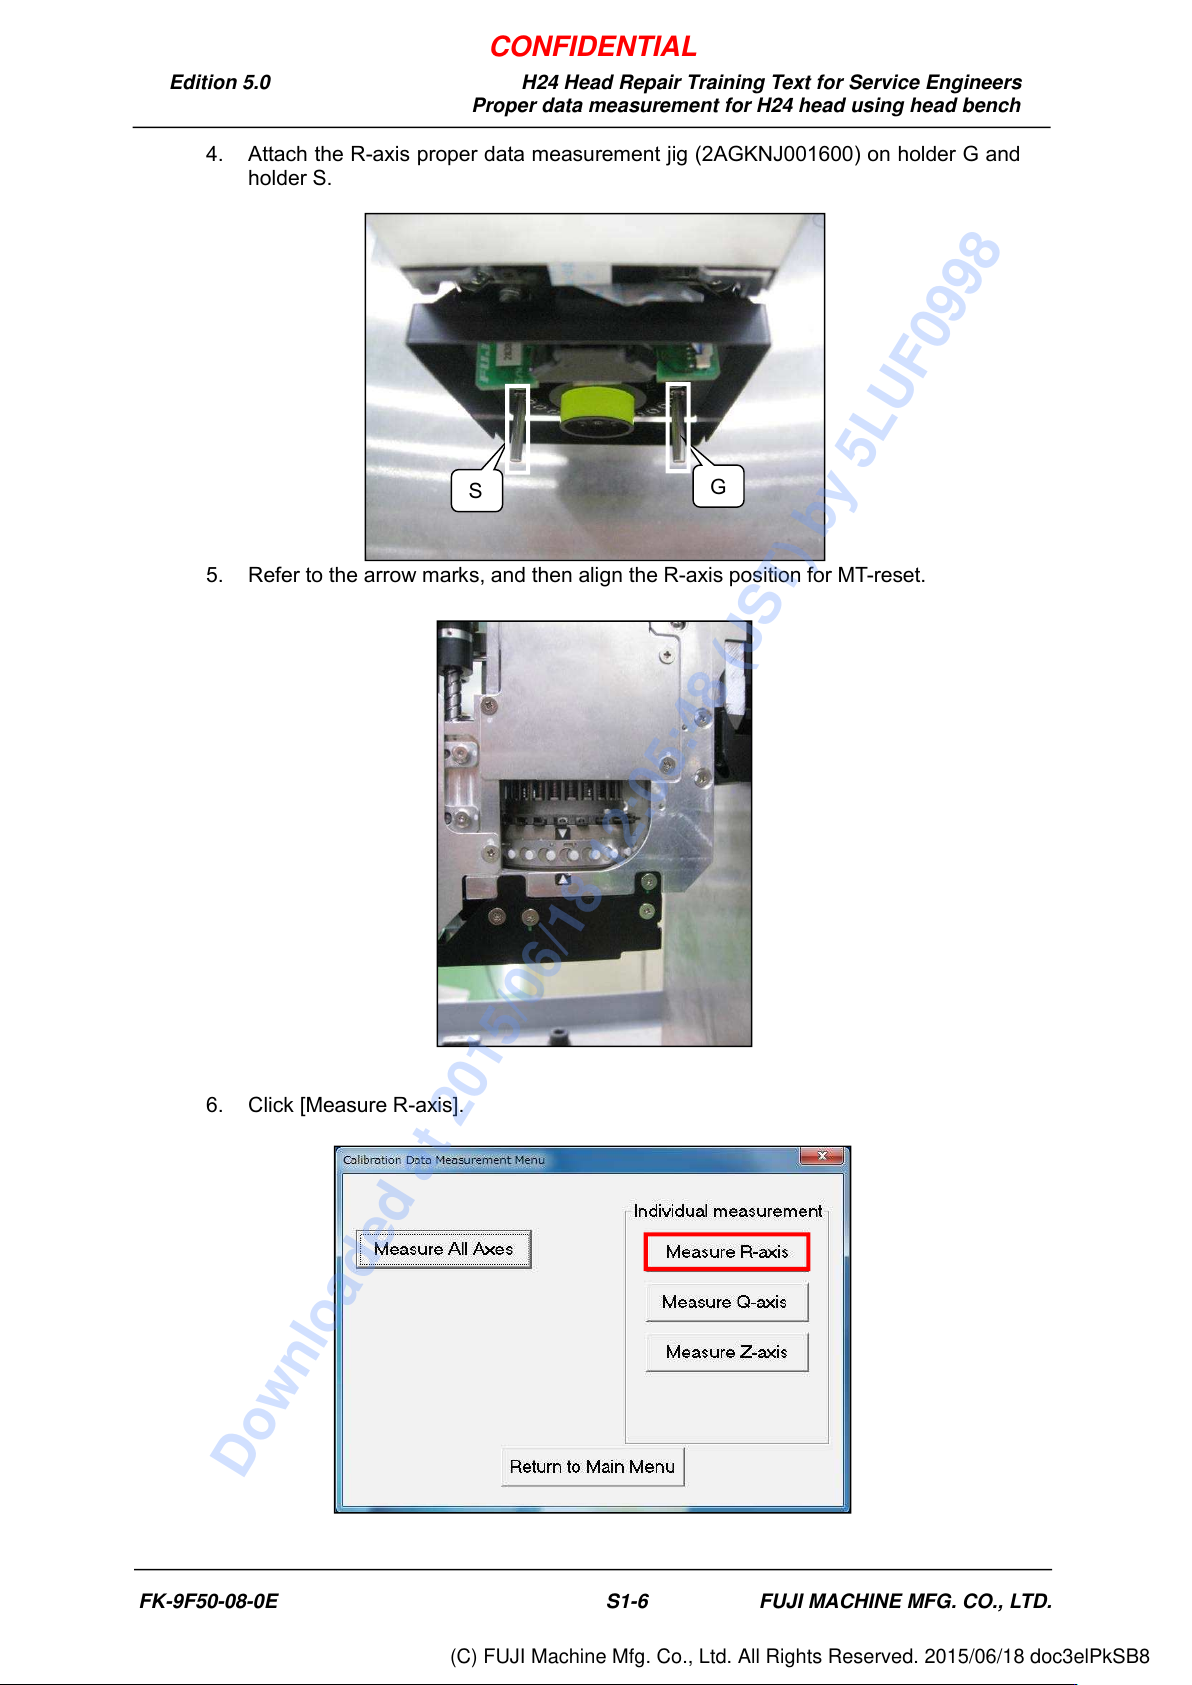
4. Attach the R-axis proper data measurement jig (2AGKNJ001600) on holder G and
holder S.
5. Refer to the arrow marks, and then align the R-axis position for MT-reset.
6. Click [Measure R-axis].
G
S
FK-9F50-08-0E S1-6 FUJI MACHINE MFG. CO., LTD.
CONFIDENTIAL
Downloaded at 2015/06/18 12:05:48 (JST) by 5LUF0998
(C) FUJI Machine Mfg. Co., Ltd. All Rights Reserved. 2015/06/18 doc3elPkSB8