1_H24维修手册.pdf - 第195页
E d i ti o n 5 .0 H 24 H ead R ep ai r T r ai n i n g T ext f o r S er vi ce E n g i n e e r s I PS C a m e r a p o s i ti o n a d j u s tm e n t fo r H 2 4 h e a d u s i n g h e a d b e n c h 4. T ur n t he h ead b enc …
Edition 5.0 H24 Head Repair Training Text for Service Engineers
IPS Camera position adjustment for H24 head using head bench
2.2 Preparation On the Head bench
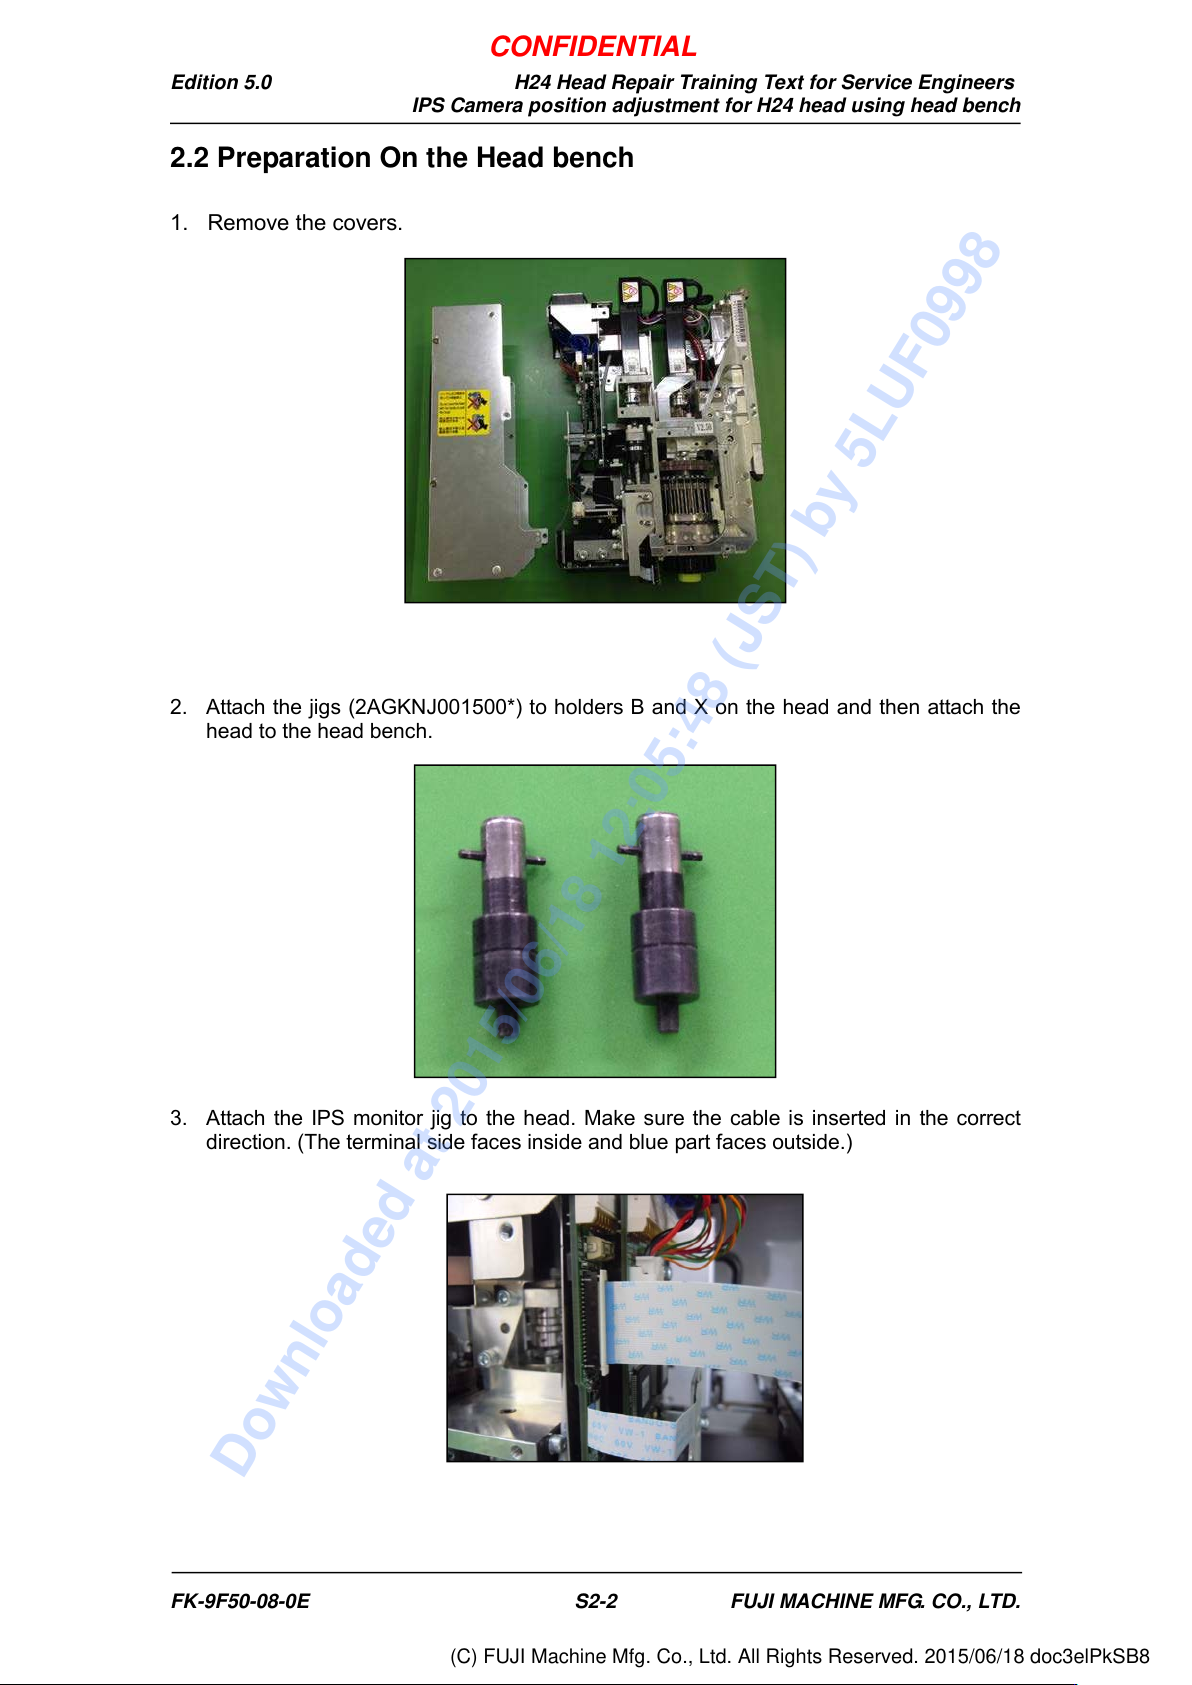
1. Remove the covers.
2. Attach the jigs (2AGKNJ001500*) to holders B and X on the head and then attach the
head to the head bench.
3. Attach the IPS monitor jig to the head. Make sure the cable is inserted in the correct
direction. (The terminal side faces inside and blue part faces outside.)
FK-9F50-08-0E S2-2 FUJI MACHINE MFG. CO., LTD.
CONFIDENTIAL
Downloaded at 2015/06/18 12:05:48 (JST) by 5LUF0998
(C) FUJI Machine Mfg. Co., Ltd. All Rights Reserved. 2015/06/18 doc3elPkSB8
Edition 5.0 H24 Head Repair Training Text for Service Engineers
IPS Camera position adjustment for H24 head using head bench
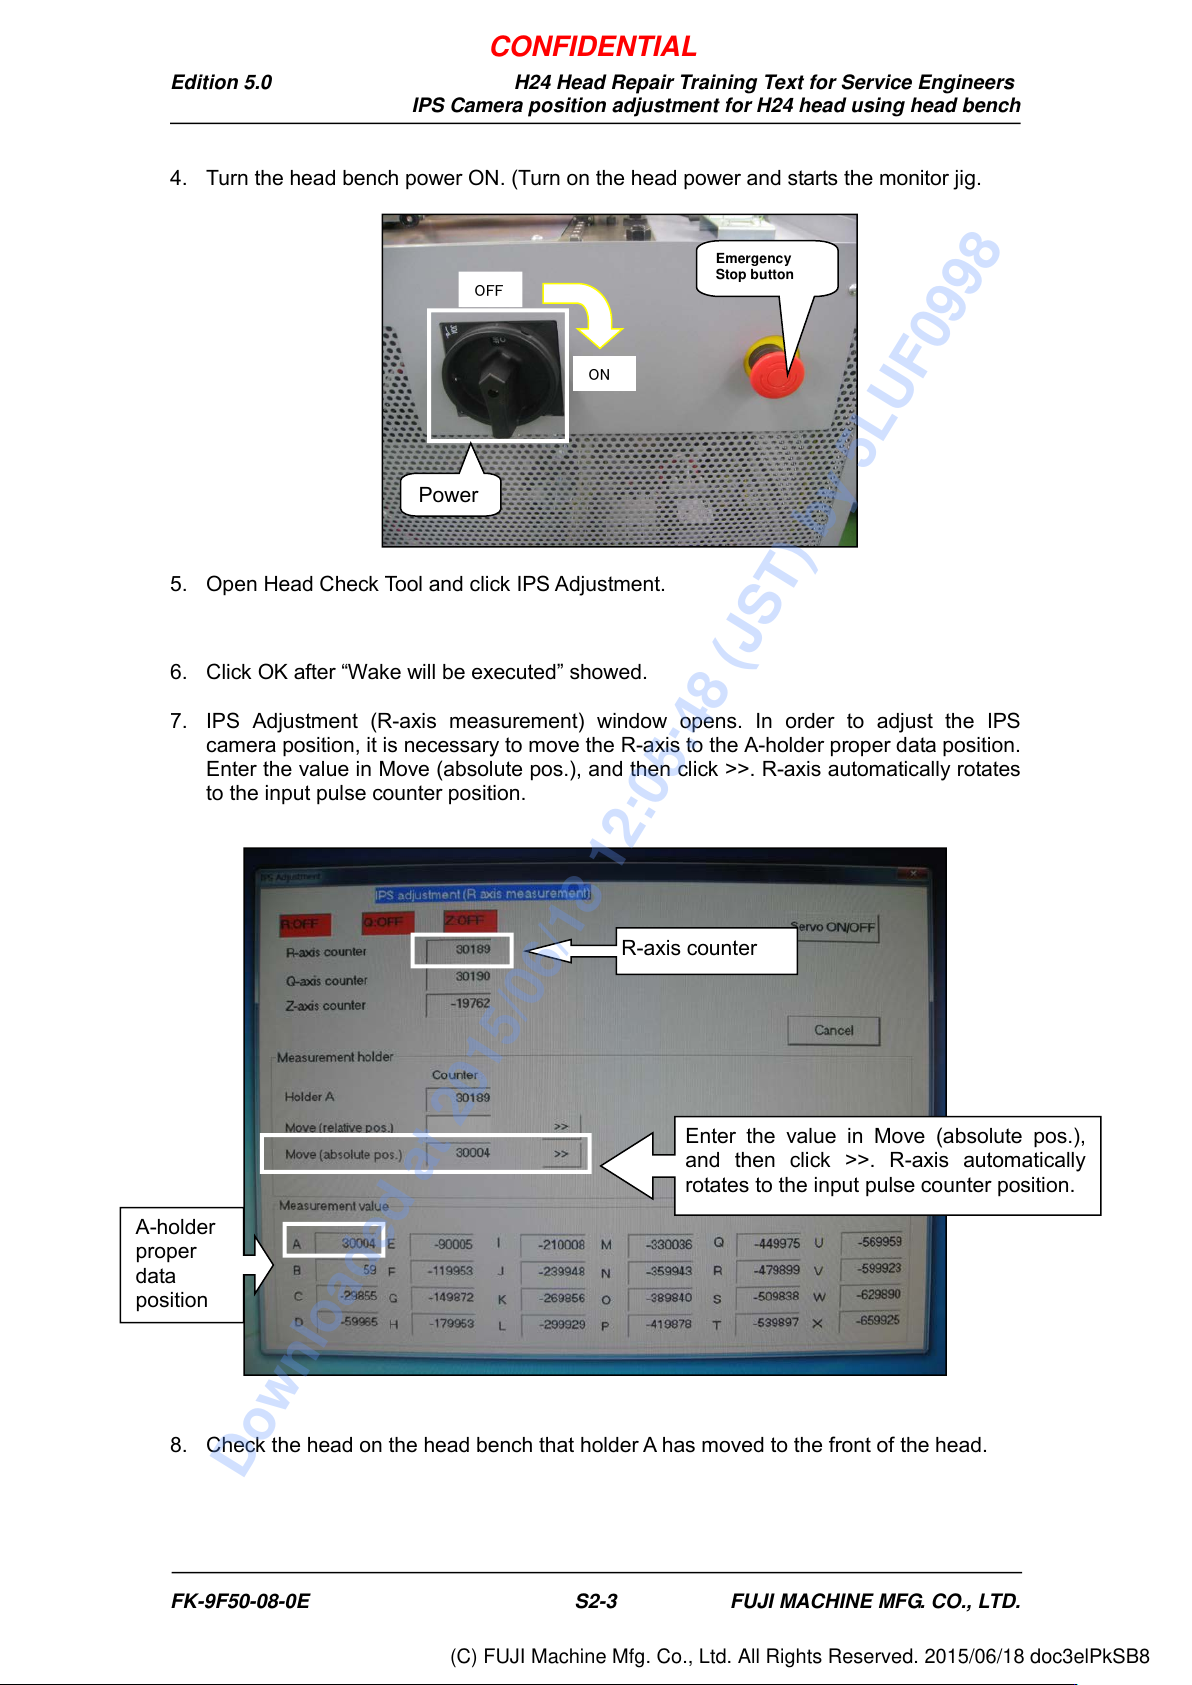
4. Turn the head bench power ON. (Turn on the head power and starts the monitor jig.
5. Open Head Check Tool and click IPS Adjustment.
6. Click OK after “Wake will be executed” showed.
7. IPS Adjustment (R-axis measurement) window opens. In order to adjust the IPS
camera position, it is necessary to move the R-axis to the A-holder proper data position.
Enter the value in Move (absolute pos.), and then click >>. R-axis automatically rotates
to the input pulse counter position.
8. Check the head on the head bench that holder A has moved to the front of the head.
A-holder
proper
data
position
Enter the value in Move (absolute pos.),
and then click >>. R-axis automatically
rotates to the input pulse counter position.
R-axis counter
OFF
Emergency
Stop button
ON
Power
FK-9F50-08-0E S2-3 FUJI MACHINE MFG. CO., LTD.
CONFIDENTIAL
Downloaded at 2015/06/18 12:05:48 (JST) by 5LUF0998
(C) FUJI Machine Mfg. Co., Ltd. All Rights Reserved. 2015/06/18 doc3elPkSB8
Edition 5.0 H24 Head Repair Training Text for Service Engineers
IPS Camera position adjustment for H24 head using head bench
2.3 Component names and explanation of the adjustment
modes
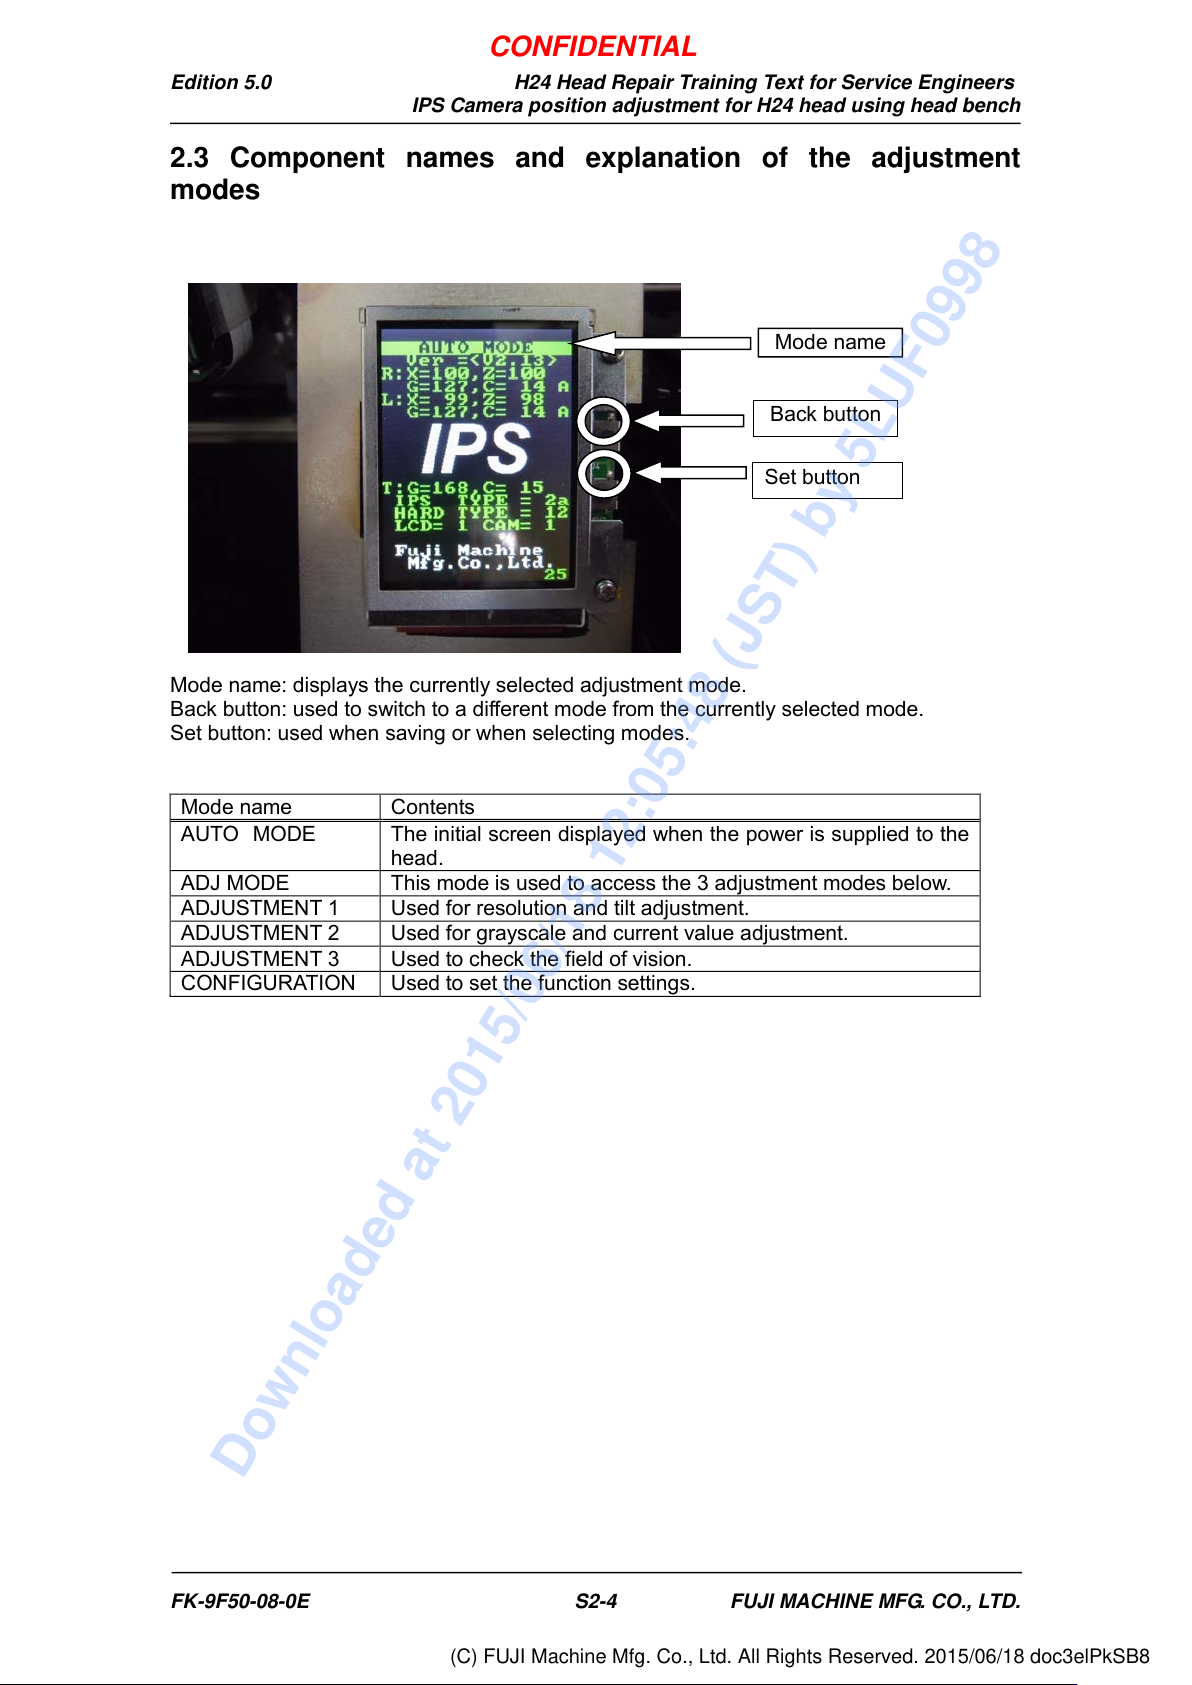
Mode name: displays the currently selected adjustment mode.
Back button: used to switch to a different mode from the currently selected mode.
Set button: used when saving or when selecting modes.
Mode name
Contents
AUTO MODE
The initial screen displayed when the power is supplied to the
head.
ADJ MODE
This mode is used to access the 3 adjustment modes below.
ADJUSTMENT 1
Used for resolution and tilt adjustment.
ADJUSTMENT 2
Used for grayscale and current value adjustment.
ADJUSTMENT 3
Used to check the field of vision.
CONFIGURATION
Used to set the function settings.
Back button
Set button
Mode name
FK-9F50-08-0E S2-4 FUJI MACHINE MFG. CO., LTD.
CONFIDENTIAL
Downloaded at 2015/06/18 12:05:48 (JST) by 5LUF0998
(C) FUJI Machine Mfg. Co., Ltd. All Rights Reserved. 2015/06/18 doc3elPkSB8