1_H24维修手册.pdf - 第32页
E d i ti o n 5 .0 H 24 H ead R ep ai r T r ai n i n g T ext f o r S er v i ce E n g i n eer s R e p l a c i n g th e Z a x i s m o t o r 3. Loos en t he 4 bo l t s on t he c oup l i ng c o nne c t i n g t he Z - ax i s a…
Edition 5.0
H24 Head Repair Training Text for Service Engineers
Replacing the Z axis motor
Chapter 2 - Replacing the Z axis Motor
The Z-axis motor replacement procedure is explained below.
Note: Be sure to prepare a replacement motor with terminals attached.
Note: Z-axis proper data measurement is required following replacement of the Z-axis
motor.
2.1 Remove the Z axis
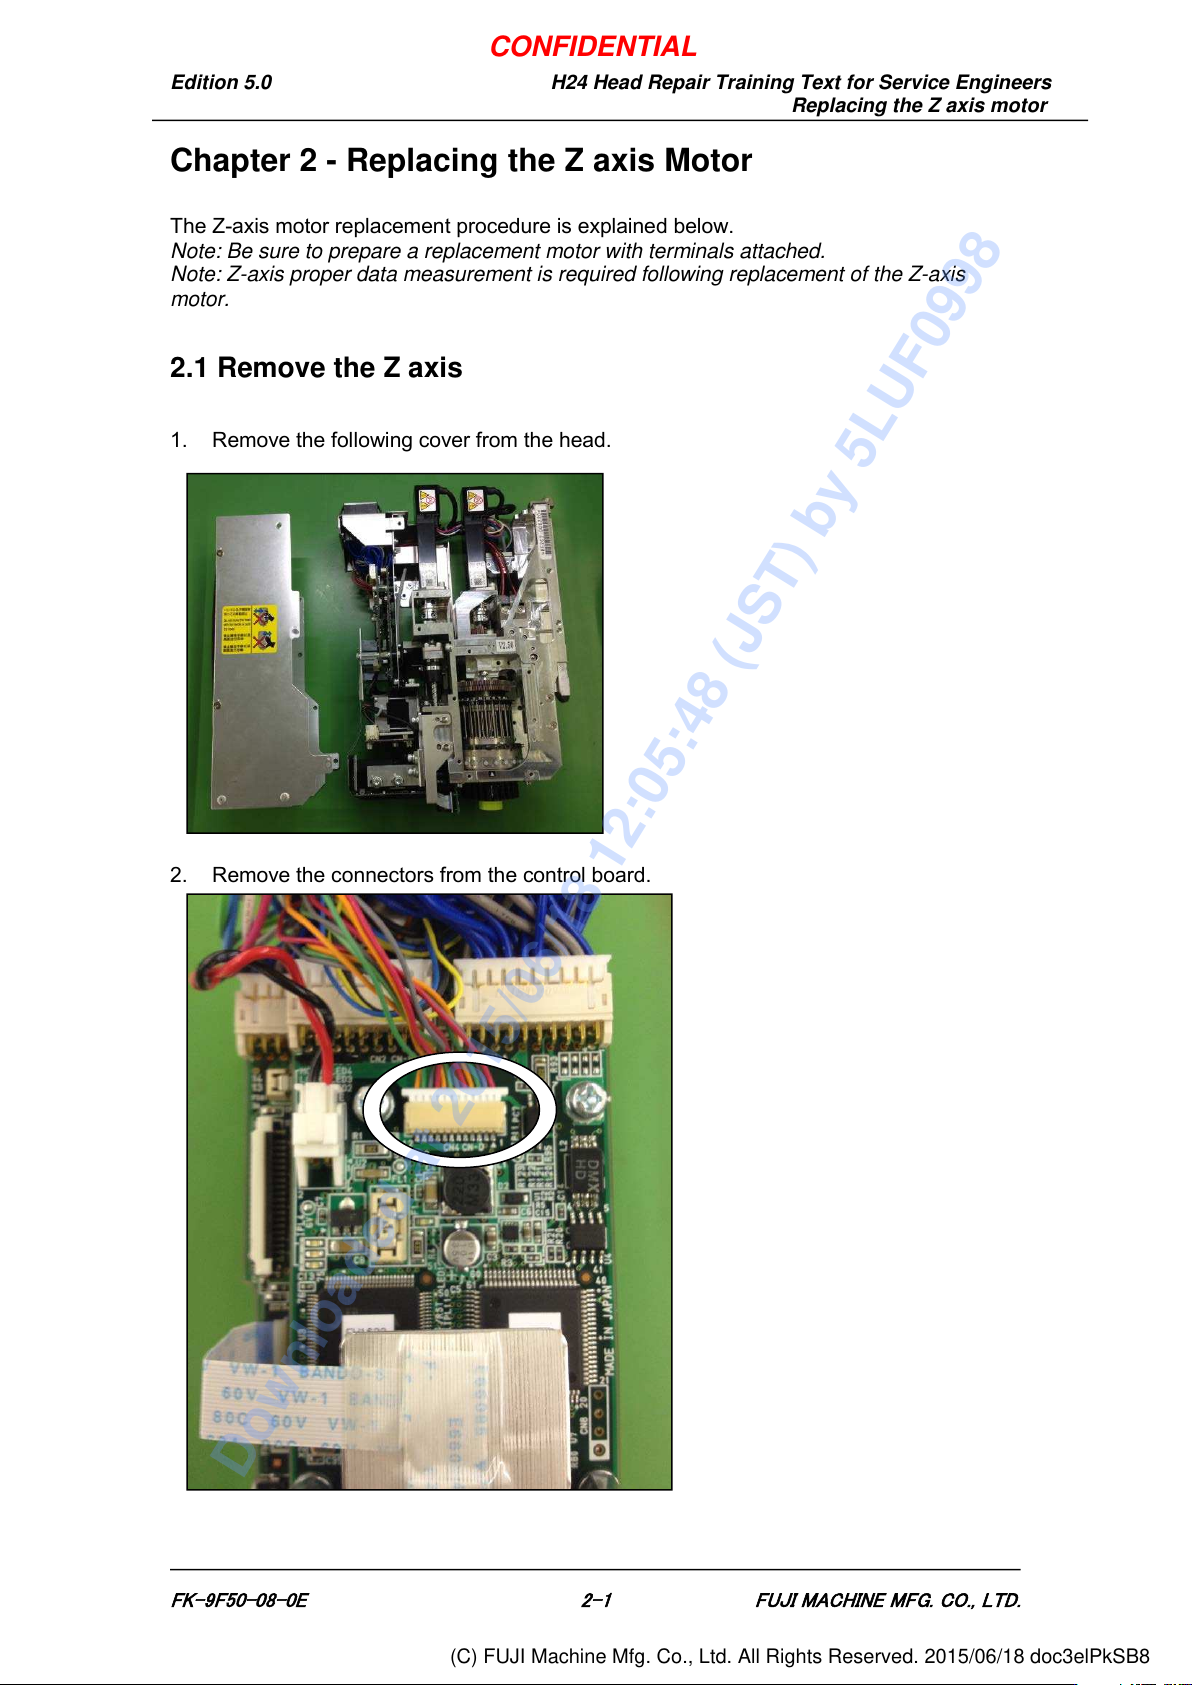
1. Remove the following cover from the head.
2. Remove the connectors from the control board.
FK-9F50-08-0E 2-1
FUJI MACHINE MFG. CO., LTD.
CONFIDENTIAL
Downloaded at 2015/06/18 12:05:48 (JST) by 5LUF0998
(C) FUJI Machine Mfg. Co., Ltd. All Rights Reserved. 2015/06/18 doc3elPkSB8
Edition 5.0
H24 Head Repair Training Text for Service Engineers
Replacing the Z axis motor
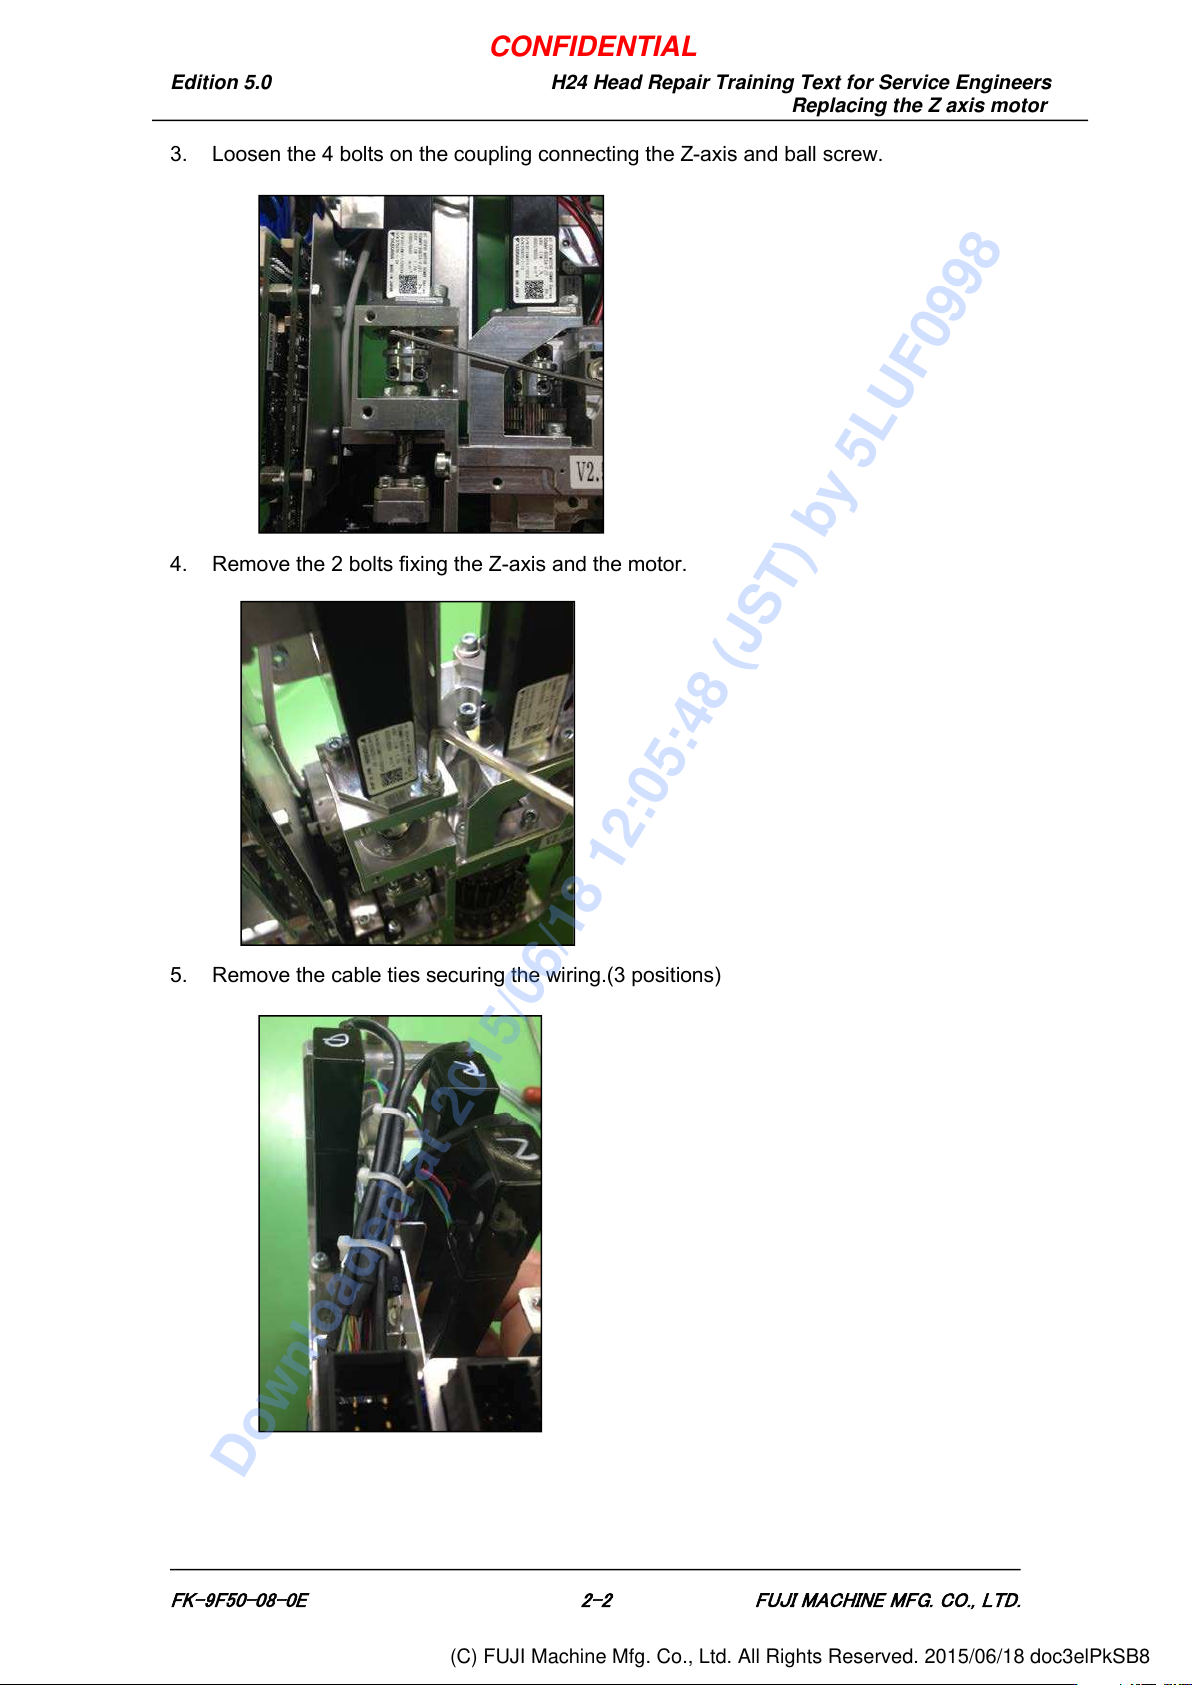
3. Loosen the 4 bolts on the coupling connecting the Z-axis and ball screw.
4. Remove the 2 bolts fixing the Z-axis and the motor.
5. Remove the cable ties securing the wiring.(3 positions)
FK-9F50-08-0E 2-2
FUJI MACHINE MFG. CO., LTD.
CONFIDENTIAL
Downloaded at 2015/06/18 12:05:48 (JST) by 5LUF0998
(C) FUJI Machine Mfg. Co., Ltd. All Rights Reserved. 2015/06/18 doc3elPkSB8
Edition 5.0
H24 Head Repair Training Text for Service Engineers
Replacing the Z axis motor
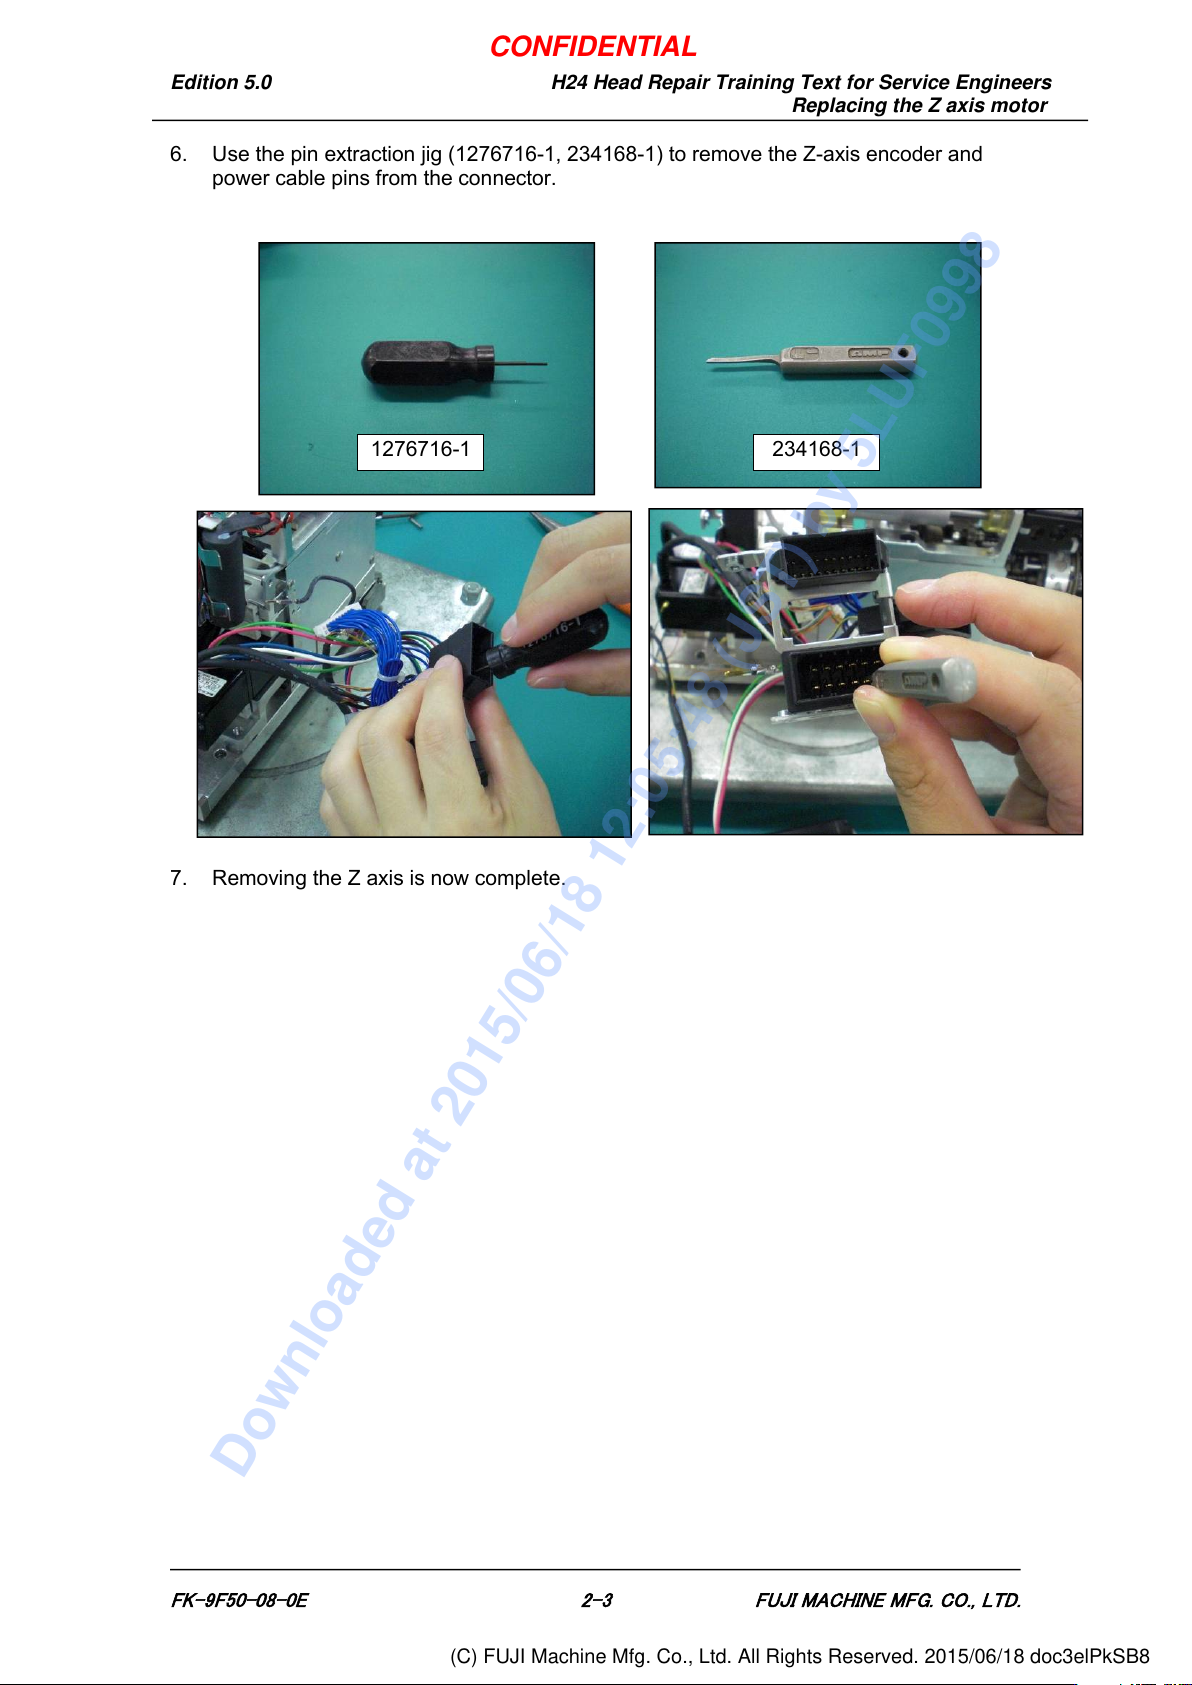
6. Use the pin extraction jig (1276716-1, 234168-1) to remove the Z-axis encoder and
power cable pins from the connector.
7. Removing the Z axis is now complete.
234168-1
1276716-1
FK-9F50-08-0E 2-3
FUJI MACHINE MFG. CO., LTD.
CONFIDENTIAL
Downloaded at 2015/06/18 12:05:48 (JST) by 5LUF0998
(C) FUJI Machine Mfg. Co., Ltd. All Rights Reserved. 2015/06/18 doc3elPkSB8