1_H24维修手册.pdf - 第55页
E d i ti o n 5 .0 H 24 H ead R ep ai r T r ai n i n g T ext f o r S er vi ce E n g i n e e r s R e p l a c i n g th e R - axi s m o t o r 3. T em po r a l l y t i ght en t he 4 c oup l i ng bo l t s . 4. S ec ur e t he m…
Edition5.0 H24 Head Repair Training Text for Service Engineers
Replacing the R-axis motor
4.2 Attaching the R-axis Motor
Note: Be sure to prepare a replacement motor with terminals attached.
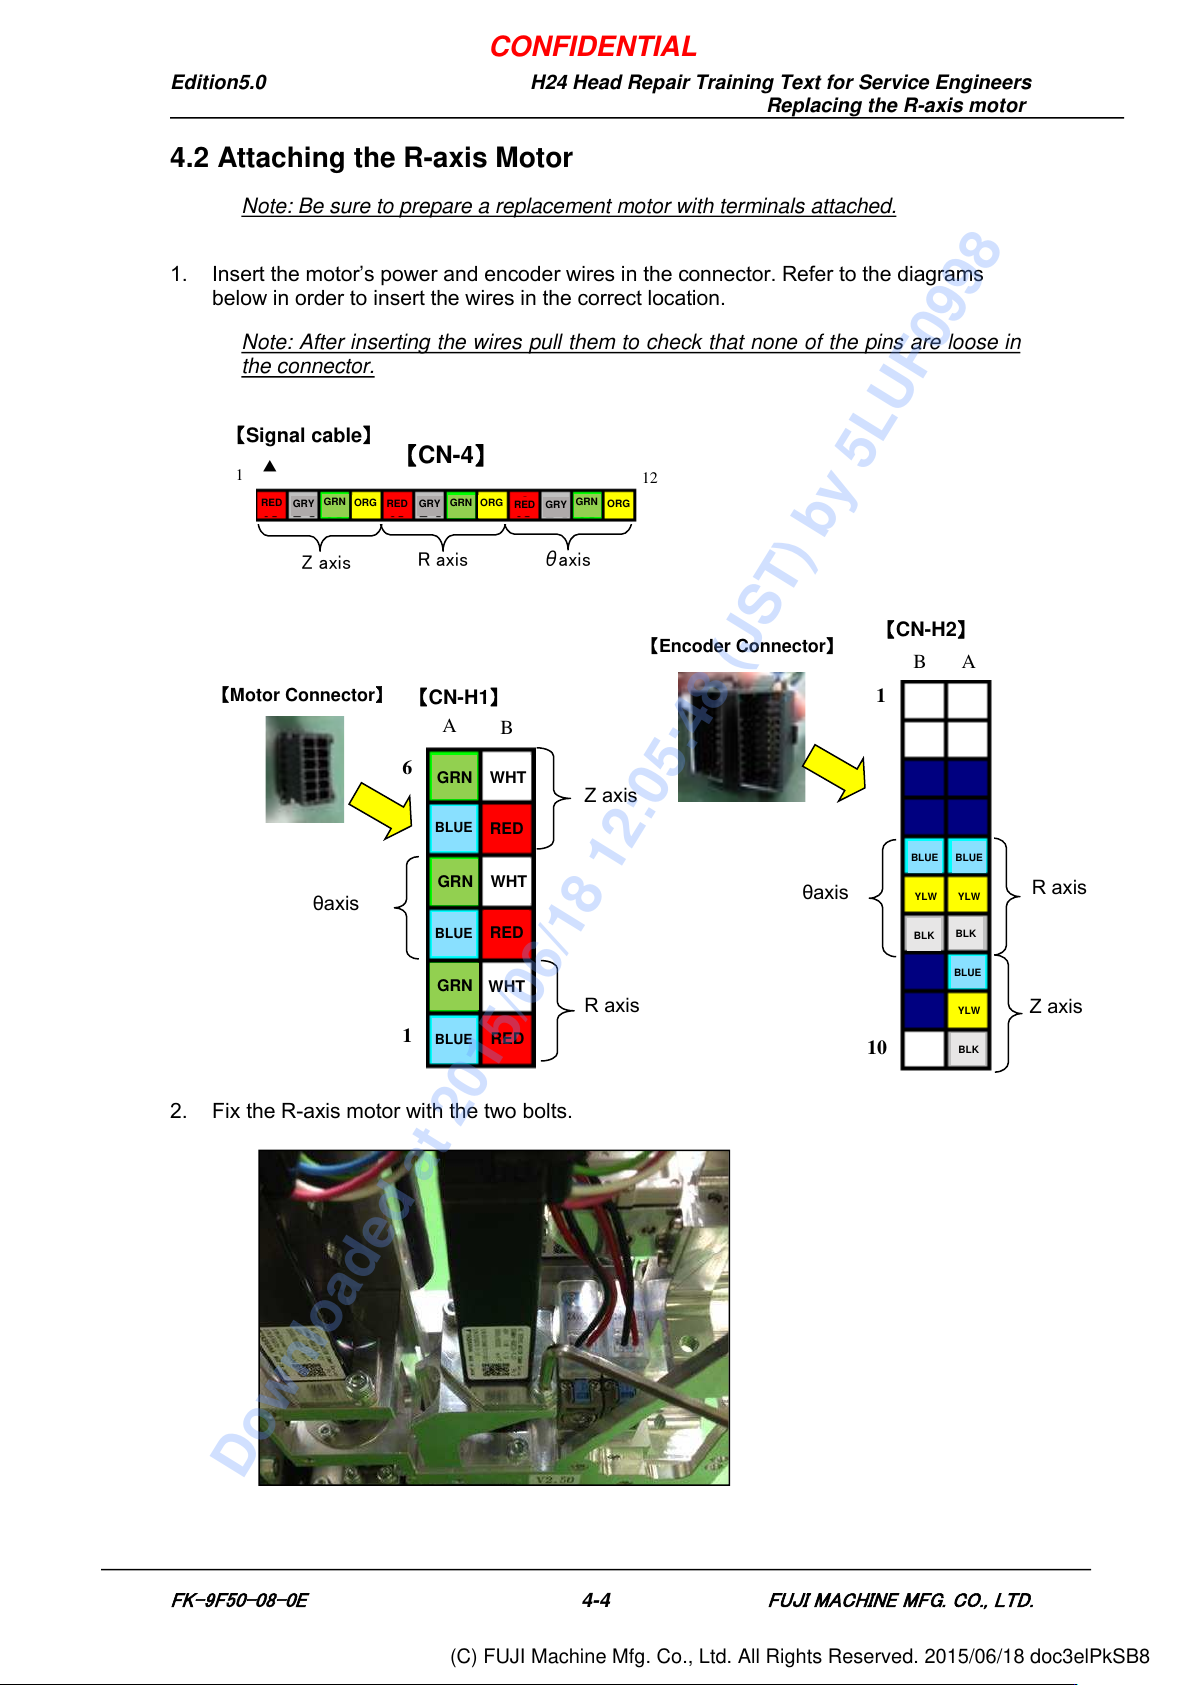
1. Insert the motor’s power and encoder wires in the connector. Refer to the diagrams
below in order to insert the wires in the correct location.
Note: After inserting the wires pull them to check that none of the pins are loose in
the connector.
2. Fix the R-axis motor with the two bolts.
【Signal wire】
【Signal cable】
θ axis R axis
Z axis
【CN-4】
▲
1
12
RE
D
RED
RED
RED
GRY
GRY
GRY
GRN
GRN
GRN
ORG
ORG
ORG
【CN-H1】
B
A
6
Z axis
R axis
θaxis
1
【Motor Connector】
GRN
GRN
GRN
RED
RED
RED
WHT
WHT
WHT
BLUE
BLUE
BLUE
【Encoder Connector】
A
B
1
10
Z axis
θaxis
R axis
【CN-H2】
BLUE
BLUE
BLUE
YLW
YLW
YLW
BLK
BLK
BLK
FK-9F50-08-0E
4-4
FUJI MACHINE MFG. CO., LTD.
CONFIDENTIAL
Downloaded at 2015/06/18 12:05:48 (JST) by 5LUF0998
(C) FUJI Machine Mfg. Co., Ltd. All Rights Reserved. 2015/06/18 doc3elPkSB8
Edition5.0 H24 Head Repair Training Text for Service Engineers
Replacing the R-axis motor
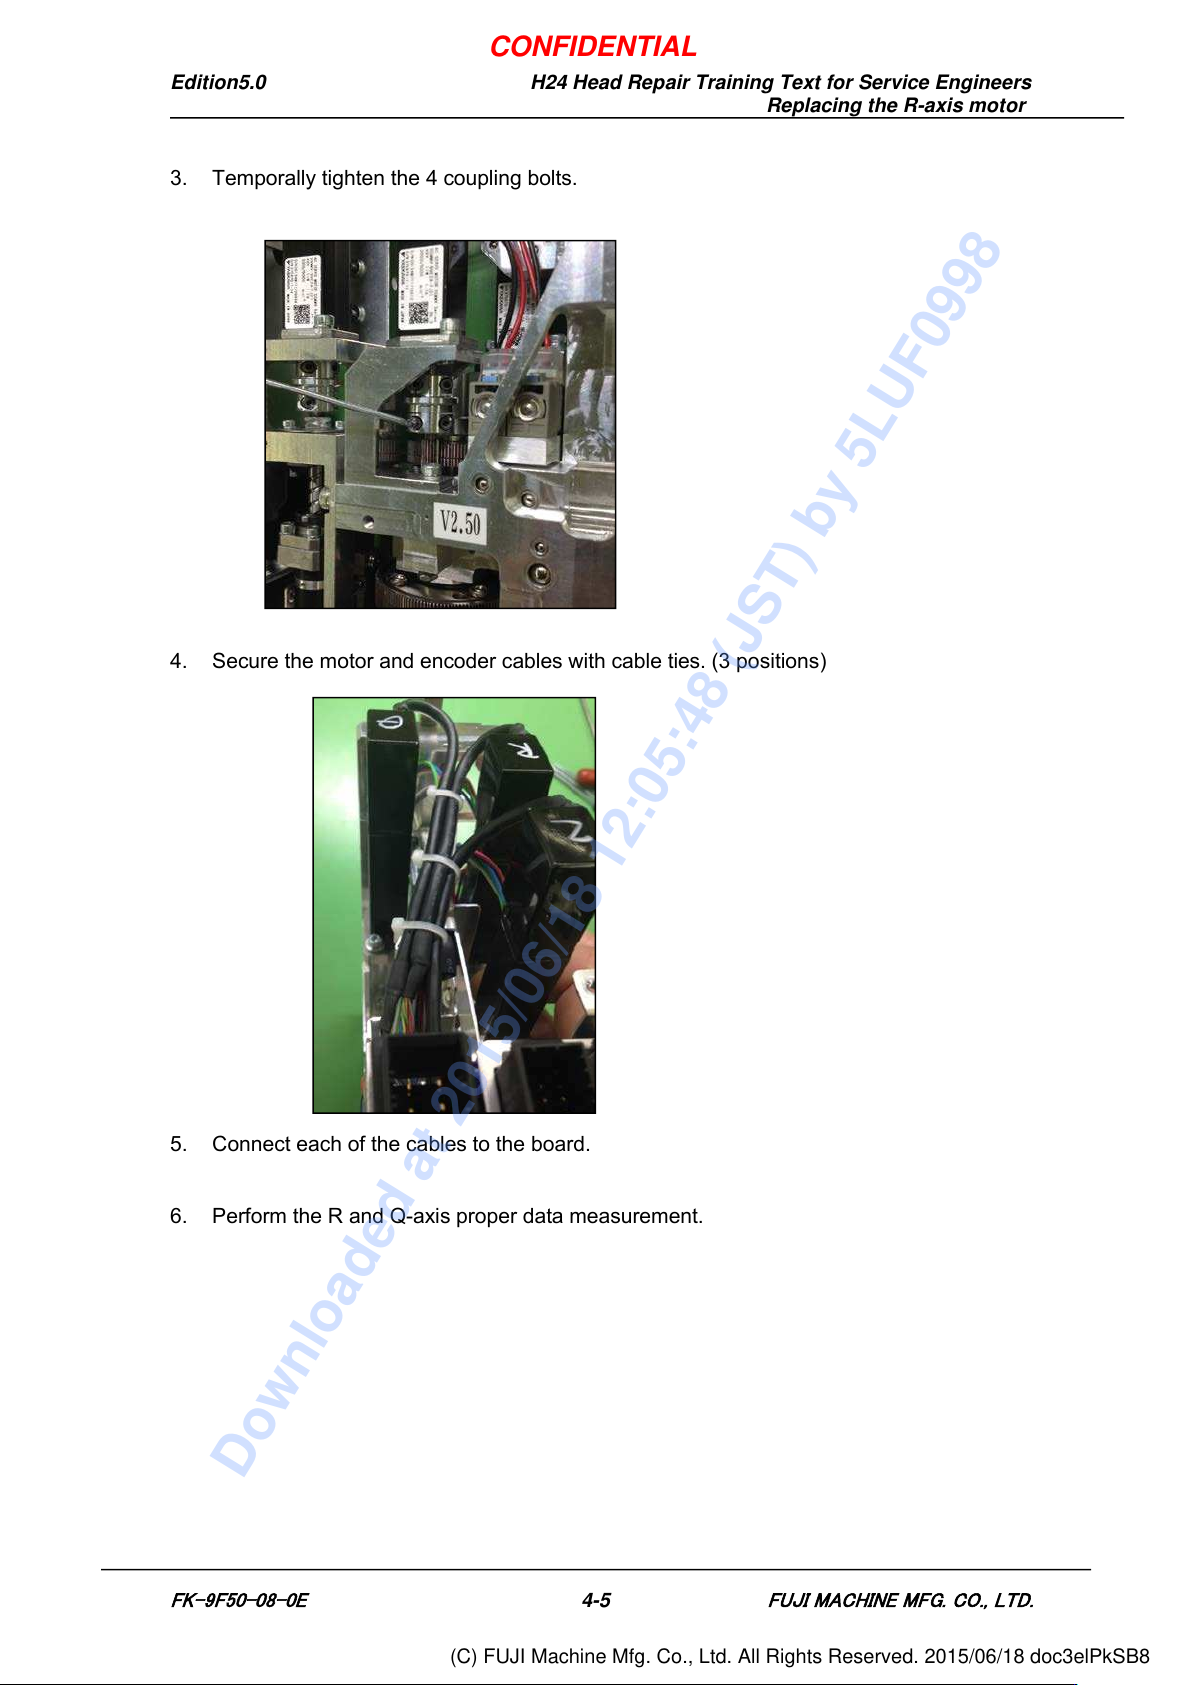
3. Temporally tighten the 4 coupling bolts.
4. Secure the motor and encoder cables with cable ties. (3 positions)
5. Connect each of the cables to the board.
6. Perform the R and Q-axis proper data measurement.
FK-9F50-08-0E
4-5
FUJI MACHINE MFG. CO., LTD.
CONFIDENTIAL
Downloaded at 2015/06/18 12:05:48 (JST) by 5LUF0998
(C) FUJI Machine Mfg. Co., Ltd. All Rights Reserved. 2015/06/18 doc3elPkSB8
Edition5.0 H24 Head Repair Training Text for Service Engineers
Replacing the R-axis motor
MEMO:
FK-9F50-08-0E
4-6
FUJI MACHINE MFG. CO., LTD.
CONFIDENTIAL
Downloaded at 2015/06/18 12:05:48 (JST) by 5LUF0998
(C) FUJI Machine Mfg. Co., Ltd. All Rights Reserved. 2015/06/18 doc3elPkSB8