Nordson_EFD_RV_Series_Operating_Manual - 第126页
RV Series Automated Dispensing Systems 126 www.nordsonefd.com info@nordsonefd.com +1-401-431-7000 Sales and service of Nordson EFD dispensing systems are available worldwide. Setting the Tip-to-W orkpiece Offset (Z Clear…
RV Series Automated Dispensing Systems
125www.nordsonefd.com info@nordsonefd.com +1-401-431-7000 Sales and service of Nordson EFD dispensing systems are available worldwide.
Setting Up the Optional Tip Detector or Tip Alignment Device
#
Click Step Reference Image
1
>
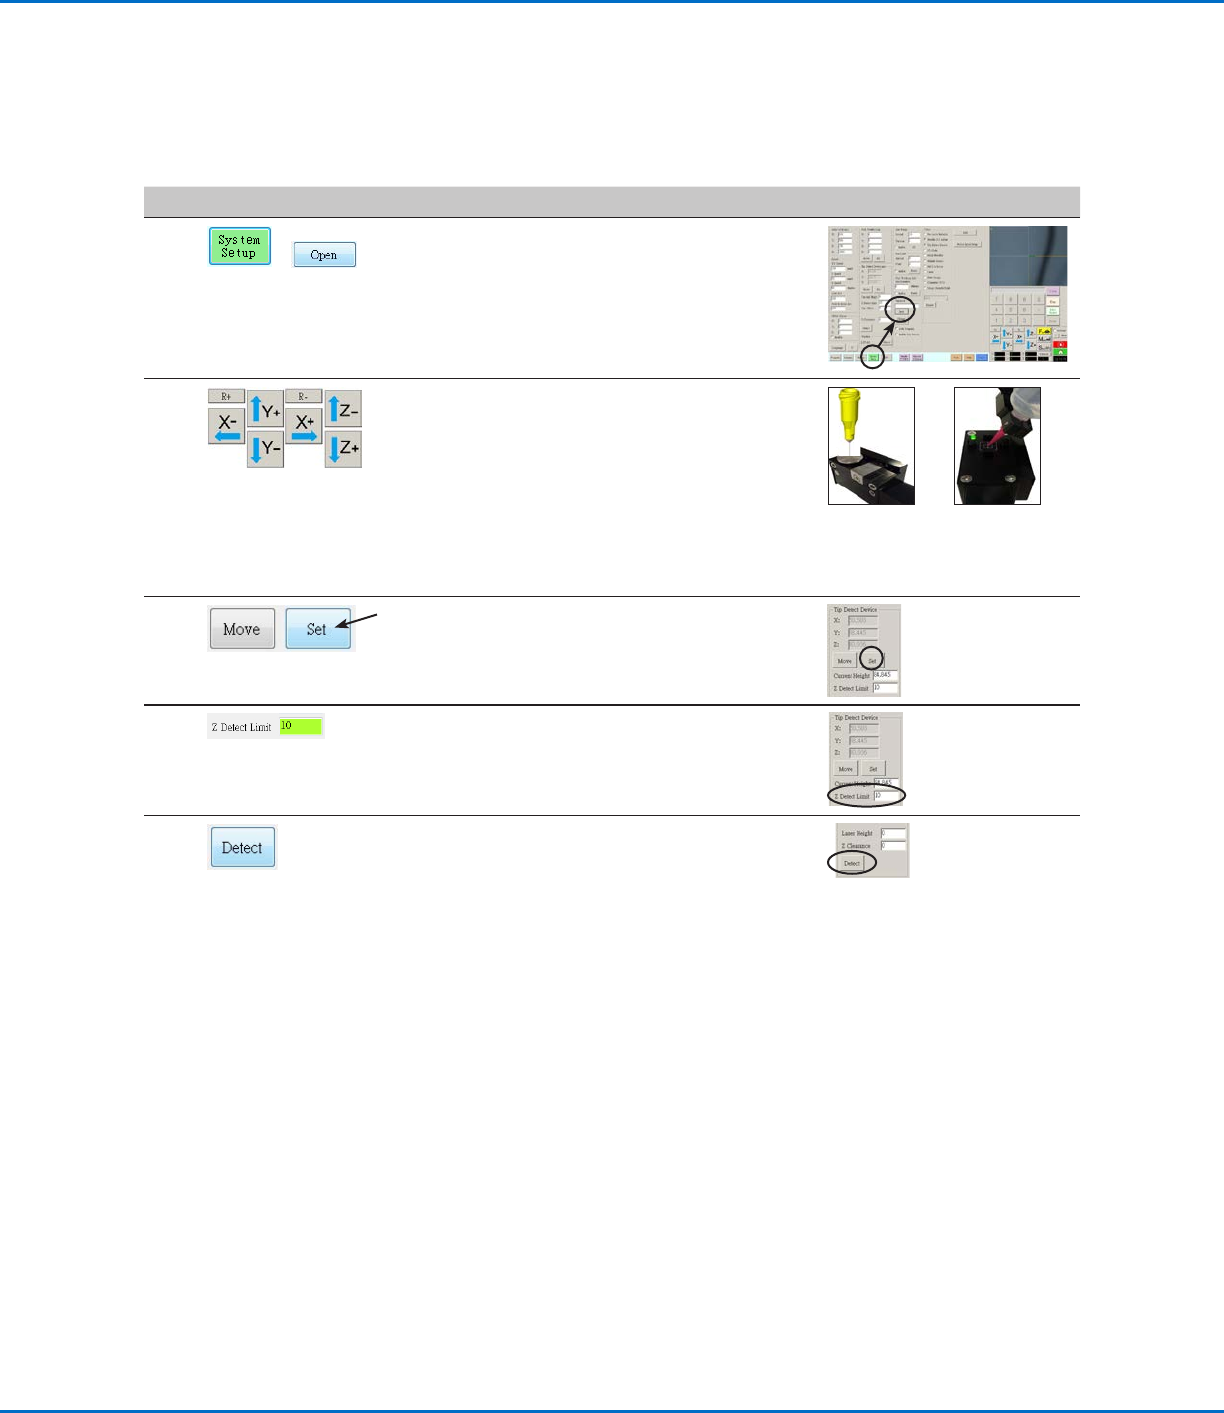
• Click SYSTEM SETUP > OPEN.
2 • Jog the tip until it is positioned about 2mm
above the sensor on the tip detector or the
crosshairs on the tip alignment device.
Sensor on
the optional
tip detector
Crosshairs on
the optional tip
aligner
3 • Under Tip Detect Device, click SET (next to
Move).
• Click YES when prompted for confirmations.
4 • Under Tip Detect Device, enter a value of
10(mm) Z Detect Limit.
5 • Under Tip Detect Device, click DETECT.
• Click YES/OK when prompted for
confirmations.
The robot raises the tip to Z = 0, then lowers
the tip onto the sensor to detect the tip
offset.
AppendixB, Non-Wizard Setup Procedures
(continued)
RV Series Automated Dispensing Systems
126 www.nordsonefd.com info@nordsonefd.com +1-401-431-7000 Sales and service of Nordson EFD dispensing systems are available worldwide.
Setting the Tip-to-Workpiece Offset (Z Clearance) Using the Camera
Focus
#
Click Step Reference Image
1
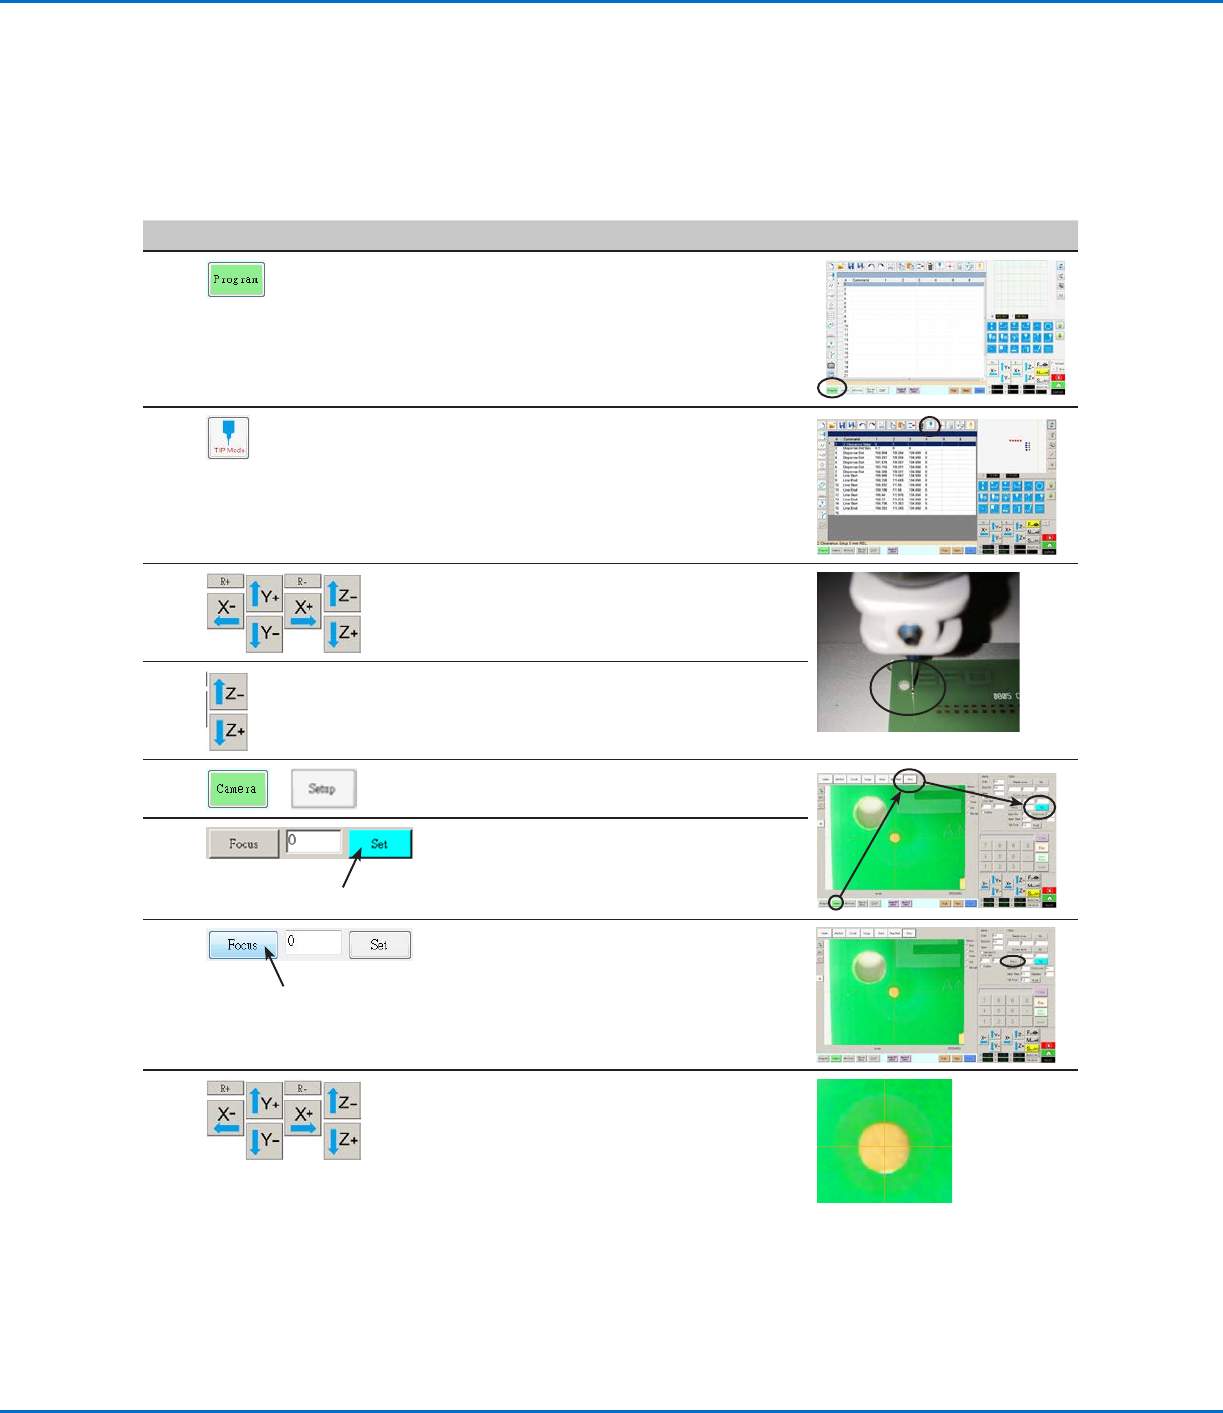
• Click the PROGRAM tab.
2 • Click the CCD Mode icon to change to the
Tip MODE.
3 • Jog the tip to a good reference point on the
workpiece.
4 • Jog the tip down until the desired dispense
gap is reached.
5
>
• Click CAMERA > SETUP to return to the
Offset fields.
6 • Click SET next to Focus.
NOTE: The Set button should be bright
blue.
7
• Click FOCUS next to Set.
8 • Jog the camera until the camera crosshairs
are centered over the dispense dot you
created earlier.
• Focus the camera until the image of the
dispense dot is clear. Refer to “Camera” on
page16 as needed for instructions on
focusing the camera.
AppendixB, Non-Wizard Setup Procedures
(continued)
RV Series Automated Dispensing Systems
127www.nordsonefd.com info@nordsonefd.com +1-401-431-7000 Sales and service of Nordson EFD dispensing systems are available worldwide.
AppendixC, DXF File Import
This appendix provides an overview of the DXF screen components and the procedure for importing DXF files.
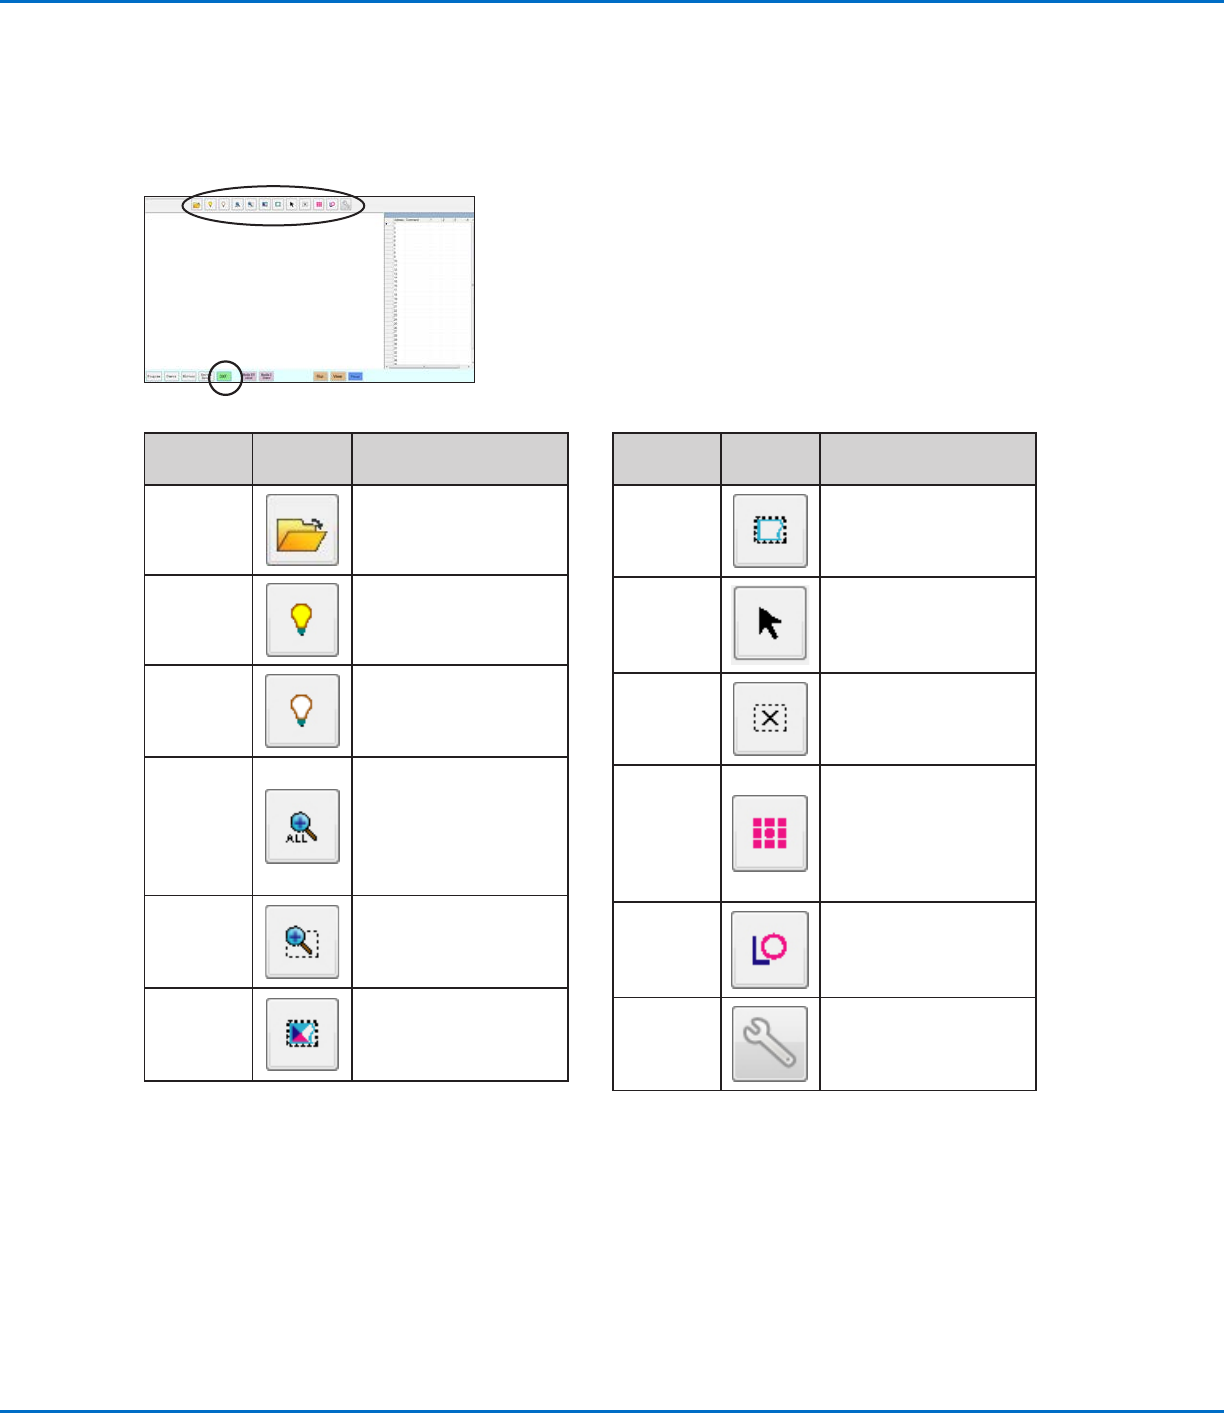
Overview of the DXF Screen
Icon
Name
Icon Function
Open a
File
Opens a file
Show All
Layers
Shows all layers of the
open DXF file
Hide All
Layers
Hides all layers of the
open DXF file
See All
Compresses or resizes
the display so that all
points of the open DXF
file are displayed in
the viewing area of the
screen
Zoom
Zooms to the selected
area
Select All
Selects all the points in
the DXF file
Icon
Name
Icon Function
Select
Selects only the points
within the area of the
rectangle
Select
Directly
Selects one element
Cancel
Select
Cancels any selections
Point
Dispense
Inserts Dispense Dot
commands for all the
selected points on an
imported DXF image
Line
Dispense
Inserts line dispense
commands for all the
selected shapes on an
imported DXF image
Option
Refer to “Setting DXF
Import Preferences” on
page128.