JO-116-001_w.pdf - 第52页
3-3 JO-1 16 1.2 Password Change 1 105-001 1.2 Password Change Procedure (1) Press the [Authority Setting] button located on the upper right corner of the "T ype Listup" window . Fig. C3 (2) The "Password&q…
3-2
JO-116
1105-001
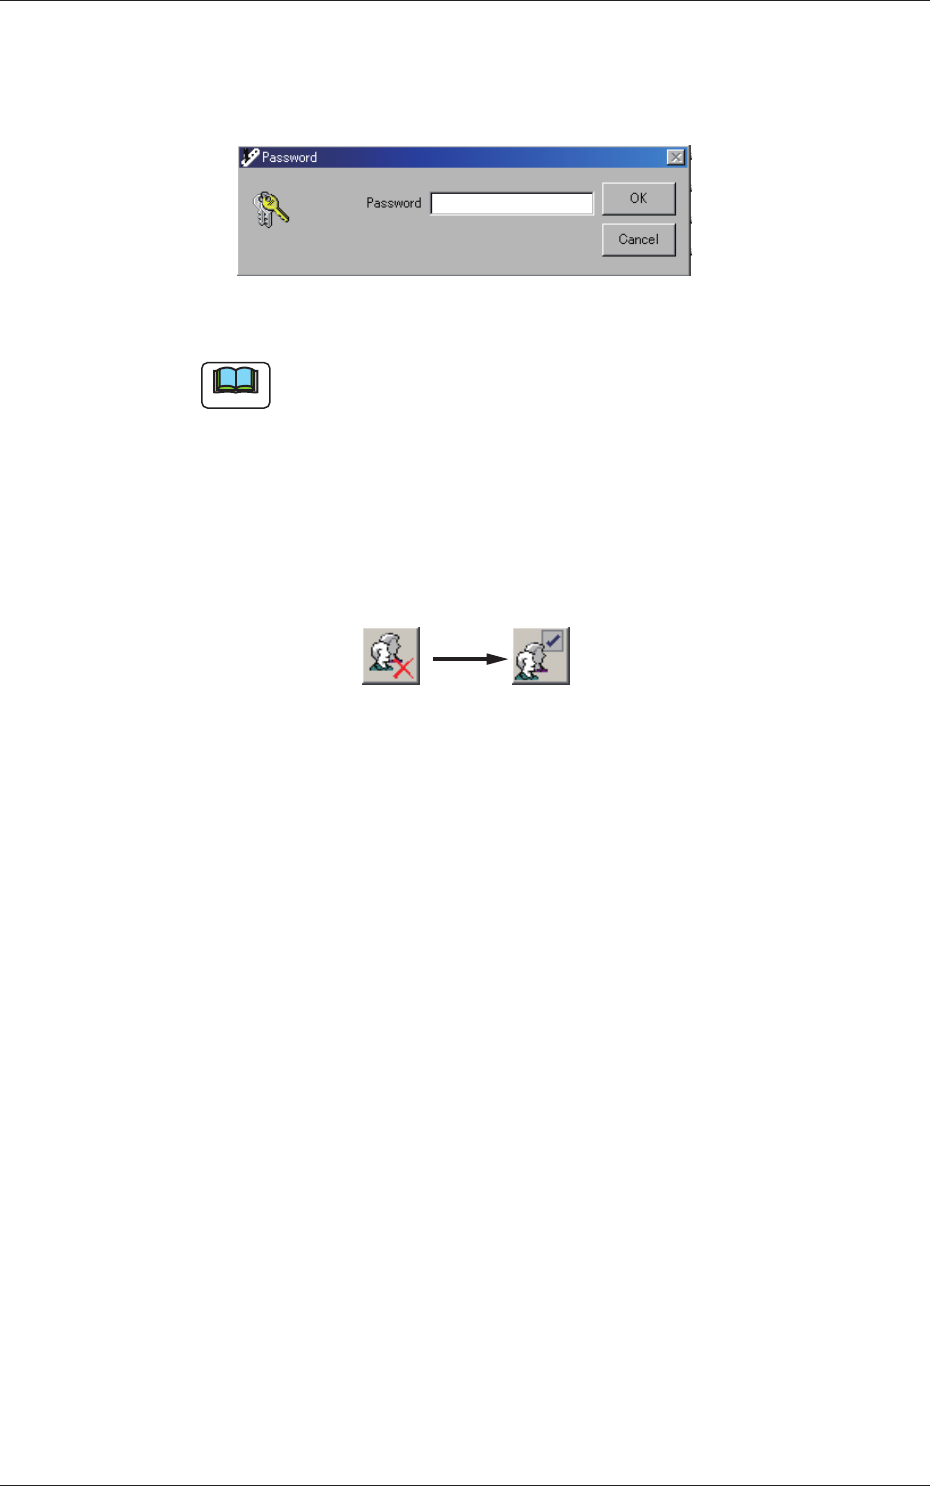
(2) The "Password" window appears. Enter the password through
keyboard navigation.
After you have entered the password, press the [OK] button.
Fig. C2
Note
Enter only alphanumeric characters.
Note that passwords are always case sensitive (sensitive to uppercase
and lowercase letters).
(3) When the entered password matches the previously stored
password, the [Authority Setting] button changes as follows.
When the [Authority Setting] button is pressed with the icon
shown below on the button, the authority returns to "User".
1.1 Authority Change
3-3
JO-116
1.2 Password Change
1105-001
1.2 Password Change
Procedure
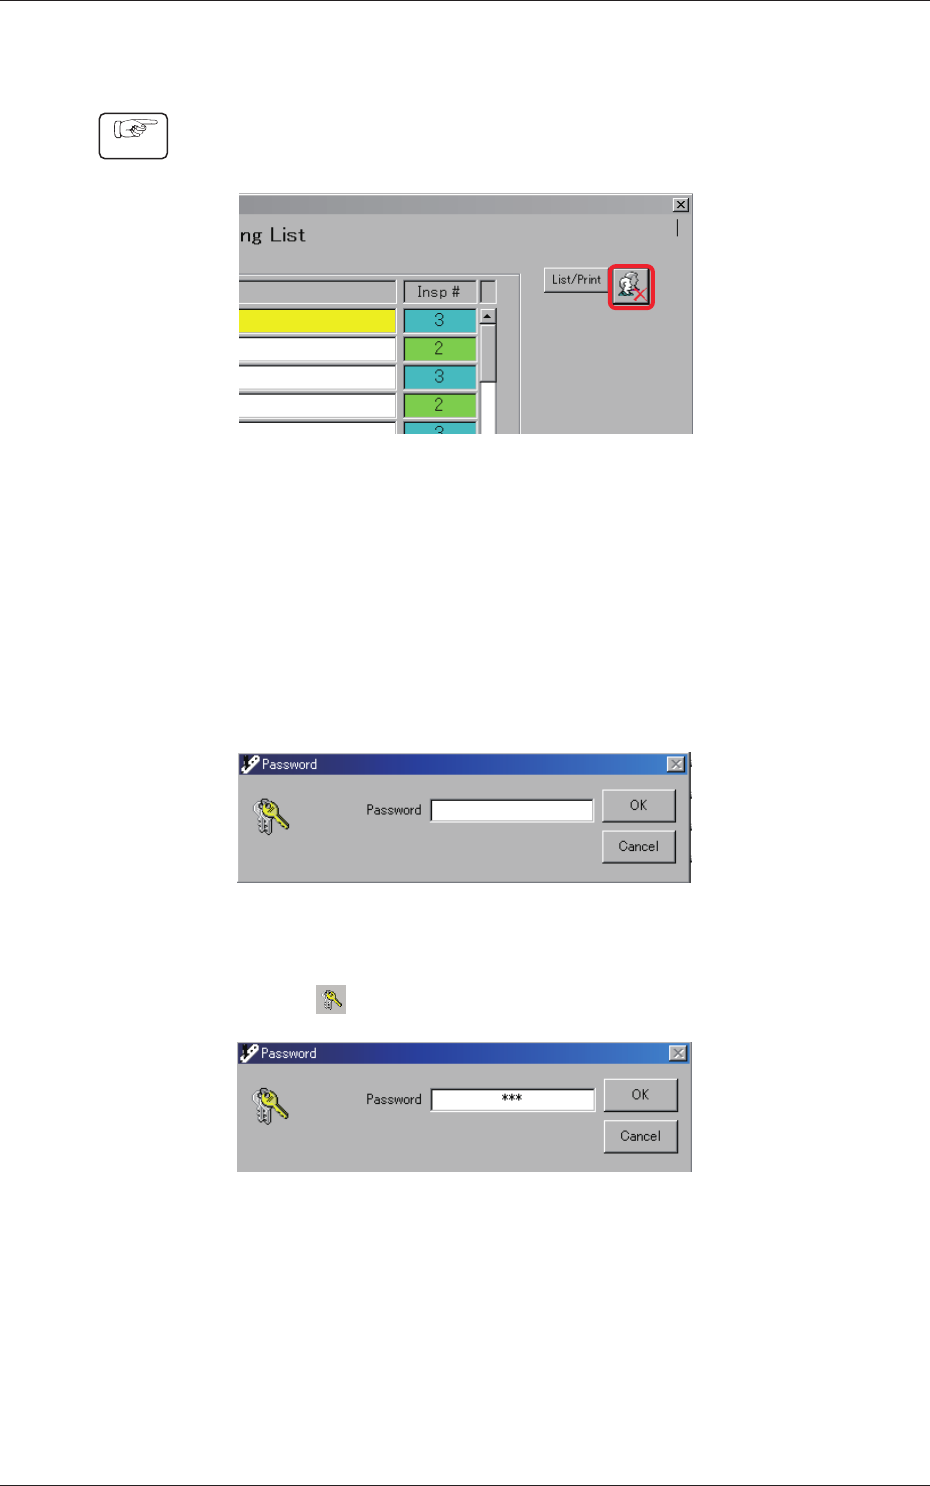
(1) Press the [Authority Setting] button located on the upper right
corner of the "Type Listup" window.
Fig. C3
(2) The "Password" window appears. Enter the password (for
"Administrator") through keyboard navigation. After the entry is
completed, press the [OK] button.
Factory-Specied Passwords
Administrator
: bbb
Power User
: aaa
Fig. C4
(3) Press "
". Be sure not to select the [OK] button.
Fig. C5
3-4
JO-116
1.2 Password Change
1105-001
(4) When the entered password matches the previously stored
password, the "Password" window appears, enabling you to
change the password.
(
When a wrong password is entered, nothing appears.)
Fig. C6
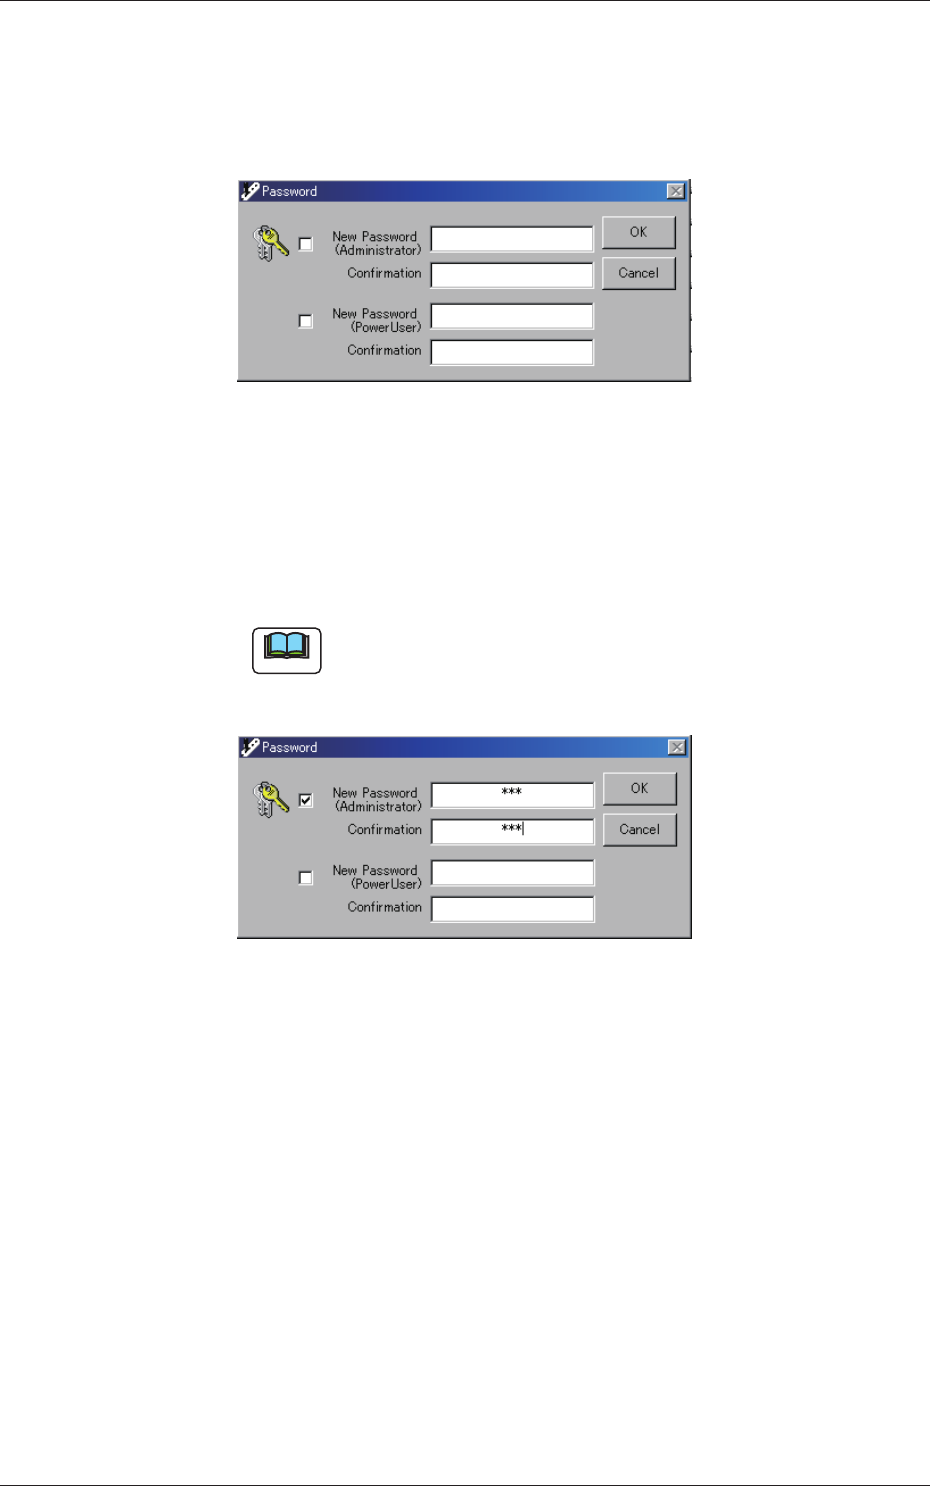
(5) Tick the "New Password (Administrator)" check box and enter a
new password.
Enter the same password in the "Conrmation" text ox for the
conrmation and press the [OK] button
Note
Follow the same procedure for "Power User".
Both passwords (for "Administrator" and "Power User") can
also be changed at the same time.
Fig. C7