00191498-01.pdf - 第34页
Power supply Conversion Instructions S-20/S-23 HM/F4/F5 8 Converting the wafflepack changer from 3x400 VAC to 3x230 VAC 09/99 edition 34 8 Converting the wafflep ack changer from 3x400 V AC to 3x23 0 V AC DANGER OF DEA T…
Conversion Instructions S-20/S-23 HM/F4/F5 Power supply
09/99 edition
33
Transformer T1 (item 1 in Fig. 7 - 1) can be accessed from beneath the top part of the frame
(item 2 in Fig. 7 - 1). 7
Å Loosen the four hexagon socket-head screws.
Å Pull the cover plate of the transformer housing down to remove.
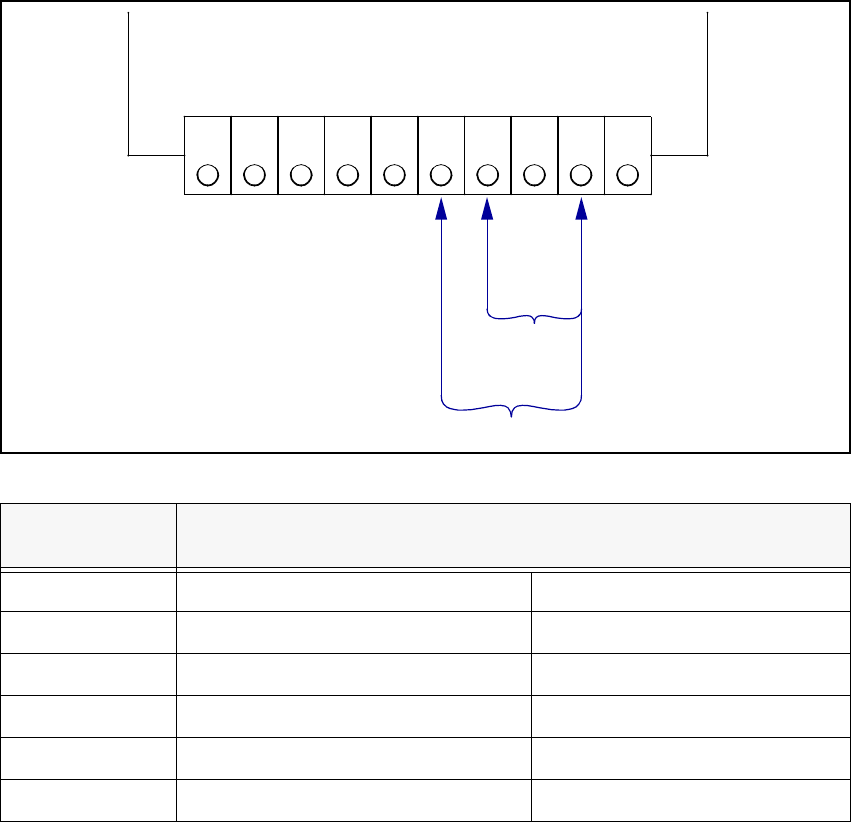
Fig. 7 - 2 Component table, transformer T1, terminals
Å Disconnect the black wire from terminal 5 and connect it to terminal 4.
Å Replace the fuse in the fuse holder on the cover plate:
Previous rating: 3.15 A medium time-lag
New rating: 6.3 A slow-blowing
Å Replace the adhesive label specifying 3.15 A with the 6.3 A label from the conversion kit.
Å Replace the cover plate on the transformer and tighten the four hexagon socket-head screws.
Voltage
Terminals
Blue wire Black wire
237 VAC 1 5
230 VAC 2 5
223 VAC 3 5
122 VAC 1 4
115 VAC 2 4
108 VAC 3 4
T1
10
9 8 7 6 5 4 3 2 1
115VAC
230VAC
bk bl
Power supply Conversion Instructions S-20/S-23 HM/F4/F5
8 Converting the wafflepack changer from 3x400 VAC to 3x230 VAC 09/99 edition
34
8 Converting the wafflepack changer from
3x400 VAC to 3x230 VAC
DANGER OF DEATH 8
Å Before you start rewiring the wafflepack changer:
– switch the placement system off,
– disconnect it from the mains supply and
– secure it to prevent reclosing as described in section 2
or 8
Å remove the plug for the wafflepack changer mains supply and the square plug for the safety
loop from the placement system.
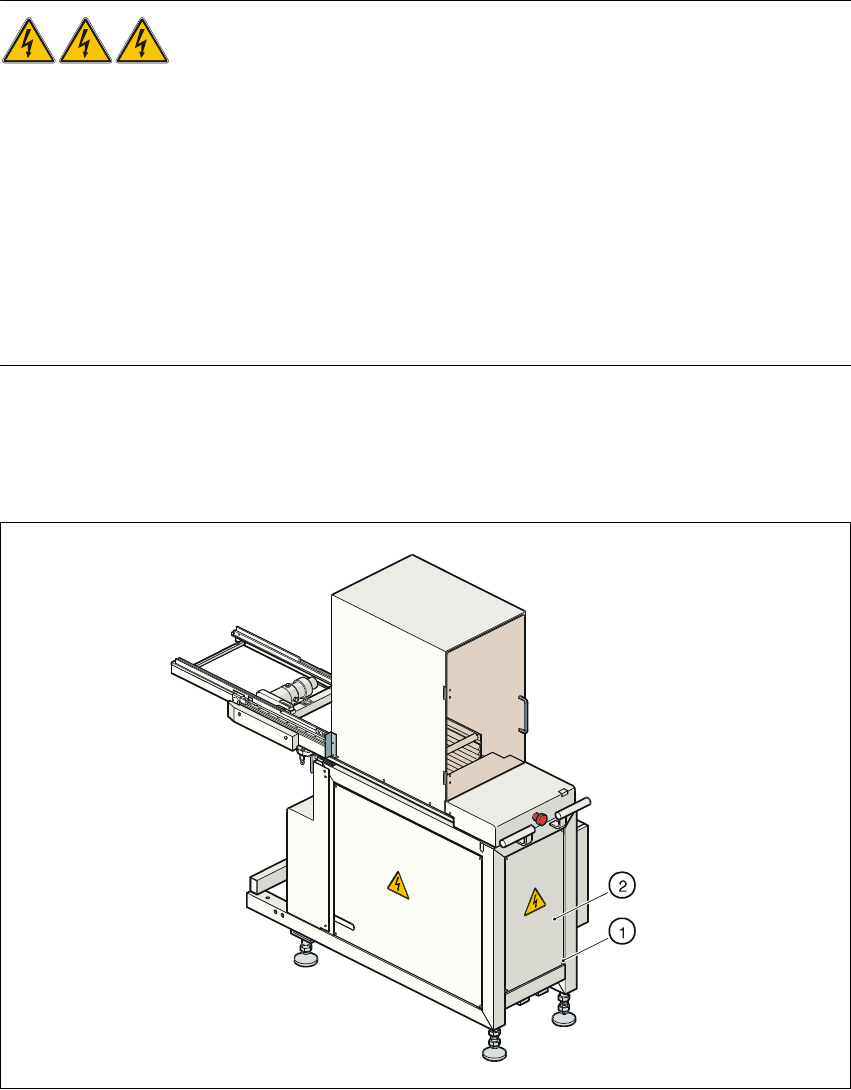
Å Loosen the four hexagon socket-head screws (item 1 in Fig. 8 - 1) at the back of the wafflepack
changer.
Å Remove the cover plate (item 2 in Fig. 8 - 1).
Fig. 8 - 1 Wafflepack changer - accessing the power supply unit

Conversion Instructions S-20/S-23 HM/F4/F5 Power supply
09/99 edition
35
Å Remove the two jumpers between terminals 1U2 - 1V2 and 1V2 - 1W2 (see Fig. 8 - 2).
Fig. 8 - 2 Wafflepack changer transformer T1, connection: 3 x 400 VAC
8
Å Place three jumpers between the following terminals:
1U1 → 1W2 BR5 (see Fig. 8 - 3)
1U2 → 1V1 BR7 (see Fig. 8 - 3)
1V2 → 1W1 BR6 (see Fig. 8 - 3)
Å Finally, replace the cover on the back of the wafflepack changer.