4OM-1011-002.pdf - 第25页
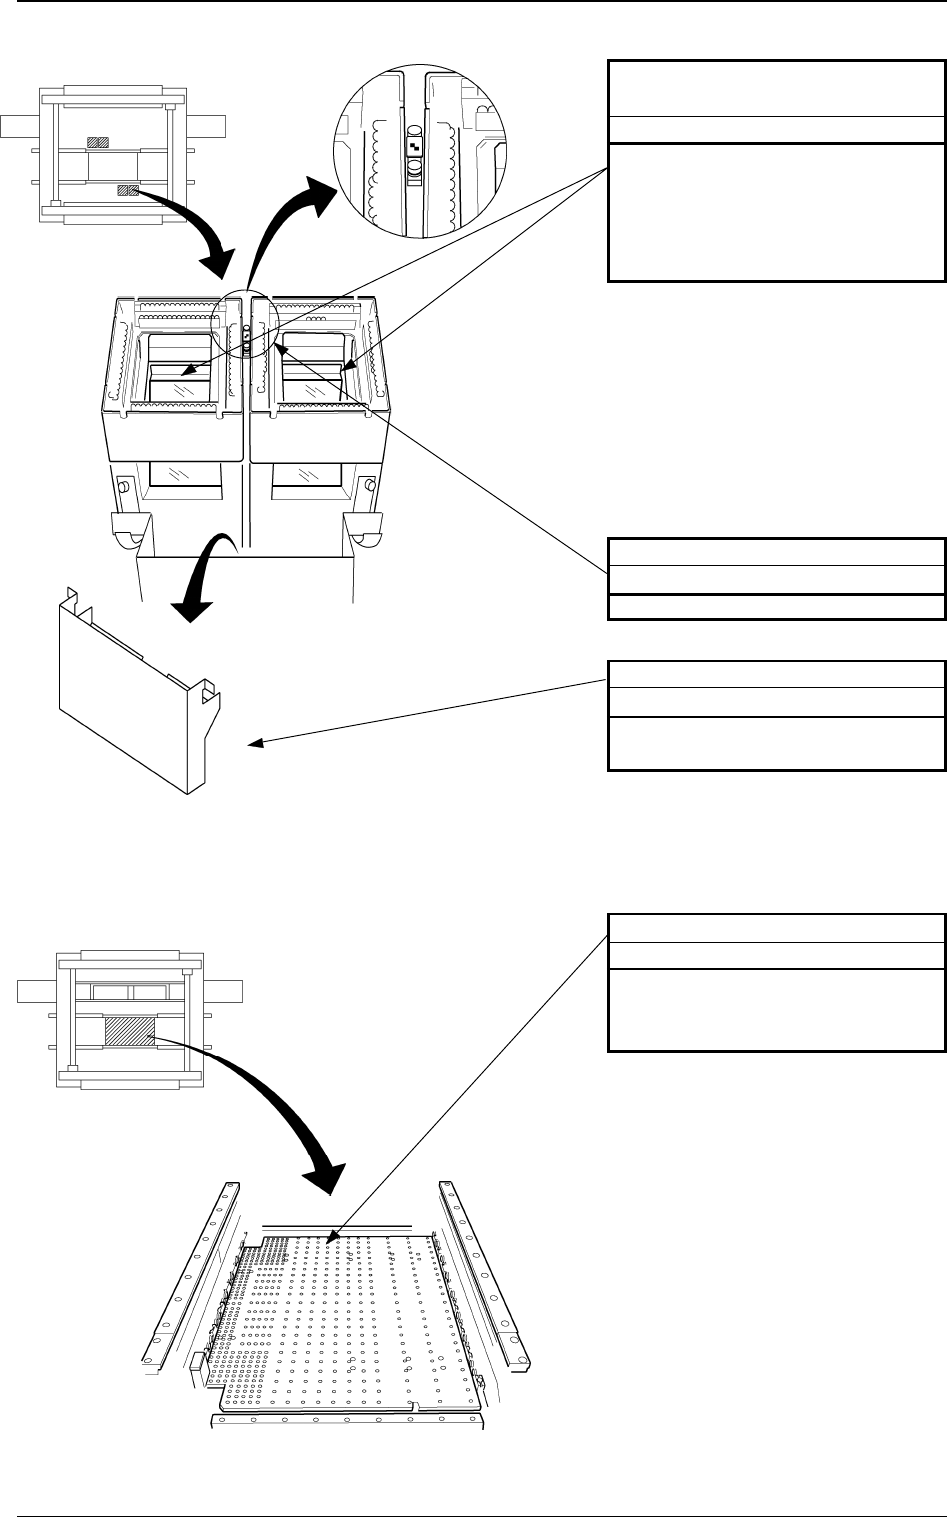
0305-001 Tg0860-PM-MM 5. Weekly Maintenance 1-10 Fig. 4A15 PCB Positioning Section Upper Surface of Fiducial Mark Cleaning Remove dirt and dust using a rag. Component Discharge Box Abandonment Remove the components accum…
0305-001 Tg0860-PM-MM
5. Weekly Maintenance
Table 4A6
5. Weekly Maintenance
1-9
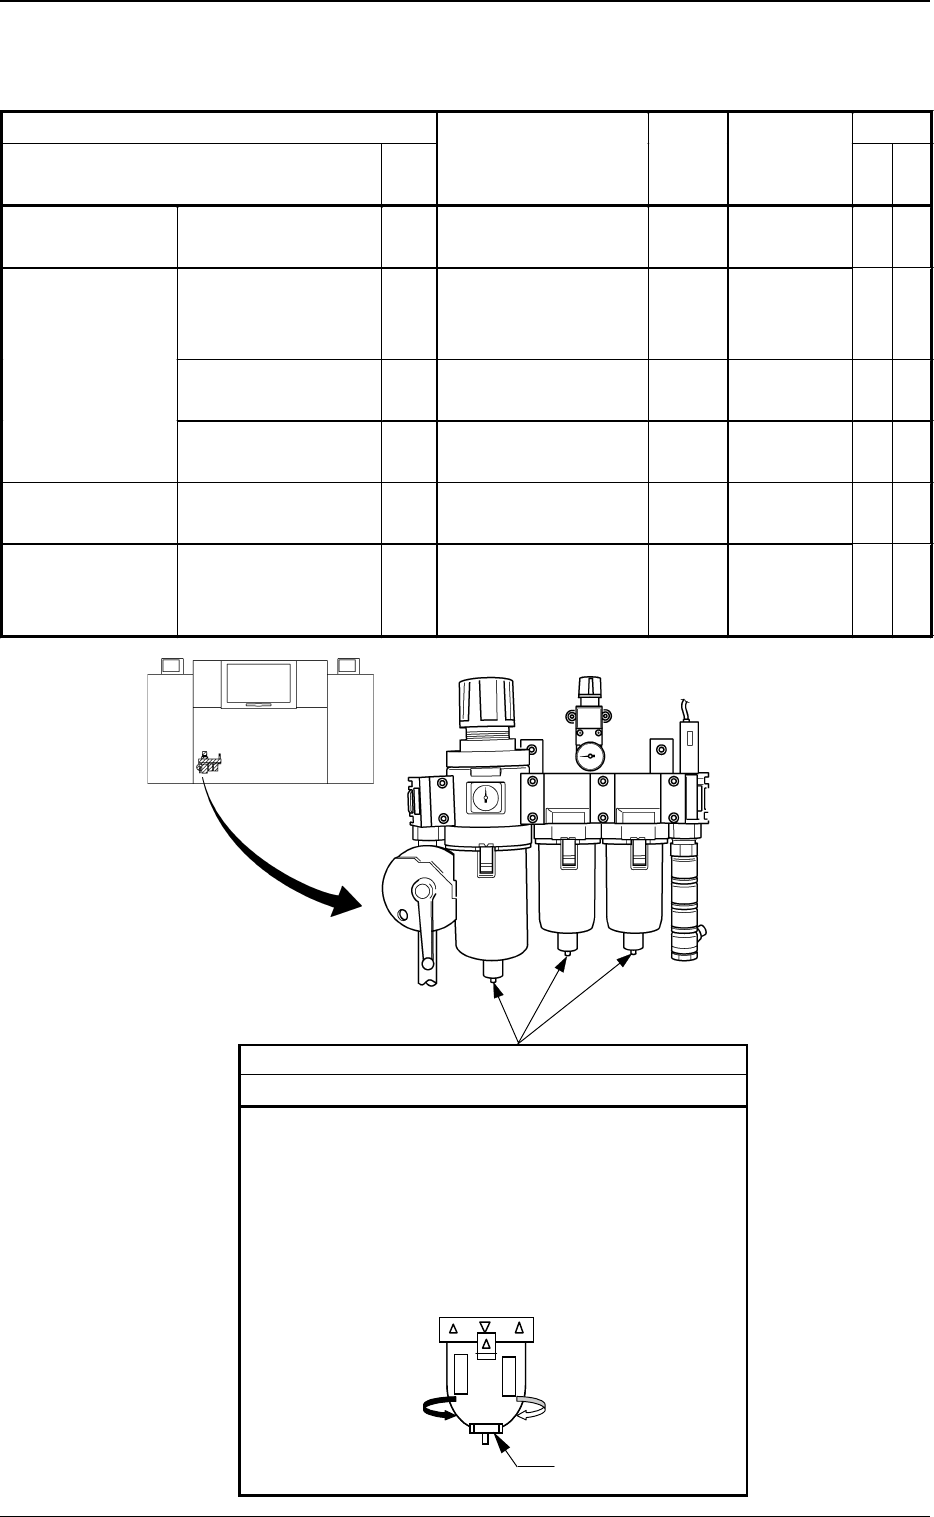
Beam A Side
Drain
Cleaning
Drain water according to the following procedure.
(1) Place a container under the drain outlet.
(2) Turn slowly the cap on the bottom of the outer case
of each air filter in the direction of Arrow A.
Note: Take the greatest care because dirty water will
splash out from the outlet if the cap is turned
too much.
Ca
p
A
Fig. 4A13 Air Regulator
Maintenance Spots Check
Name
Fig.
No.
Description Grease
Cleaning
Tools,
Nozzles, etc.
Air Regulator Drain 4A13 Cleaning − − − Container,
etc.
Component
Recognition
Section
Protective Glass of
the Component
Recognition Camera
4A14 Cleaning − − − Rag, Air
Blow for
Camera
Upper Surface of
Fiducial Mark
4A14 Cleaning − − − Rag
Component Discharge
Box
4A14 Abandonment − − − − − − − − −
PCB Positioning
Section
Upper Surface of
Backup Table
4A15 Cleaning − − − Vacuum
Cleaner
Component
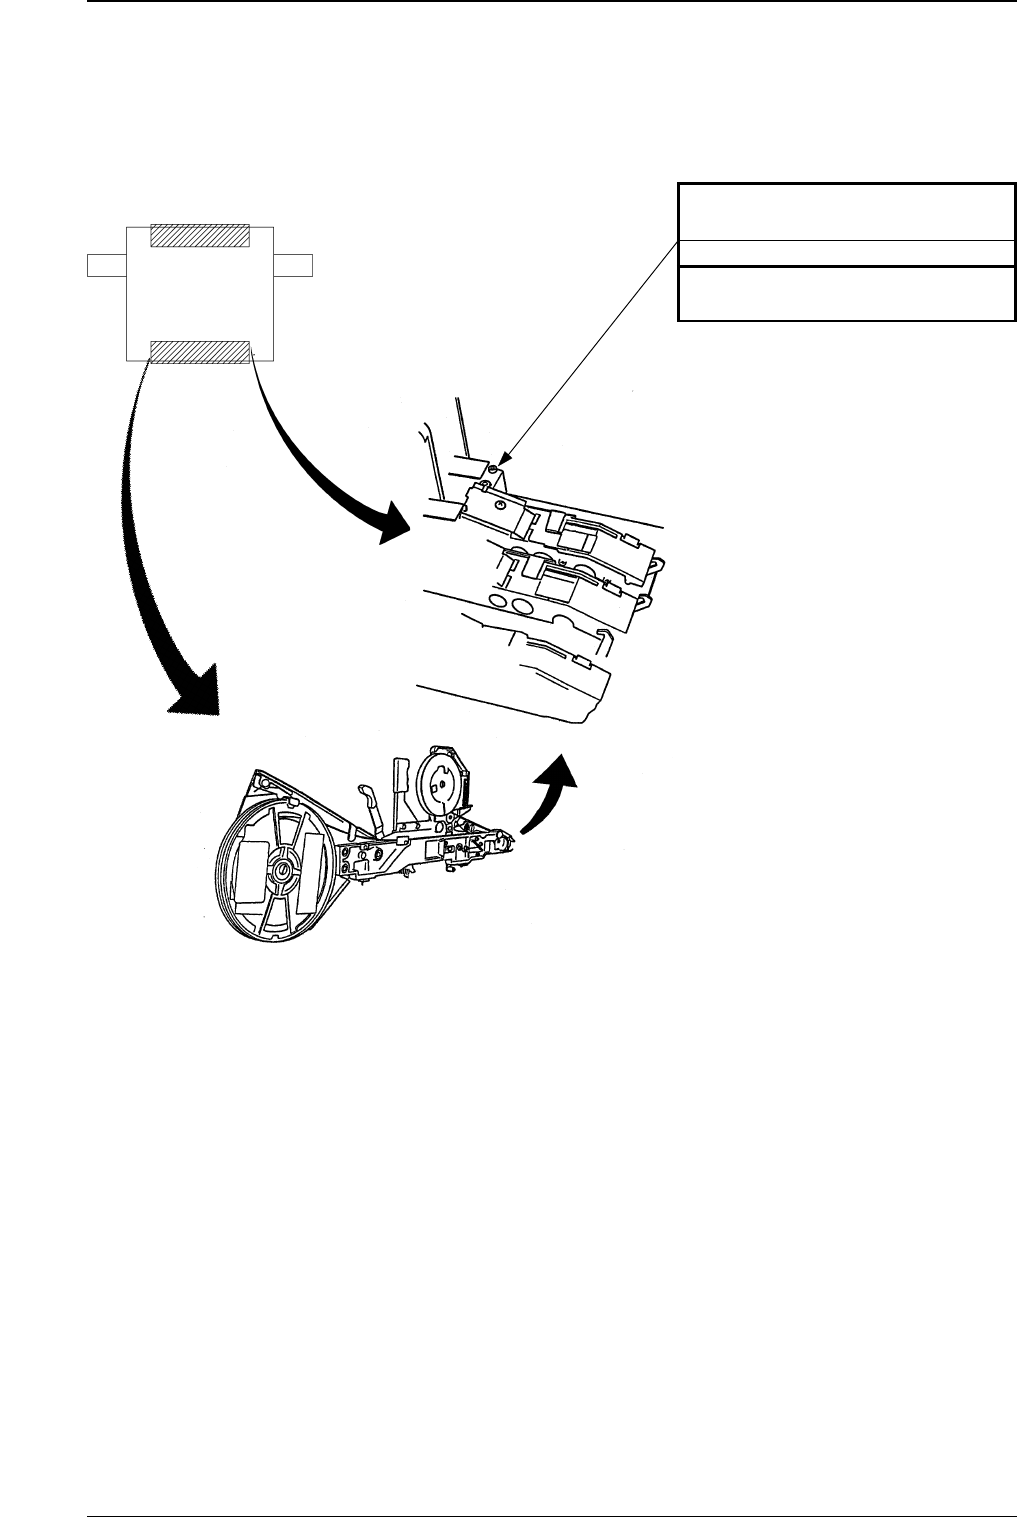
Supply Section
(Feeder)
Component Pick-Up
Position of Tape
Feeder
4A16 Cleaning − − − − − − − − −
0305-001 Tg0860-PM-MM
5. Weekly Maintenance
1-10
Fig. 4A15 PCB Positioning Section
Upper Surface of Fiducial Mark
Cleaning
Remove dirt and dust using a rag.
Component Discharge Box
Abandonment
Remove the components accumu-
lated in the box.
Protective Glass of the Compo-
nent Recognition Camera
Cleaning
Drop dirt and dust into the compo-
nent discharge box using the air blow
for the camera. If the protective glass
is dirty with grease, remove it using
a rag.
Fig. 4A14 Component Recognition Section
Beam A Side
Beam B Side
Beam A Side
Beam B Side
PCB Positioning Section
Cleaning
Clean dirt and dust on the upper sur-
face of the PCB backup table using a
vacuum cleaner.
0305-001 Tg0860-PM-MM
5. Weekly Maintenance
1-11
Component Pick-Up Position of
Tape Feeder
Cleaning
Remove adhering dirt, etc., with a
brush whenever necessary.
Fig. 4A16 Component Supply Section (Feeder)
Beam A Side
Beam B Side