4OM-1011-002.pdf - 第35页
0305-001 Tg0860-PM-MM 1-20 Fig. 4A26 Clamp Sections of T ray T raverse Cam Follower Cleaning and Lubrication (DE1) (1) W ipe off old grease with an oiled rag. Note: T ake care not to leave any waste thread. ( 2) Apply ne…
0305-001 Tg0860-PM-MM
1-19
Nipple
Nipple
Nipple
Nipple
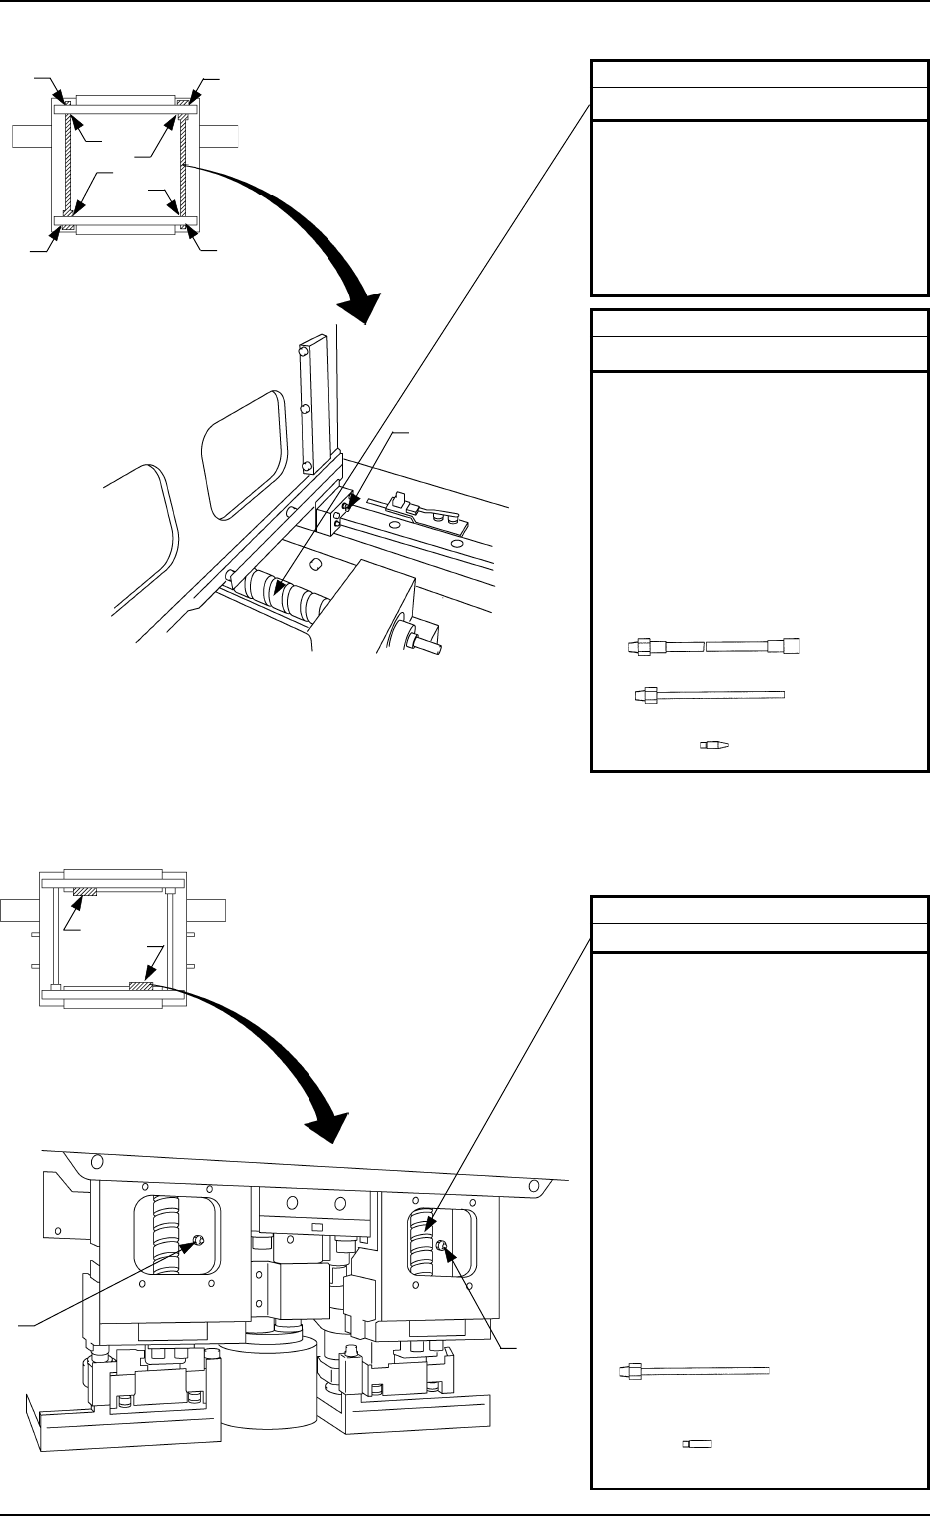
Fig. 4A24 X/Y Beam (Beams A and B) Y-Axis
Beam A Side
Beam B Side
Fig. 4A25 Placement Head
Y-Axis Ball Screw
Cleaning and Lubrication (DE1)
(1) Wipe off old grease with an oiled
rag.
Note: Take care not to leave
any waste thread.
(2) Apply new grease by hand or with
a brush.
Y-Axis Linear Guide
Cleaning and Lubrication (DE1)
(1) Wipe off old grease with an oiled
rag.
Note: Take care not to leave
any waste thread.
(2) Lubricate the 8 nipples with new
grease from a grease gun.
Note: The attachments to be
used are SPK-3C, U
type and P type.
SPK-3C
U Type
P Type
Ball Screw and Linear Guide
Cleaning and Lubrication (DE1)
(1) Wipe off old grease with an oiled
rag.
Note: Take care not to leave
any waste thread.
(2) Lubricate the 4 nipples with new
grease from a grease gun.
Notes: (a) For the lubrication
procedure, refer to
“10.1 Placement
Head and PCB Posi-
tioning Section”.
(b) The attachments to
be used are U type
and N type.
U Type
N Type
Nipple
Nipple
Beam A Side
Beam B Side
Nipple
Nipple
2 nipples
2 nipples
Nipple
Nipple
Nipple
7. Maintenance (Every 3 Months after Initial Maintenance in 1 Month)
0305-001 Tg0860-PM-MM
1-20
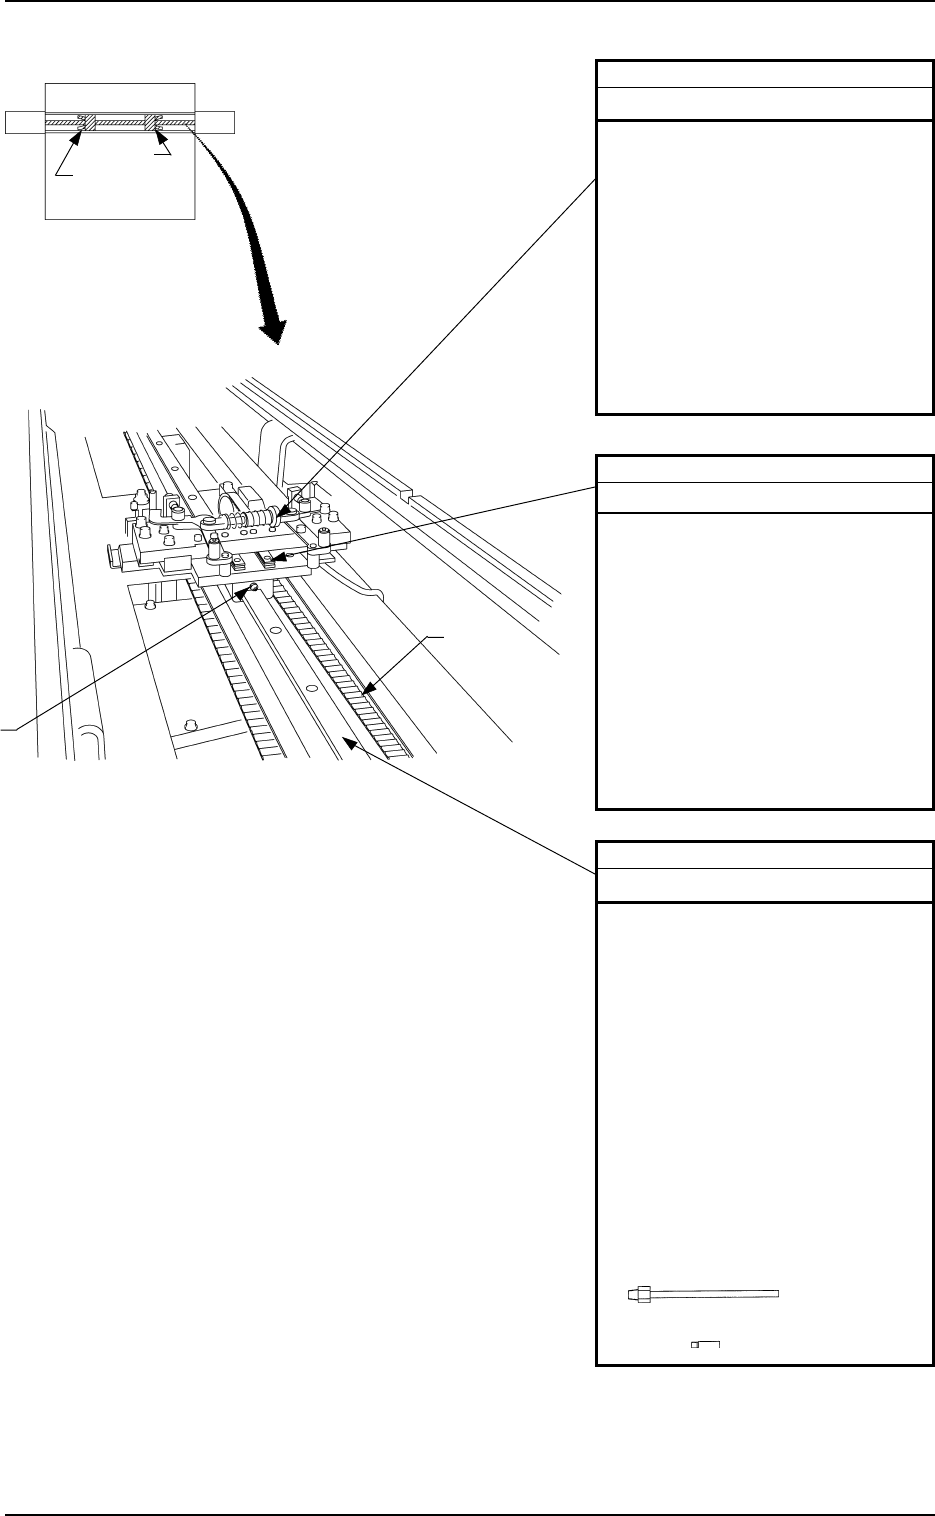
Fig. 4A26 Clamp Sections of Tray Traverse
Cam Follower
Cleaning and Lubrication (DE1)
(1) Wipe off old grease with an oiled
rag.
Note: Take care not to leave
any waste thread.
(2) Apply new grease by hand or with
a brush.
Note: For the lubrication
procedure, refer to
“10.2 Traverse Clamp
Section”.
Large Linear Guide
Cleaning and Lubrication (DE1)
(1) Wipe off old grease with an oiled
rag.
Note: Take care not to leave
any waste thread.
(2) Lubricate the 2 nipples with new
grease from a grease gun.
Notes: (a) For the lubrication
procedure, refer to
“10.2 Traverse
Clamp Section”.
(b) The attachments to
be used are U type
and N type.
Small Linear Guide
Cleaning and Lubrication (DE1)
(1) Wipe off old grease with an oiled
rag.
Note: Take care not to leave
any waste thread.
(2) Apply new grease by hand or with
a brush.
Note: For the lubrication
procedure, refer to
“10.2 Traverse Clamp
Section”.
Beam A Side
Beam B Side
Nipple
Nipple
Nipple
Belt
U Type
N Type
7. Maintenance (Every 3 Months after Initial Maintenance in 1 Month)

0305-001 Tg0860-PM-MM
1-21
Air Filters
Cleaning
(1) Remove the air filter.
Align the mark with the release position by pressing
and turning the button at the same time. Then, draw the
outer case downward to remove. Remove the inner air
filter by turning it in the direction of Arrow A.
(2) Blow off dust with compressed air.
(3) Mount the air filter.
Mount the air filter turning it in the direction of Ar-
row B.
Mount the outer case and at the same time press and
turn the button to align the mark with the locking
position.
Button
Lock
Unlock
B
A
Table 4A9
8. Maintenance (Every 3 Months)
8. Maintenance (Every 3 Months)
Fig.4A27 Air Regulator
Maintenance Spots Check
Name
Fig.
No.
Description Grease
Cleaning
Tools,
Nozzles, etc.
Air Regulator Air Filters 4A27 Cleaning − − − Air Gun
Vacuum Pressure
System
Aggregated Vacuum
Filter
4A28 Cleaning − − − Air Gun
Control Box Dust Filter 4A29 Cleaning − − − Vacuum
Cleaner
Beam A side