4OM-1011-002.pdf - 第88页
0305-001 Tg0860-PM-MM • Each message is arranged and recalled in a time series. • Mark (green) shows an error ocurred during operation. How to Delete the Recalled Messages (1) Press the [DELETE MESSAGE] key A. The key tu…
0305-001 Tg0860-PM-MM
4. RECALL MESSAGES Display
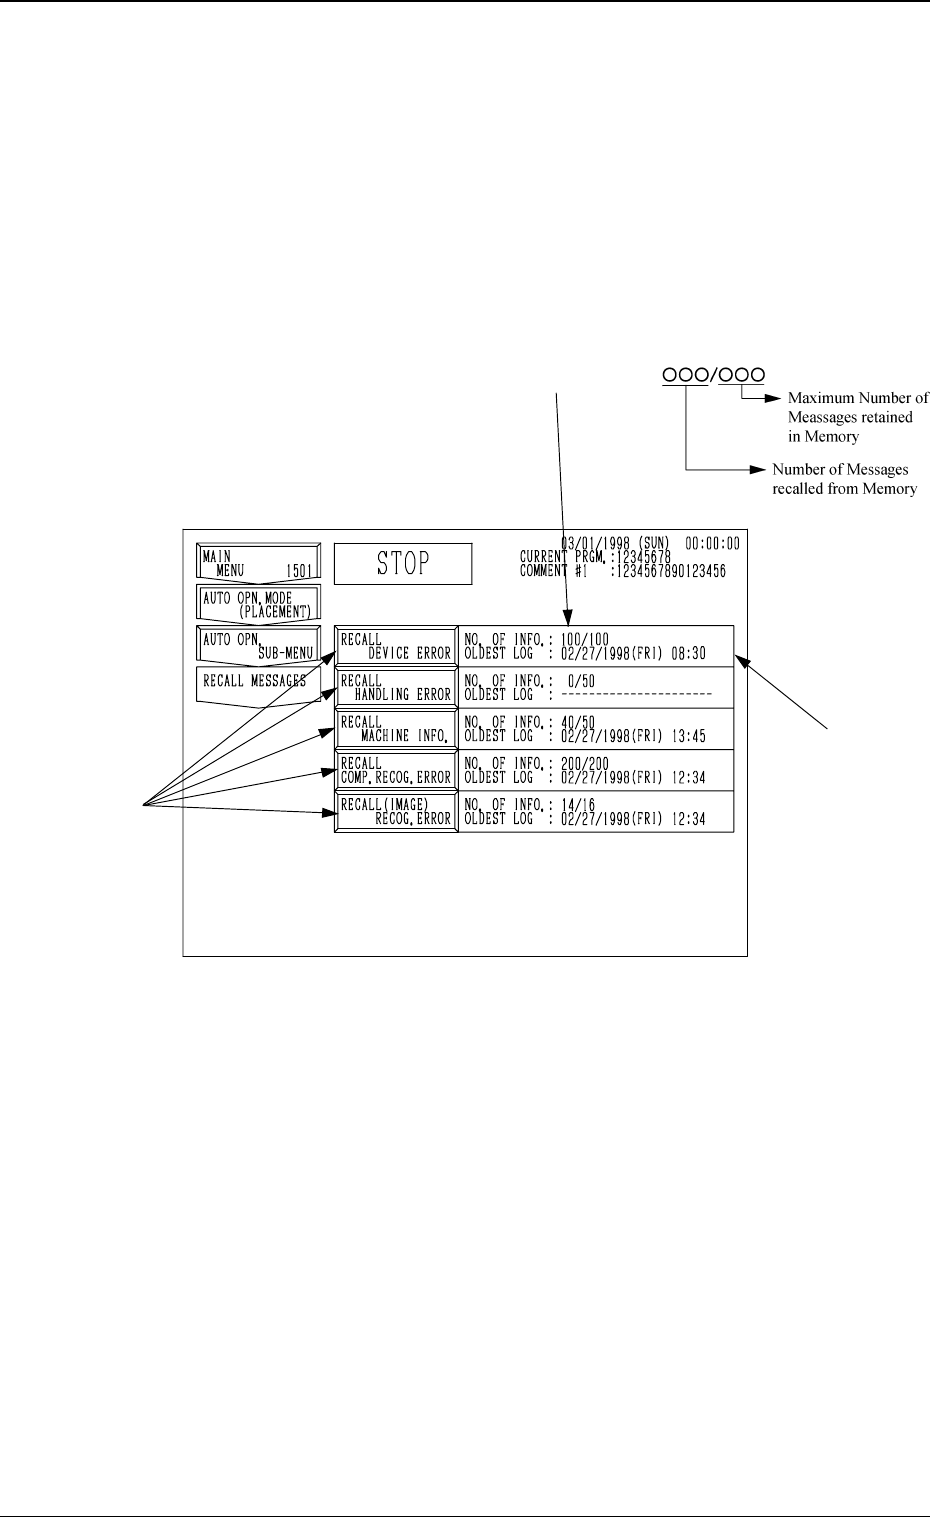
Menus are provided to recall device errors, handling errors, recognition errors,
and machine information which occurred in the past.
When the [RECALL MASSAGES] key is pressed at the “SPECIAL SEL.”
display, the following display appears on the screen.
This display can also be opened from the “AUTO OPN. SUB-MENU”
display.
*1 NO. OF INFO.
Shown is the number of information messages retained in the current memory
area. The numerator shows the number of retained messages and the de-
nominator the maximum number of retainable messages in memory.
*2 OLDEST LOG
Shown is the oldest date and time for the currently retained information
messages.
When no information message is retained in memory, “--------” appears.
• When one of the keys A is selected, the corresponding display appears on
the screen. The “RECALL DEVICE ERROR”, “RECALL HANDLING
ERROR”, “RECALL MACHINE INFO.”, “RECALL COMP. RECOG.
ERROR”, or “RECALL (IMAGE) RECOG. ERROR” display (Figs. 4C44
through 4C48) will appear accordingly.
3-36
4. RECALL MESSAGES Display
Fig. 4C43
*1
*2
A

0305-001 Tg0860-PM-MM
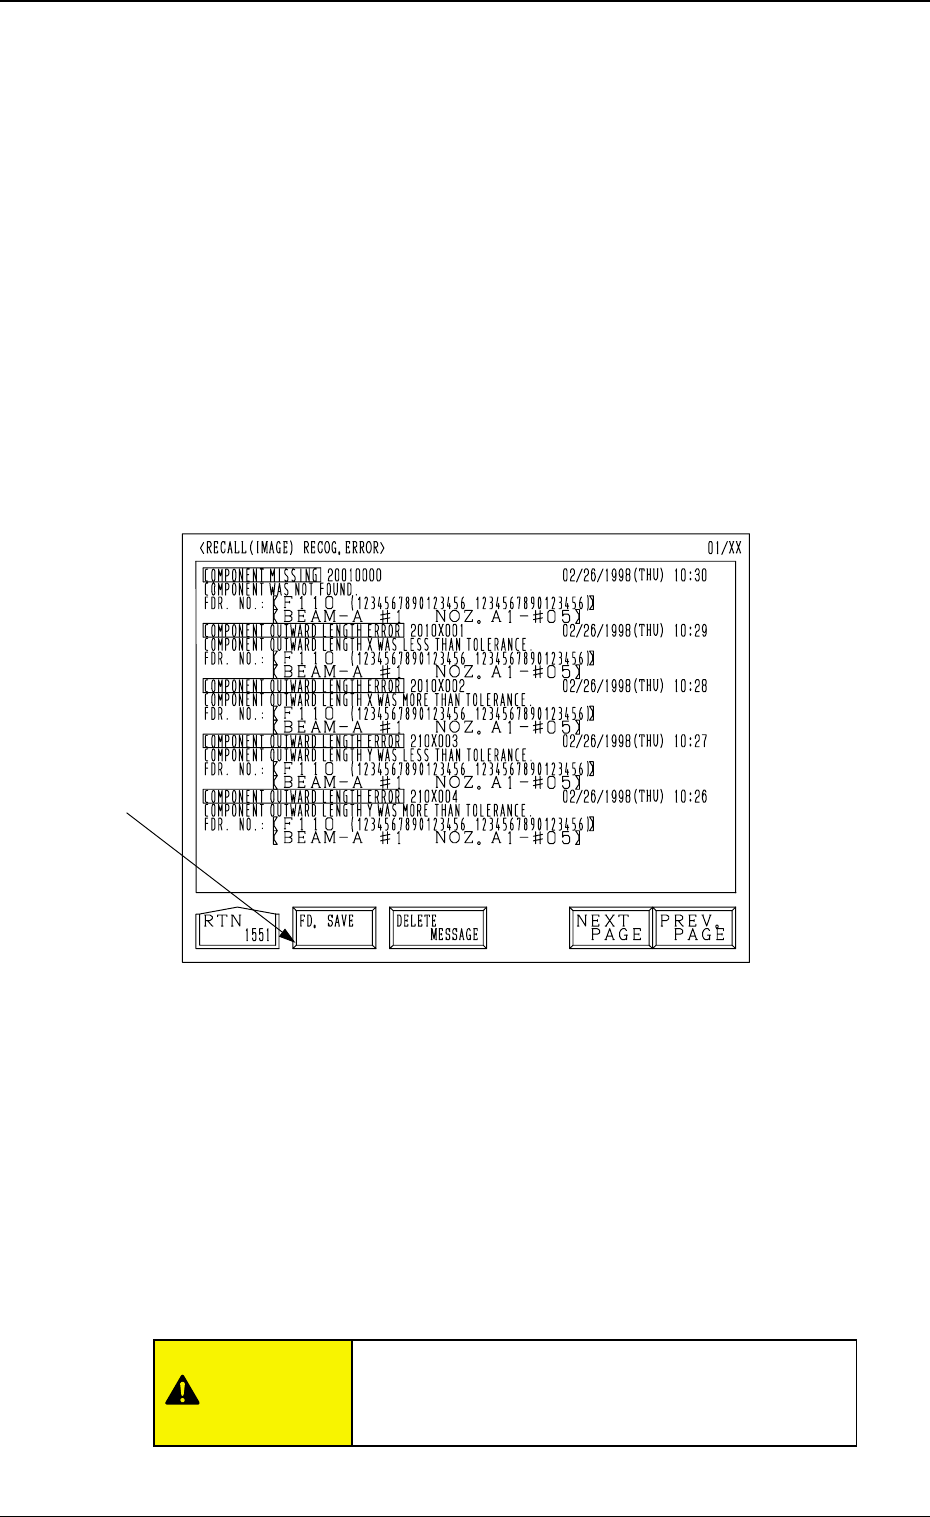
• Each message is arranged and recalled in a time series.
• Mark (green) shows an error ocurred during operation.
How to Delete the Recalled Messages
(1) Press the [DELETE MESSAGE] key A.
The key turns red, indicating that the delete mode is set.
The [DELETE] key B appears beside the [DELETE MESSAGE] key as
shown in Fig. 4C49.
(To cancel the delete mode, press the [DELETE MESSAGE] key again.)
(2) When the [DELETE] key is pressed, the registered information messages
are deleted and the “RECALL MESSAGES” display (Fig. 4C43) appears
on the screen.
Fig. 4C48
Fig. 4C46
Fig. 4C45
Fig. 4C44
Fig. 4C47
3-37
4. RECALL MESSAGES Display
A
B
Fig. 4C49
0305-001 Tg0860-PM-MM
4.1 Error Image Save Function
When the “RECALL (IMAGE) RECOG. ERROR”(Fig. 4C48) display appears
on the screen, an error image appears on the recognition monitor.
Error images can be saved on a floppy disk and sent to us for error analysis.
• To activate this function, set “SAVE” in the “FUNCTION” data box at the
“RECOGNITION ERROR IMAGE SAVE SET-UP” display.
Refer to “3. RECOGNITION ERROR IMAGE SAVE SET-UP Display of
Section 4 in Volume 2” for details.
To save a recognition error image on a floppy disk
(1) When the [RECALL (IMAGE) RECOG. ERROR] key is pressed at the
“RECALL MESSAGES” display, the following display appears on the
screen and an error image appears on the recognition monitor.
(2) Insert a formatted floppy disk (FD) into the floppy disk drive (FDD) on
the front console panel.
(3) When the [FD. SAVE] key A in Fig. 4C50 is pressed, the image on the
recognition monitor is saved on the floppy disk (FD).
• Up to 3 image planes (resolution: 100 %) can be saved on one piece of
floppy disk. (Excluding any divided recognition error)
(4) When the access lamp of the FDD extinguishes, it indicates that data is
saved completely.
Press the eject button and take out the floppy disk from the disk drive.
3-38
4.1 Error Image Save Function
Fig. 4C50
A
CAUTION
Do not press the eject button of the disk drive when
the access lamp is ON. Otherwise, the data stored
on the inserted floppy disk may be corrupted.