Oxford-100-Manual.pdf - 第86页
PiasmaiabSystem100 Oxford Instruments Plasma Technology System Manual 5.4.9 11) When the 'Process Complete' message is displayed, select the Pump Control page and move the wafer from the process chamber to the …
System
Manual
Oxford
Instruments
Plasma
Technology
PlasmalabSystem
100
5.4.8
Manual
process
run
1)
Insert
the
wafer
into
the
Automatic
load lock.
(If
necessary,
vent
the
Automatic
load
lock
by
selecting
the
STOP
button
then
the
VENT
button).
2)
Close
the
Automatic
load
lock lid.
3)
Select
the
Automatic
load lock's EVACUATE
button.
A
dialogue
box
will
be
displayed
allowing
entry
of
a
Wafer
Name,
if
any.
4)
Check
that
the
system has
pumped
down
to
base pressure. (The process chamber
message panel should display 'Base Pressure reached').
5)
Select
the
Process menu,
then
the
Chamber 1
option.
Set
the
parameters
as
required,
e.g. Step Time,
RF
generator
power, chiller
temperature,
chamber pressure, and
gas
demands.
6)
Ensure
that
the
Automatic
load lock
is
at
the
required
pressure. (Check
the
relevant
panels
on
the
Pump
Control
page). Green 'ready
for
transfer'
indicators (
....
~)
are
displayed on each chamber mimic
when
it
is
available
for
vacuum transfer.
7)
On
the
Pump
Control
page, click on
the
Automatic
load lock
wafer
mimic. The Robot
Control
page
is
displayed
(see
Fig 5.13, page 5-36).
8)
Click
on
the
Process Chamber
wafer
mimic. The
wafer
is
transferred
from
the
Automatic
load lock
into
the
Process
Chamber.
9)
On
the
Chamber 1 process page, check
that
the
set parameters are correct
for
your
required
process.
10) Click
the
START
button.
(Note
that
if
this
button
is
not
active,
the
chamber has
not
reached base pressure.) The process
will
commence.
NOTES:
a)
You
can pause
the
process
at
any
time
by
selecting
the
PAUSE
button.
This
will
cause
the
Step Time and
the
plasma
power
to
stop
with
the
current
step
time
indicated. Re-starting
the
process
will
cause
the
process
to
continue
from
the
time
it
was paused. If,
during
the
pause period, you change any
of
the
process parameters, e.g. gas demand, pressure etc.,
you
must press
the
START
button
for
the
changes made
to
come
into
effect, this
will
cause
the
step
timer
to
continue
from
the
time
it
was paused.
b)
You
can stop
the
process
at
any time;
the
message 'Process Complete'
will
be
displayed,
if
required,
you
can
then
run
the
same
or
another
process.
WARNING
CONTACT WITH TOXIC GASES CAN CAUSE DEATH OR SERIOUS INJURY.
WHERE
ANY
PROCESS GAS IS TOXIC,
DO
NOT TRANSFER A WAFER FROM
THE
PROCESS CHAMBER TO
THE
LOAD LOCK UNTIL ALL PROCESS GAS HAS BEEN
PUMPED OUT.
ENSURE THAT THE AUTOMATIC VENT SEQUENCE IS ALLOWED TO COMPLETE.
IF THESE PRECAUTIONS ARE NOT CARRIED OUT,
THERE
COULD
BE
A HAZARD
IN
THE
LOAD LOCK.
Printed: 22-Mar-06, 10:42
Operating
Instructions
Page 5-19
of
52
UC
Davis 94-721001
Issue
1:
March 06
PiasmaiabSystem100
Oxford
Instruments
Plasma
Technology
System
Manual
5.4.9
11)
When
the
'Process
Complete'
message
is
displayed, select
the
Pump
Control
page
and
move
the
wafer
from
the
process chamber
to
the
Automatic
load lock using
the
same
method
as
the
transfer in.
12) Open
the
Automatic
load lock's lid and remove
the
wafer.
13)
If
required,
the
system can
now
be vented,
see
sub-section 5.4.9 page 5-20.
Venting
the
system
WARNING
CONTACT WITH TOXIC GASES CAN CAUSE DEATH OR SERIOUS INJURY.
BEFORE
VENTING THE PROCESS CHAMBER, ALWAYS ENSURE THAT THE SYSTEM IS
ADEQUATELY PURGED
AND
PUMPED.
Do
not
vent
a system
which
has used toxic gases unless
the
system has been
adequately
pumped
first.
For example:
Gases
having Threshold
Limit
Values
(TLVs)
of
1
ppm
or
below,
e.g.
Chlorine,
require
at
least 20
minutes
pumping
before
venting.
After
venting,
there
may
still be residual gases in
the
process chamber. Consider
wearing
suitable personal
protection,
e.g. a respirator.
To
vent
the
system, use
the
following
steps.
1)
From
the
System menu, select
the
Pumping
option.
2)
On
the
Pump Control page, select
the
STOP
button
then
the
VENT
button
for
each
chamber.
Note
that
the
vent
sequence
is
controlled
by
a
timer
to
allow
time
for
the
turbo
pumps
to
'spin'
down.
3)
When
all
of
the
'Vent
Time
Left'
timers have decremented
to
zero, all
of
the
pumps
have been switched
off
automatically, and
the
complete
system has been vented.
Do
not
attempt
to
open
the
process chamber lid
until
the
vacuum switch has changed status,
i.e.
to
its high-pressure status (In this
condition,
on
the
Pump Control page
the
vacuum status
field
will
display 'FAULT').
UC
Davis 94-721001
Issue
1:
March 06
Operating
Instructions
Page 5-20
of
52
Printed: 22-Mar-06. 10:42
System
Manual
Oxford
Instruments
Plasma
Technology
PlasmalabSystem1
00
5.5
Creating
and
editing
recipes
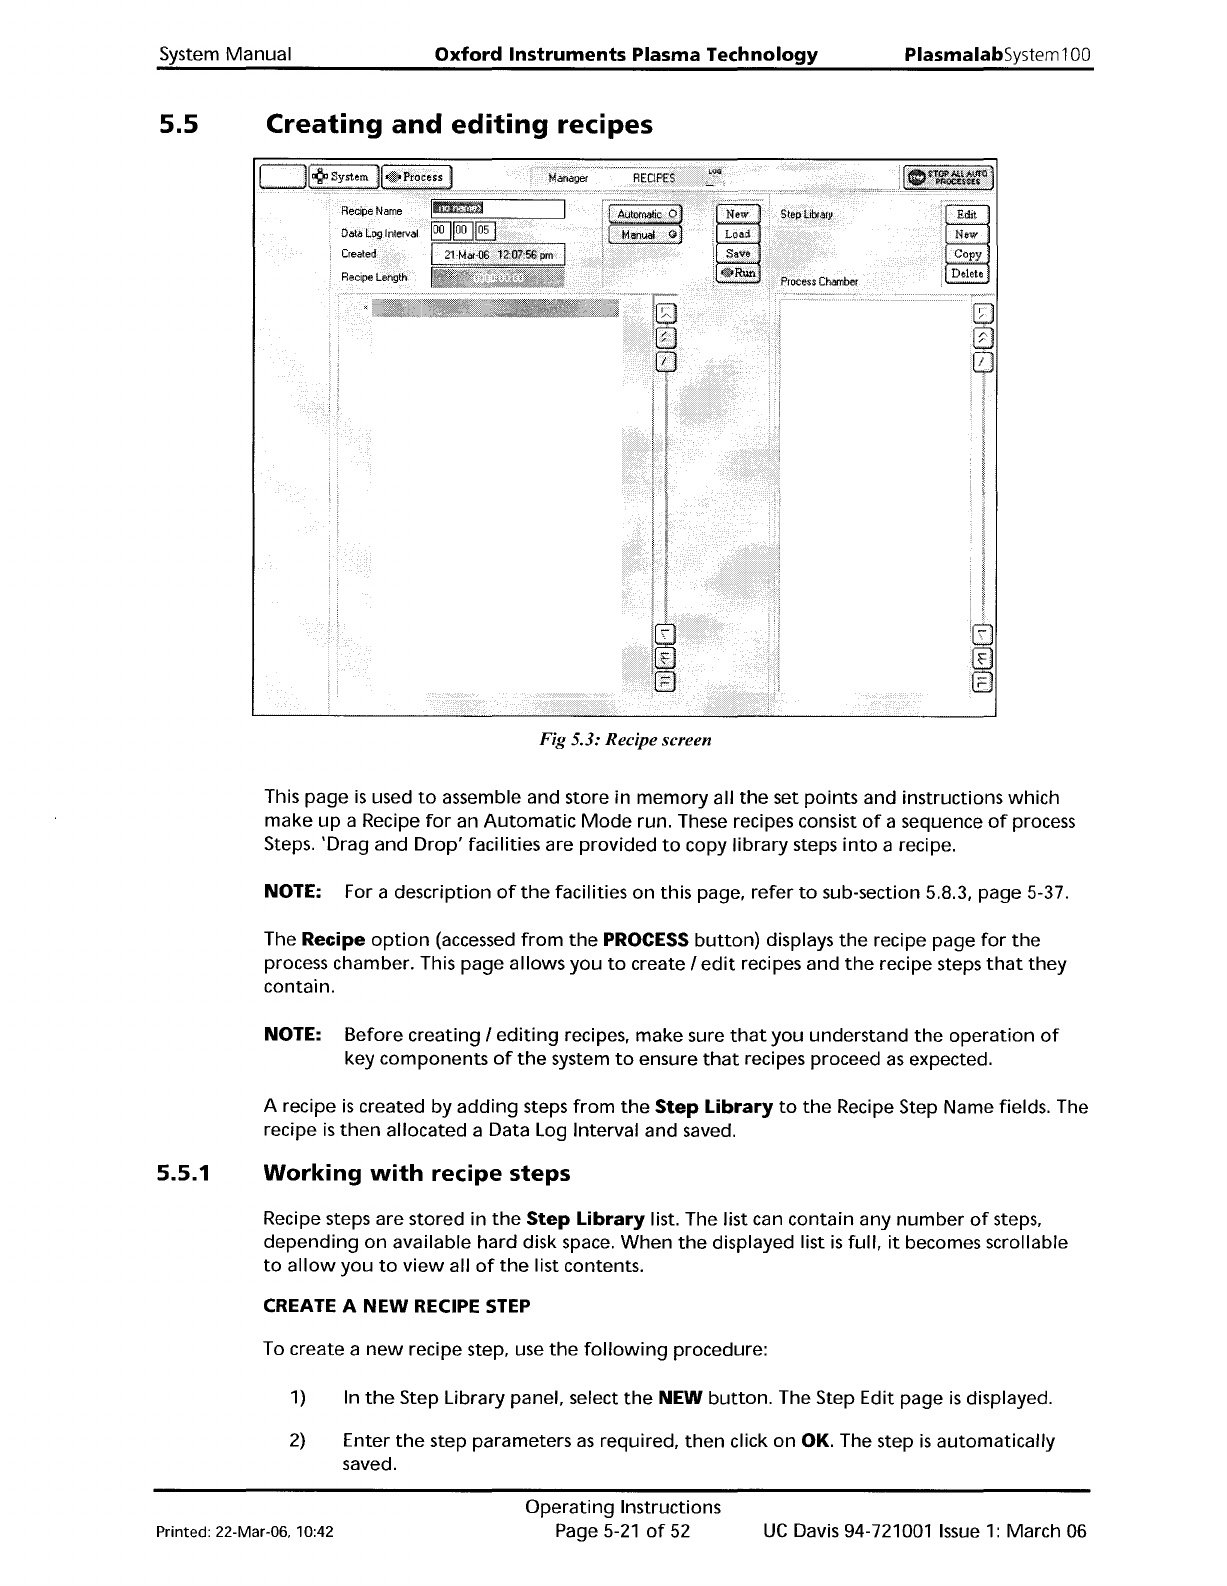
Fig 5.3: Recipe screen
This
page
is
used
to
assemble and store in
memory
all
the
set
points
and instructions
which
make
up
a Recipe
for
an
Automatic
Mode
run. These recipes consist
of
a sequence
of
process
Steps.
'Drag
and
Drop'
facilities are
provided
to
copy
library
steps
into
a recipe.
NOTE: For a description
of
the
facilities
on
this page,
refer
to
sub-section 5.8.3, page 5-37.
The Recipe
option
(accessed
from
the
PROCESS
button)
displays
the
recipe page
for
the
process chamber. This page allows
you
to
create I
edit
recipes and
the
recipe steps
that
they
contain.
NOTE:
Before
creating I
editing
recipes,
make
sure
that
you
understand
the
operation
of
key components
of
the
system
to
ensure
that
recipes proceed
as
expected.
A recipe
is
created
by
adding
steps
from
the
Step
Library
to
the
Recipe Step Name fields. The
recipe
is
then
allocated a Data Log Interval and saved.
5.5.1
Working
with
recipe steps
Recipe steps are stored in
the
Step
Library
list. The list can
contain
any
number
of
steps,
depending
on
available hard disk space.
When
the
displayed list
is
full,
it
becomes scrollable
to
allow
you
to
view
all
of
the
list contents.
CREATE A
NEW
RECIPE
STEP
To create a
new
recipe step, use
the
following
procedure:
1)
In
the
Step Library panel, select
the
NEW
button.
The Step Edit page
is
displayed.
2)
Enter
the
step parameters
as
required,
then
click
on
OK. The step
is
automatically
saved.
Printed: 22-Mar-06. 10:42
Operating
Instructions
Page
5-21
of
52
UC
Davis 94-721001
Issue
1:
March 06