ASM_Guide To Adhesive Dot Dispensing_Stinger_en_0321_online.pdf - 第20页
2 STINGER, A GUIDE TO ADHESIVE DOT DISPENSING 2.3 SOFTWARE INTERFACE 20 GUIDE TO ADHESIVE DOT DISPENSING STINGER 03/2021 Purging can take place on either an area of the product or in the purge station. NOTE Details of se…
2 STINGER, A GUIDE TO ADHESIVE DOT DISPENSING
2.3 SOFTWARE INTERFACE
GUIDE TO ADHESIVE DOT DISPENSING STINGER 03/2021 19
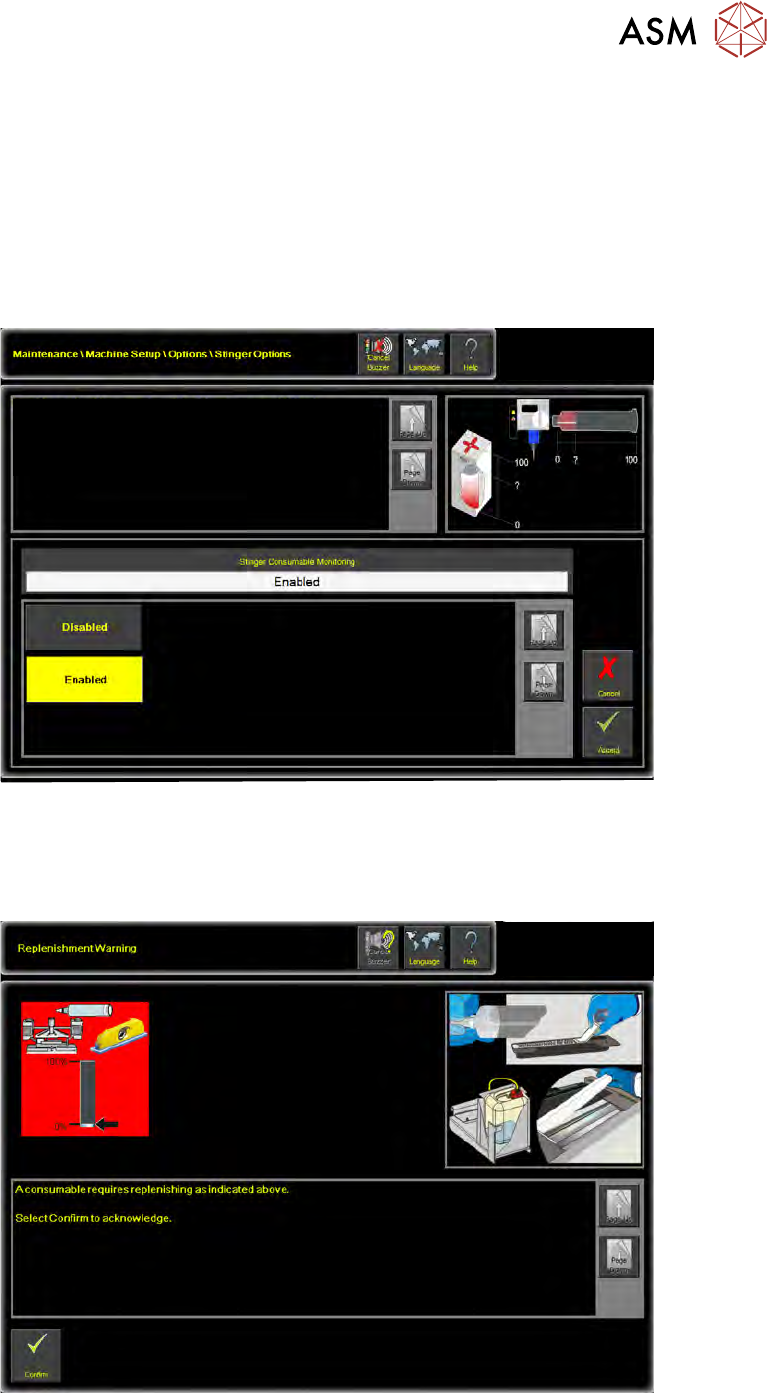
2.3.2.1 Stinger Consumable Monitoring
Stinger Consumable Monitoring enables the reporting of the consumable level - adhesive in the
syringe or spent adhesive in the purging station.
As the level of the adhesive diminishes in the syringe, a capacitive sensor at the end of the syringe
detects this; Sensors and Motors section of the manual refers. The low level of adhesive is repor-
ted in a consumable warning window.
1. Select Stinger Consumable Monitoring.
2. Select Enabled.
This parameter enables or disables the reporting of Stinger Consumable
Material level.
Additional Information
A measure is taken for both the purge pot (if fitted) and the syringe.
3. Select Accept.
With this functionality enabled, the user is expected to confirm acknowledgement of the consum-
able warning and can elect to take further action, such as, stop the print run to open the printer
cover and replace the syringe. Refer to the Product Changeover section of this manual.
2 STINGER, A GUIDE TO ADHESIVE DOT DISPENSING
2.3 SOFTWARE INTERFACE
20 GUIDE TO ADHESIVE DOT DISPENSING STINGER 03/2021
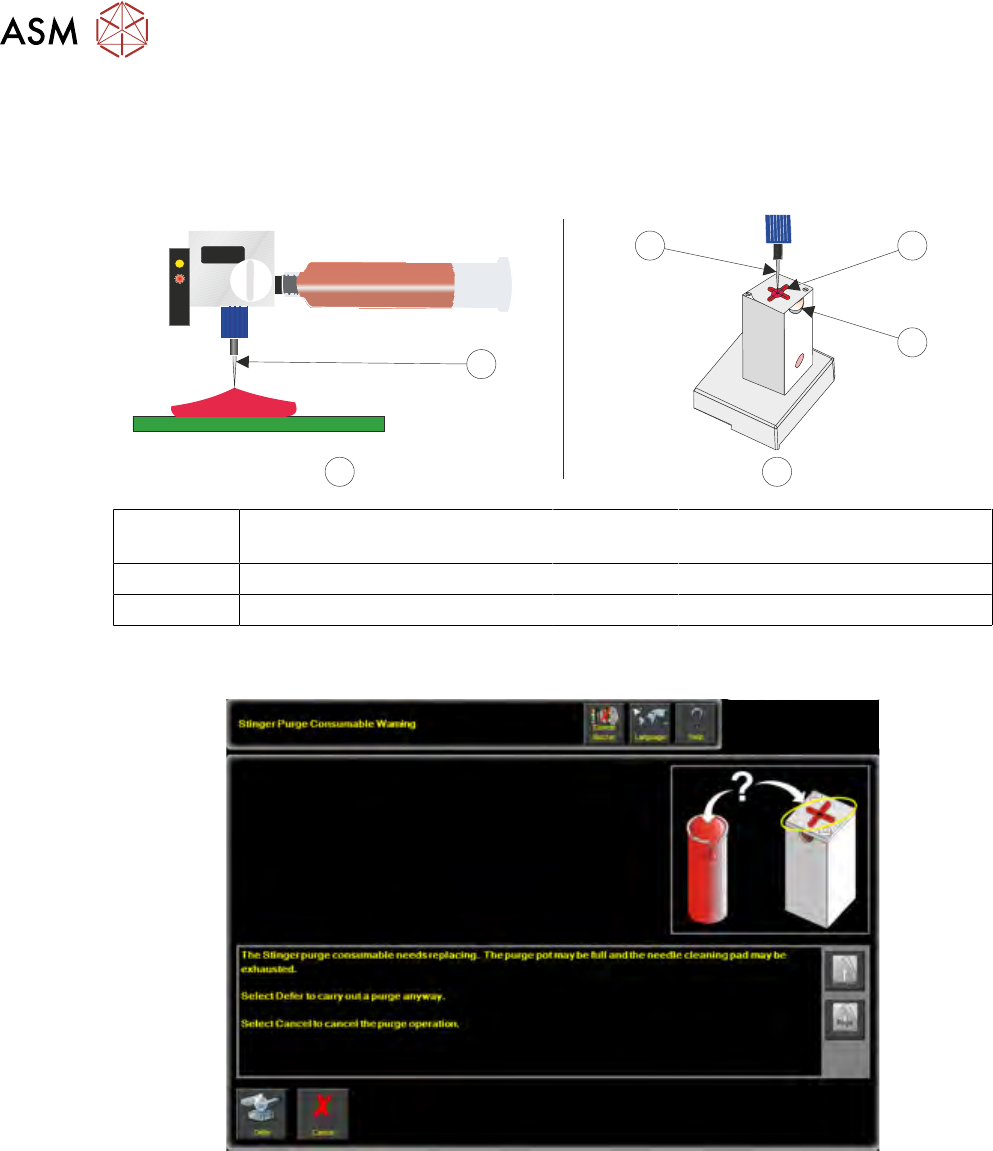
Purging can take place on either an area of the product or in the purge station.
NOTE
Details of setting the over-board purging locations are given in the Running a Product and Best
Working Practices sections of this manual.
1
1 2
3
A B
A Pre-Programmed Product Purge
Site
2 Wiper Target
B Purge Station 3 View Port
1 Nozzle
The software, estimates when the pot is likely to be full and it posts a warning on the printer’s inter-
face.
2 STINGER, A GUIDE TO ADHESIVE DOT DISPENSING
2.3 SOFTWARE INTERFACE
GUIDE TO ADHESIVE DOT DISPENSING STINGER 03/2021 21
A view port on the side of the station can be monitored to check the level of the adhesive in the pot.
If the pot is not full, the user can elect to defer the action and continue printing.
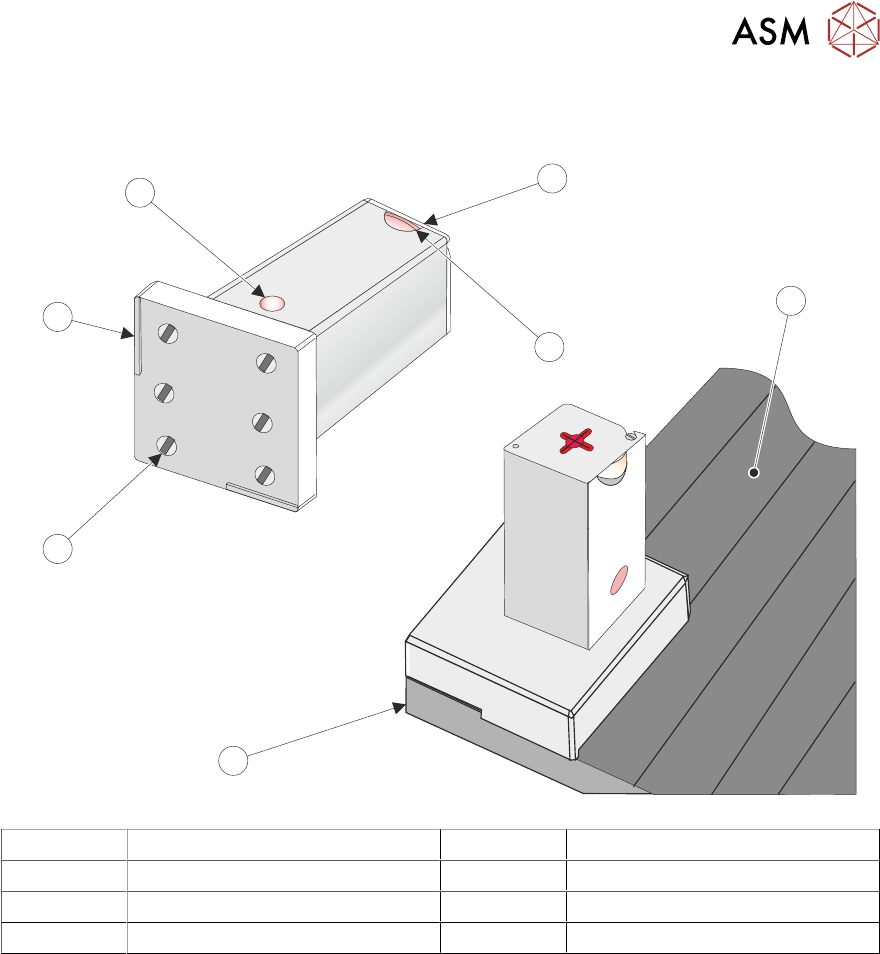
2
3
5
7
1
4
6
1 Rising Table 5 Waste Container (in the housing)
2 Front of Printer (Left Side) 6 Lid
3 Base Magnets (6 positions) 7 View Port
4 Barrier (2 positions)
NOTE
See ‘Purge Station Location’ for selecting the purge station location in software.