ASM_Guide To Adhesive Dot Dispensing_Stinger_en_0321_online.pdf - 第21页
2 STINGER, A GUIDE TO ADHESIVE DOT DISPENSING 2.3 SOFTWARE INTERFACE GUIDE TO ADHESIVE DOT DISPENSING STINGER 03/2021 21 A view port on the side of the station can be monitored to check the level of the adhesive in the p…
2 STINGER, A GUIDE TO ADHESIVE DOT DISPENSING
2.3 SOFTWARE INTERFACE
20 GUIDE TO ADHESIVE DOT DISPENSING STINGER 03/2021
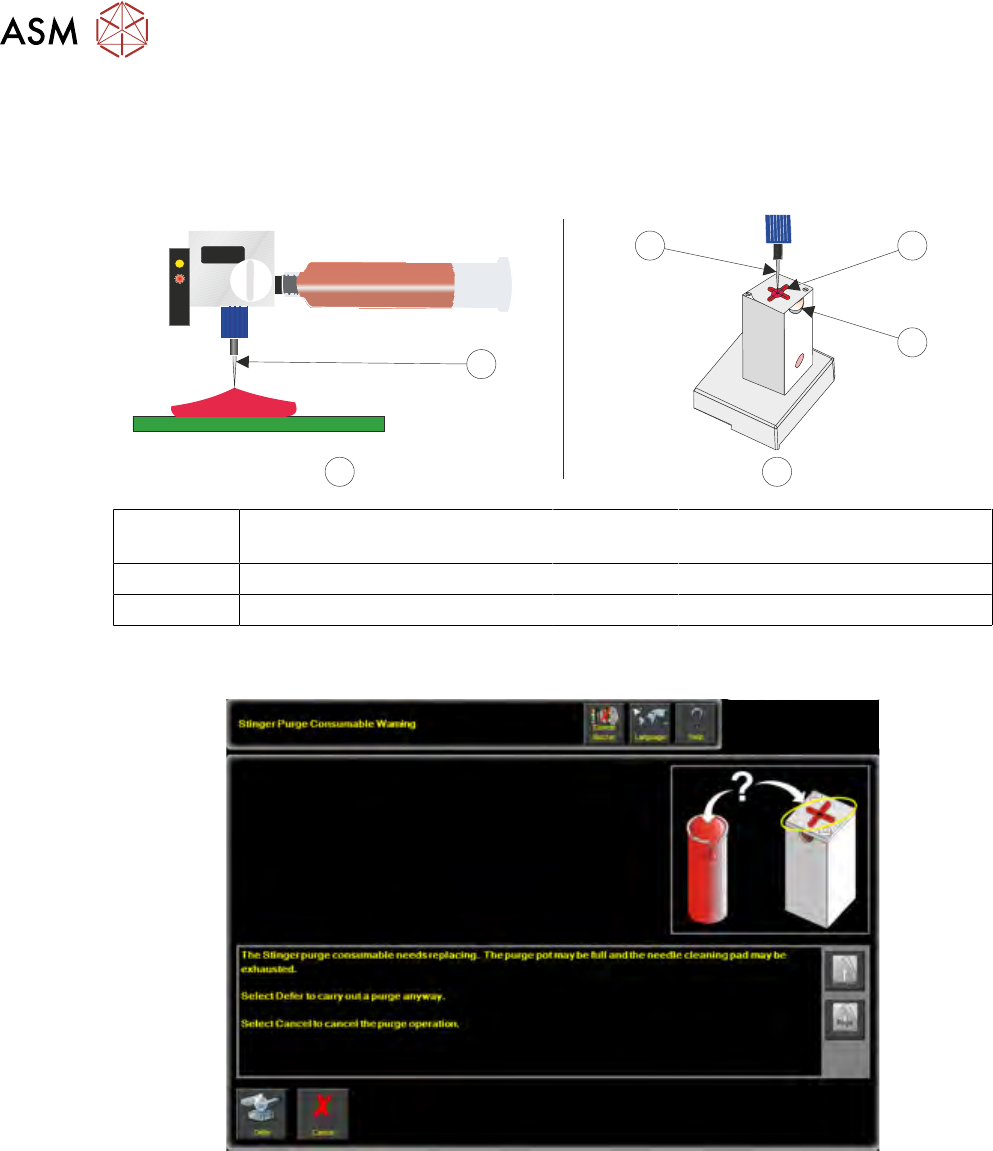
Purging can take place on either an area of the product or in the purge station.
NOTE
Details of setting the over-board purging locations are given in the Running a Product and Best
Working Practices sections of this manual.
1
1 2
3
A B
A Pre-Programmed Product Purge
Site
2 Wiper Target
B Purge Station 3 View Port
1 Nozzle
The software, estimates when the pot is likely to be full and it posts a warning on the printer’s inter-
face.
2 STINGER, A GUIDE TO ADHESIVE DOT DISPENSING
2.3 SOFTWARE INTERFACE
GUIDE TO ADHESIVE DOT DISPENSING STINGER 03/2021 21
A view port on the side of the station can be monitored to check the level of the adhesive in the pot.
If the pot is not full, the user can elect to defer the action and continue printing.
2
3
5
7
1
4
6
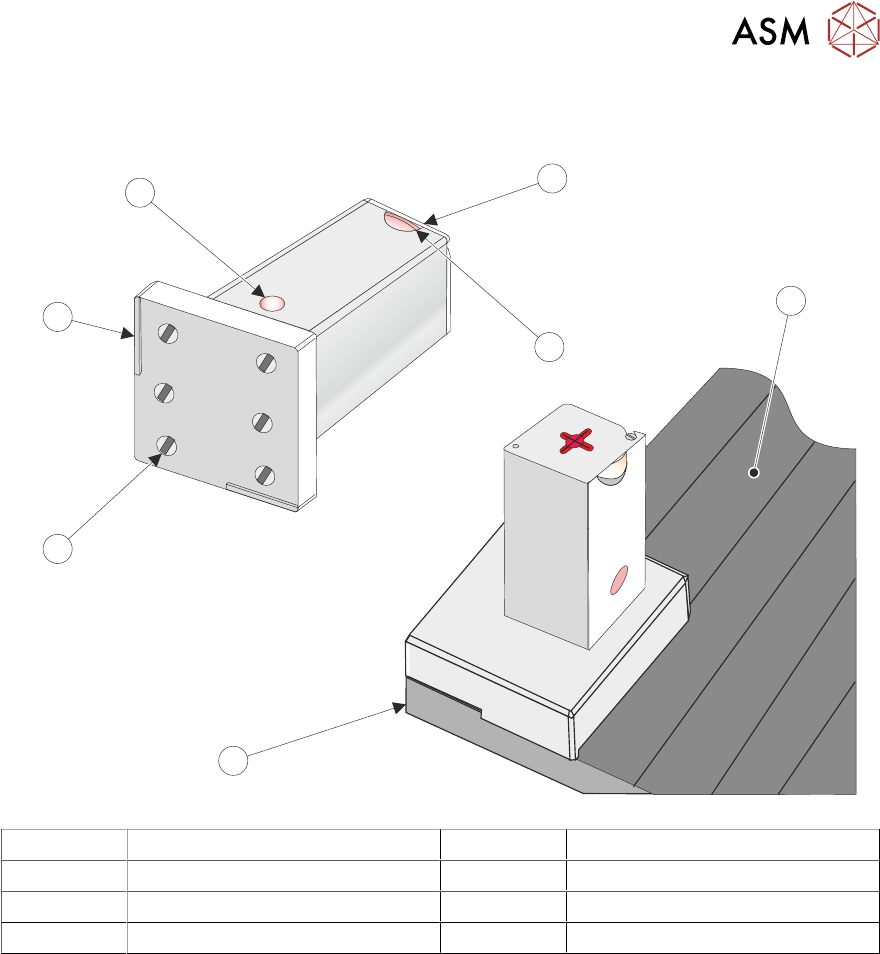
1 Rising Table 5 Waste Container (in the housing)
2 Front of Printer (Left Side) 6 Lid
3 Base Magnets (6 positions) 7 View Port
4 Barrier (2 positions)
NOTE
See ‘Purge Station Location’ for selecting the purge station location in software.
2 STINGER, A GUIDE TO ADHESIVE DOT DISPENSING
2.3 SOFTWARE INTERFACE
22 GUIDE TO ADHESIVE DOT DISPENSING STINGER 03/2021
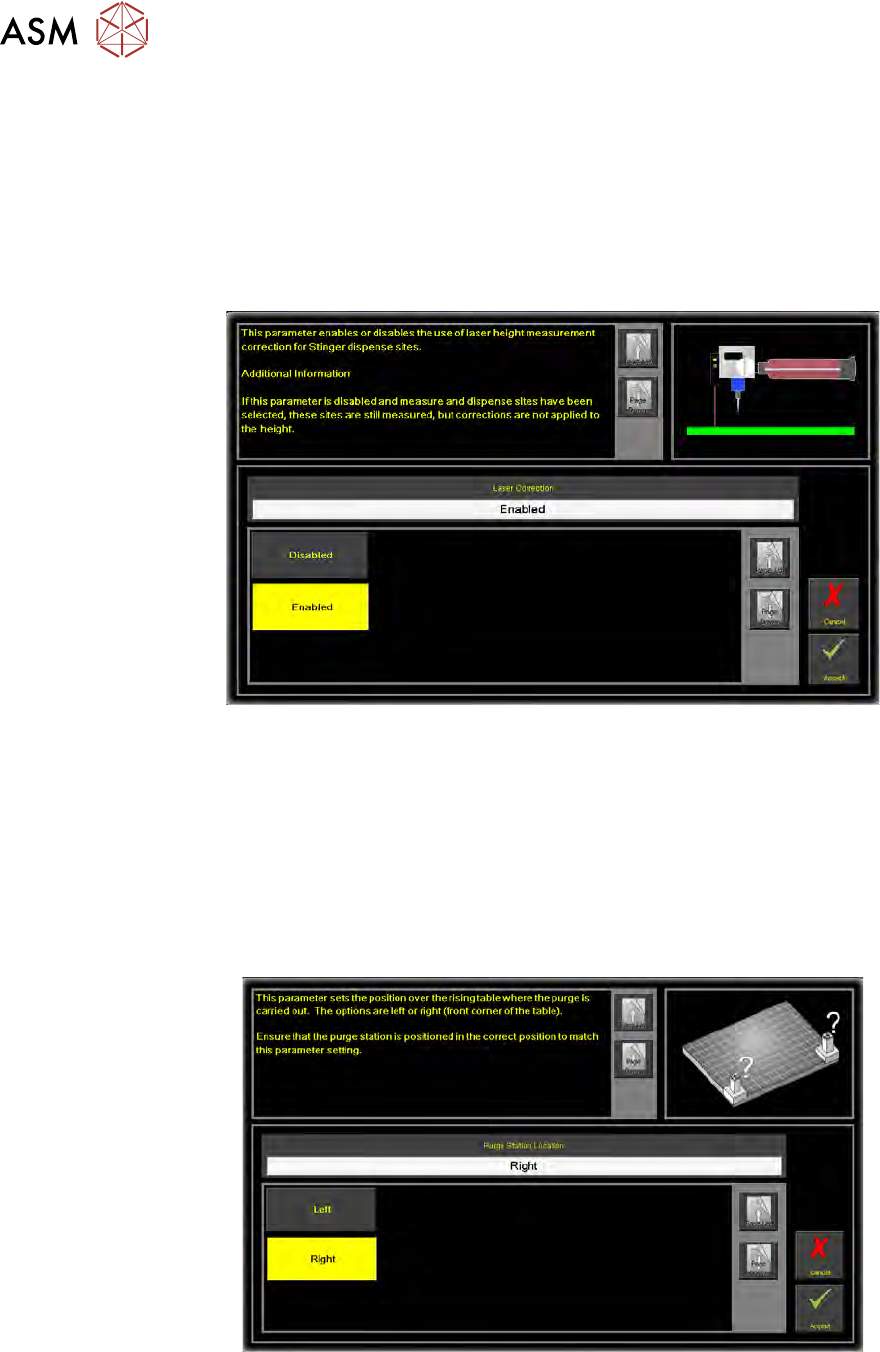
2.3.2.2 Laser Correction
Laser Correction uses laser height measurement correction at dispense and calibration sites.
When enabled, the laser takes a comparative reading at each programmed site. This data is
gathered to compensate for differences in board height across its upper surface and to provide cali-
bration data. The reading becomes a datum point for the placement of the nozzle tip, prior to dot
placement. If disabled, readings are taken but the correction is not performed; the system relies
upon accurate Z-Axis coordinates set in the parameter Stinger Dispense Gap.
1. To enable laser correction, select Laser Correction.
2. Select Enabled.
3. Select Accept.
2.3.2.3 Purge Station Location
Purge Station Location is the location at the front of the rising table where the purge station is
placed. At the start or end of a production run, the user may request a purge. Purging ensures that
the flow of adhesive is continuous and homogenous. The purge station contains a pot that collects
the purged adhesive; it can be located on the front left or front right corner of the rising table.
1. To set the location, select Purge Station Location.
2. Select the location where you are going to place the purge station (front Left or Right).
NOTE
The purge station is not placed at this time. The action above is to set the location in software.
3. Select Accept.