ASM_Guide To Adhesive Dot Dispensing_Stinger_en_0321_online.pdf - 第46页
2 STINGER, A GUIDE TO ADHESIVE DOT DISPENSING 2.4 PRODUCT CHANGEOVER 46 GUIDE TO ADHESIVE DOT DISPENSING STINGER 03/2021 3. Select Unload Screen . Open the printhead cover and remove the screen. Close the printhead cover…
2 STINGER, A GUIDE TO ADHESIVE DOT DISPENSING
2.4 PRODUCT CHANGEOVER
GUIDE TO ADHESIVE DOT DISPENSING STINGER 03/2021 45
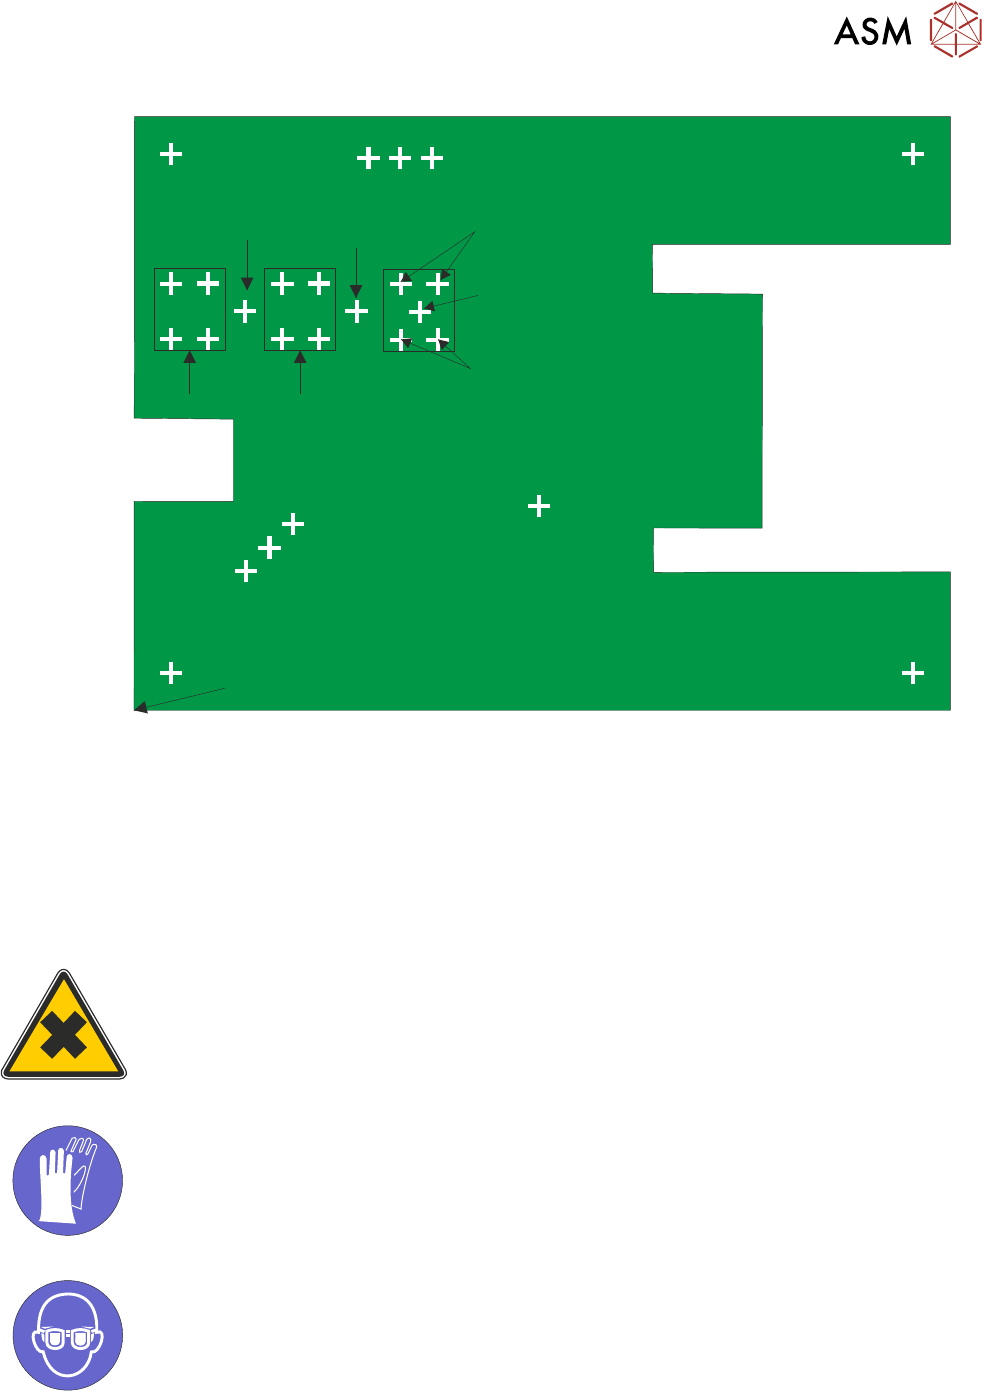
Measurements are made reference to X=0, Y = 0
10 Steps
50 Steps
100 Steps
100, 80
(Purge Process Point)
Dispense
Dispense
Dispense
Top Left 10, 150
Bottom Left 10, 10
Bottom Right 210, 10
Sacrificial Purge Points
Top Right 210, 150
Measure
Measure
Measure
Measure & Dispense
2.4.2.1 Fiducials
NOTE
Moving fiducial locations, during product run, may affect the location of sites. If 2Di or HawkEye are
used in conjunction with Stinger; moving sites results in a new pre-image being taken. In this in-
stance, a screen clean should be performed to ensure good pre-image quality. Site corrections do
not need to be applied if fiducial locations are moved during setup.
2.4.3 Syringe Removal and Replacement
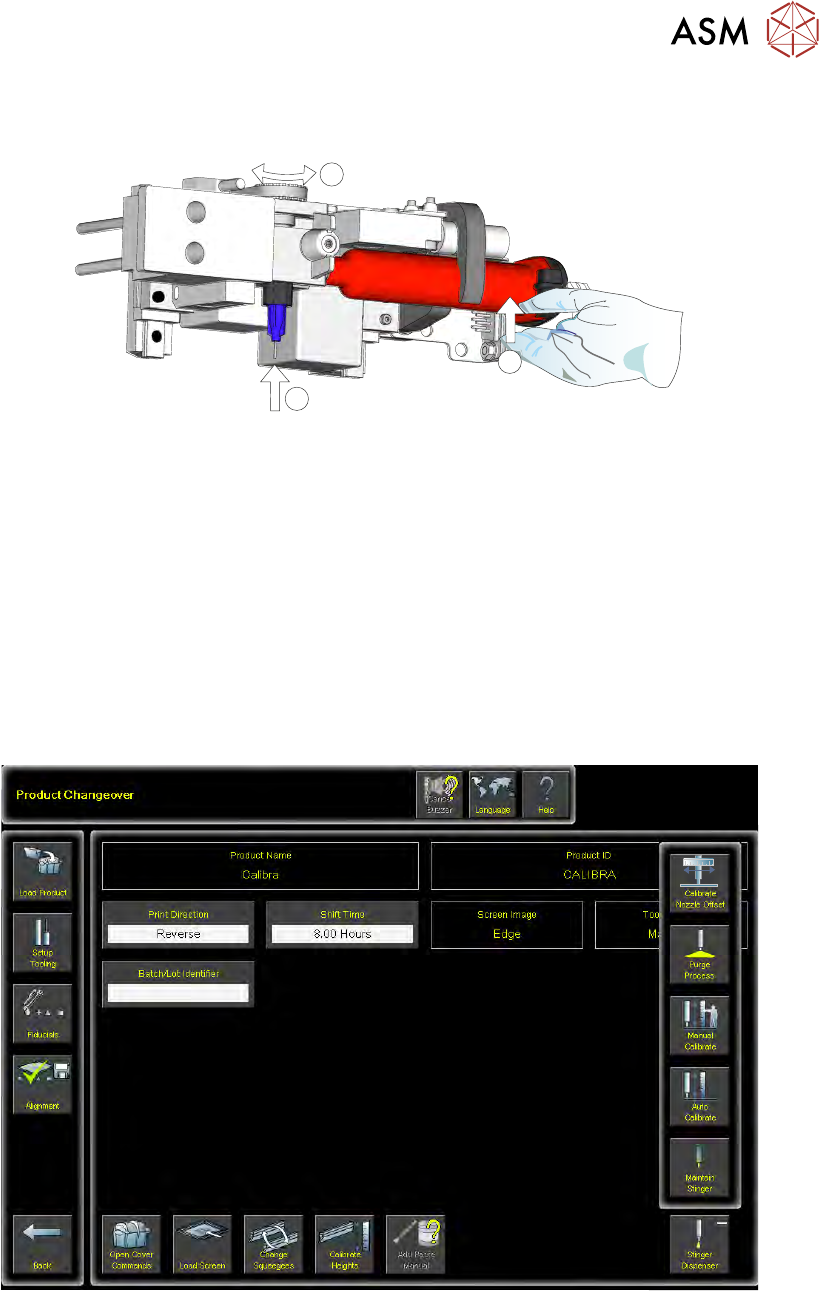
WARNING
HARMFUL SUBSTANCES. CLEANING WIPES AND CLEANING SOLUTIONS MAY
CONTAIN SUBSTANCES HAZARDOUS TO HEALTH. WHEN USING CLEANING
WIPES AND CLEANING SOLUTIONS THE MANUFACTURERS’ SAFETY DATA
SHEETS MUST BE STRICTLY ADHERED TO.
MANDATORY
TOXIC SUBSTANCES MAY BE PRESENT. SAFETY GLOVES MUST BE WORN.
MANDATORY
TOXIC SUBSTANCES MAY BE PRESENT. EYE PROTECTION MUST BE WORN.
1. Remove the replacement syringe assembly from refrigeration and allow the temperature to
rise in accordance with the manufacturers’ recommendations. Remove the end dust cap.
2. Select Unload Board. Choose the preferred remove board method or manual.

2 STINGER, A GUIDE TO ADHESIVE DOT DISPENSING
2.4 PRODUCT CHANGEOVER
46 GUIDE TO ADHESIVE DOT DISPENSING STINGER 03/2021
3. Select Unload Screen. Open the printhead cover and remove the screen. Close the printhead
cover and press the System
button to restore system power.
4. Select Maintain Stinger.
5. Open the cover; the camera axis is located at the front of the printer where the applicator can
be removed. If necessary, move the print carriage back to gain access to the print area.
6. Slacken off the auger clamp screw (1).
1
2
3
5
4
6
7. Release the auger (5), nozzle (4) and syringe (2) as one assembly from the drive gear and the
‘C’ clamp.
8. Remove the pneumatic air connector (3) from the rear of the syringe assembly.
9. Store part-used assemblies in a refrigerator or dispose of the whole assembly in accordance
with any national, federal or local disposal regulations.
10. Remove the syringe sealing cap.
11. Fit a replacement auger and nozzle to the syringe.
12. Fit the pneumatic air connector to the rear of the syringe assembly.
2 STINGER, A GUIDE TO ADHESIVE DOT DISPENSING
2.4 PRODUCT CHANGEOVER
GUIDE TO ADHESIVE DOT DISPENSING STINGER 03/2021 47
13. Lift the assembly: auger, nozzle, syringe and air connector, up toward the auger drive gear.
Align the syringe with the ‘C’ clamp (2).
1
1
2
14. The auger engages with the square shaft of the drive motor, rotate the exposed portion of the
drive belt at the same time pushing the complete assembly upward, ensuring that it is in the
fully up position (1).
15. Check that the whole assembly is secure in the ‘C’ clamp.
16. Refit the in-line air connection.
17. Tighten the plastic auger clamp screw. Do not over tighten.
18. Remove the nozzle dust cap. Ensure that the nozzle assembly is in line with auger valve and
not bent or at an angle.
19. Select Load Board and load the calibrated test product as described in the Software Interface
section of this manual.
20. Navigate to the Product Changeover page.
21. Select Unload Screen.
22. Select Stinger Dispenser. An extended menu is shown.
23. Select Purge Process. The camera axis drives to the centre of the board.