ASM_Guide To Adhesive Dot Dispensing_Stinger_en_0321_online.pdf - 第50页
2 STINGER, A GUIDE TO ADHESIVE DOT DISPENSING 2.4 PRODUCT CHANGEOVER 50 GUIDE TO ADHESIVE DOT DISPENSING STINGER 03/2021 2.4.3.2 Calibrated Test Product Page 1. For calibrated test product purging, select Open Cover Comm…
2 STINGER, A GUIDE TO ADHESIVE DOT DISPENSING
2.4 PRODUCT CHANGEOVER
GUIDE TO ADHESIVE DOT DISPENSING STINGER 03/2021 49
2.4.3.1 Replacing the Wiper Pad; Removing the Waste Container
WARNING
BOARD CLAMPS. EXTREME CARE MUST BE EXERCISED WHEN WORKING IN
THE TOOLING AREA OF THE MACHINE TO AVOID INJURY. THE FOILS ON THE
FRONT AND REAR BOARD CLAMPS ARE VERY SHARP.
MANDATORY
TOXIC SUBSTANCES MAY BE PRESENT. SAFETY GLOVES MUST BE WORN.
MANDATORY
TOXIC SUBSTANCES MAY BE PRESENT. EYE PROTECTION MUST BE WORN.
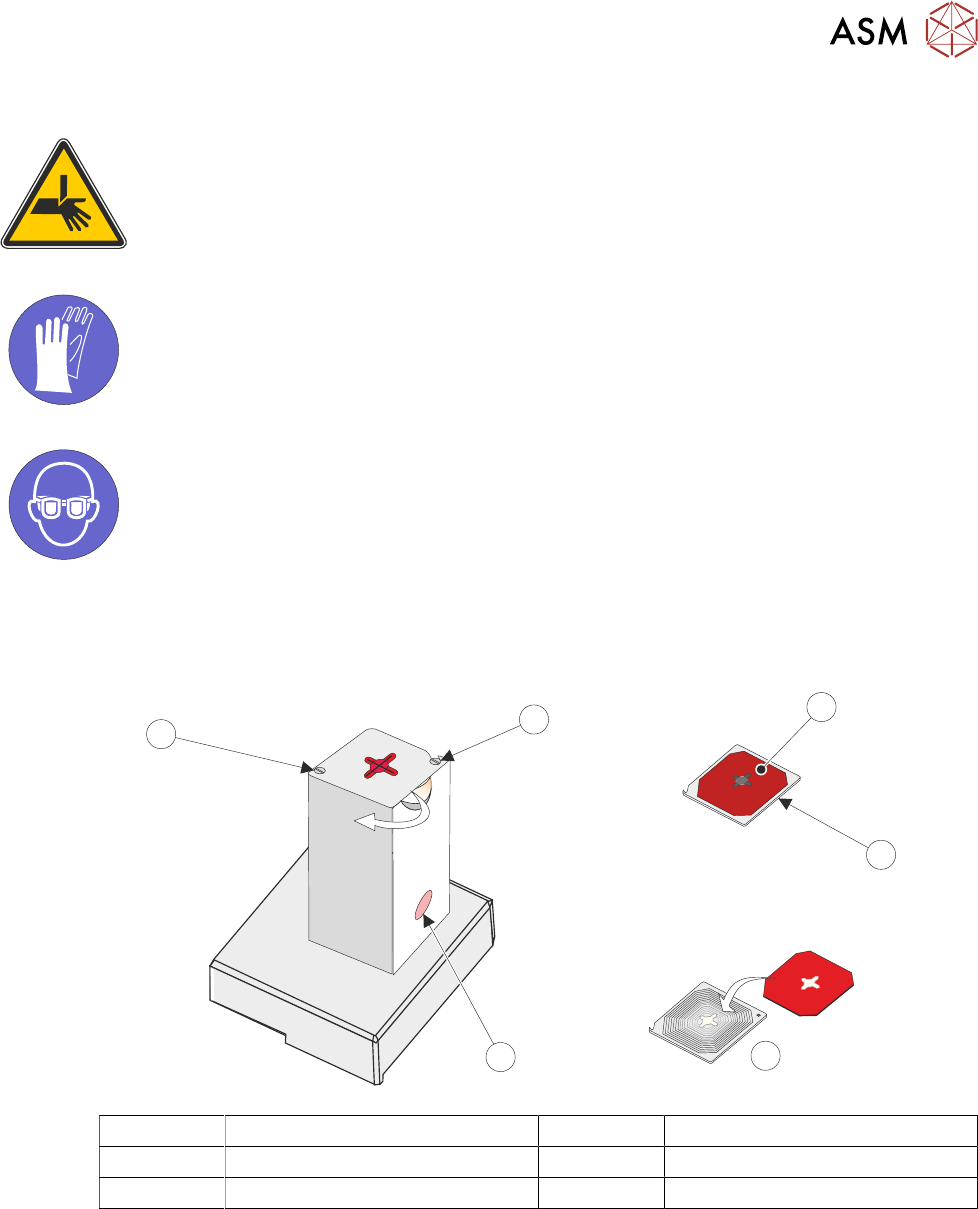
The lid is fixed with two captive shoulder screws, when in the locked position it engages a hook
mechanism. Underneath the lid there are two ball bearings that engage a dimple in the lid to
provide the lock. The lid can be opened by swivelling it as shown by the arrow in the graphic.
1
2
4
5
6
3
1 Wiper Pad 4 Waste Container
2 Lid (as viewed from underside) 5 Captive Screw
3 Replace 6 Hook Screw
1. Swivel the lid in the rotate direction shown, inwards away from the board clamps.
2. The waste container can now be removed, emptied, cleaned and replaced.
3. Remove the used wiper pad and replace with new.
4. Rotate the lid and wiper assembly back into position until it locks in place.
NOTE
The unit can be fitted to either the right hand or the left hand side of the rising table. The lid is de-
signed such that it swivels in towards the centre of the machine. The lid can be fitted correctly for
either left hand or right hand usage; simply fix it to the opposite screw locations to those shown, i.e.
the hook screw becomes the captive screw.
2 STINGER, A GUIDE TO ADHESIVE DOT DISPENSING
2.4 PRODUCT CHANGEOVER
50 GUIDE TO ADHESIVE DOT DISPENSING STINGER 03/2021
2.4.3.2 Calibrated Test Product Page
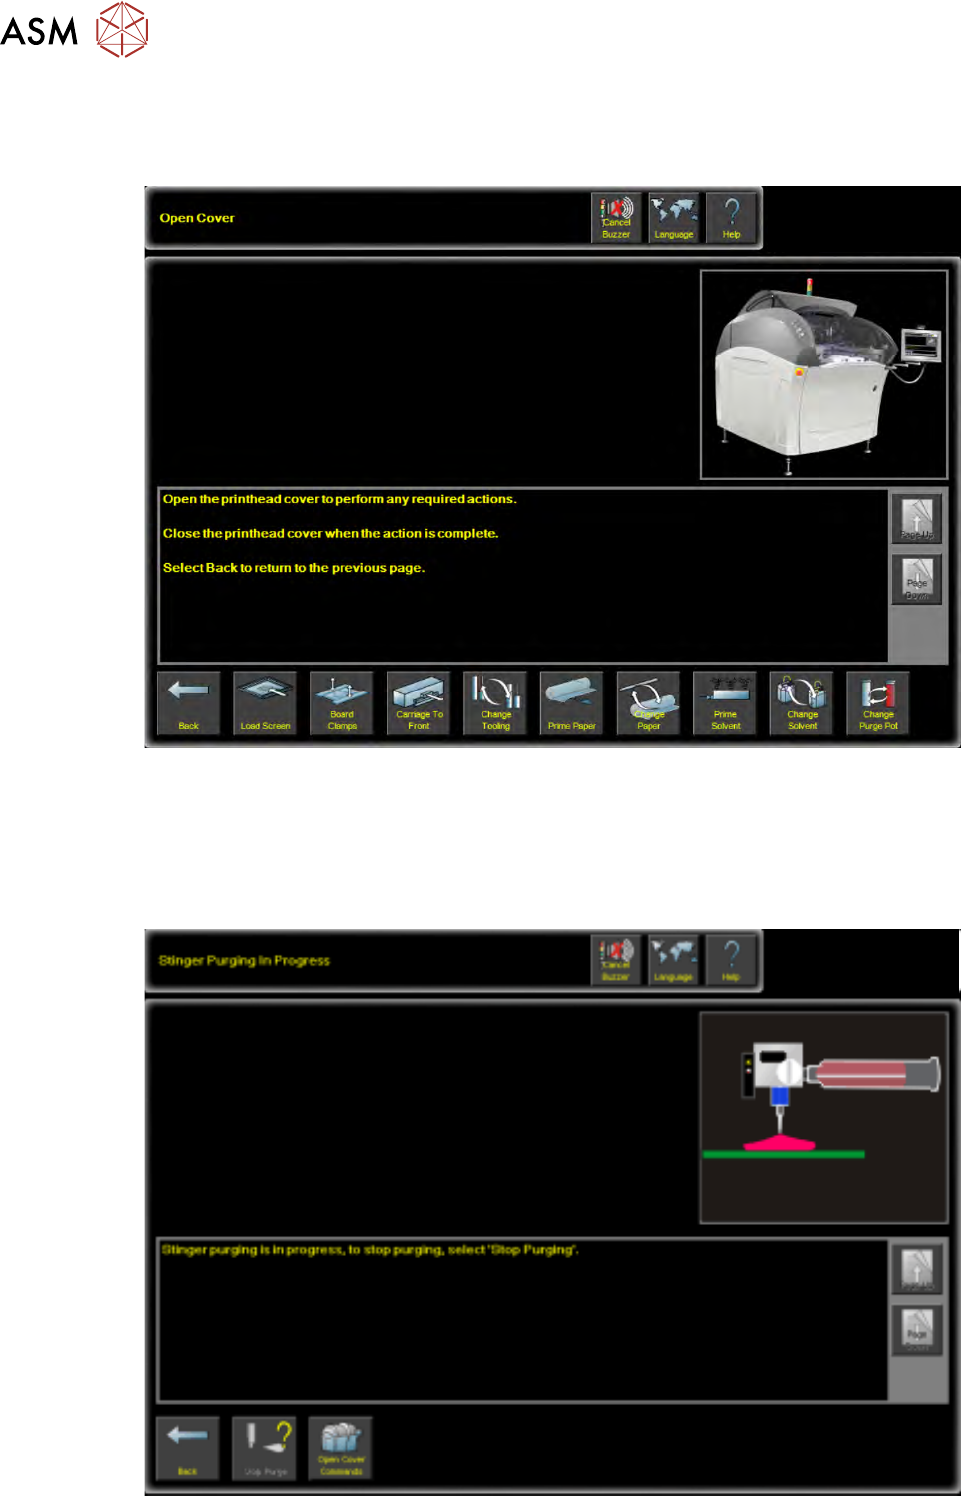
1. For calibrated test product purging, select Open Cover Commands. Open the front printhead
cover.
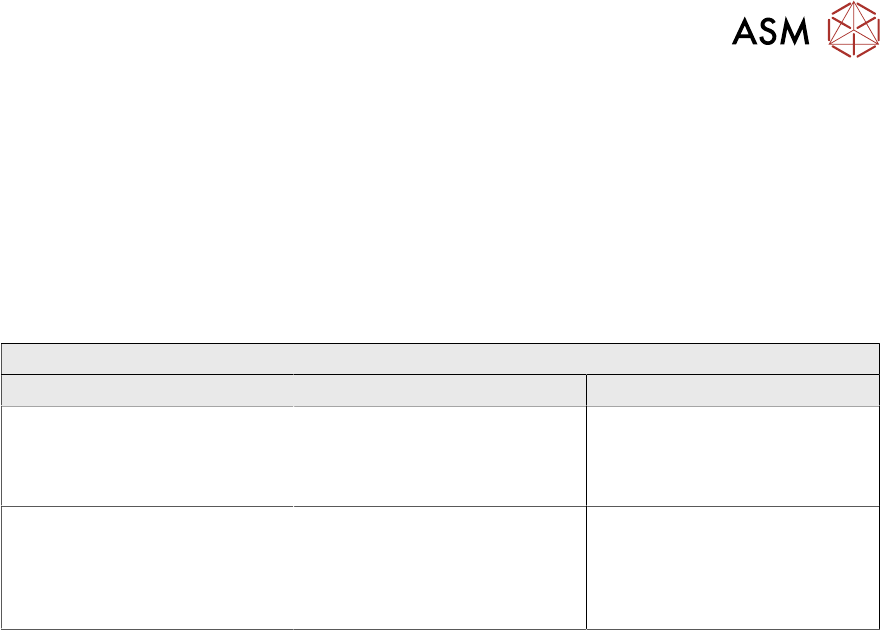
2. Selecting Start Purge starts the purge routine. Adhesive is delivered onto the centre of the
boards’ upper surface until the Stop Purge
button is selected.
3. Purging should be monitored to ensure that the adhesive delivery is flowing without being
spurious or spluttering. Any signs of inconsistency are likely to be due to air pockets in the de-
livery mechanism. Provided the assembly has been set up correctly this should be almost
negligible.
2 STINGER, A GUIDE TO ADHESIVE DOT DISPENSING
2.4 PRODUCT CHANGEOVER
GUIDE TO ADHESIVE DOT DISPENSING STINGER 03/2021 51
4. Close the cover.
5. Press the System button.
6. Select Back.
7. Carry out the procedure for Calibrating Stinger Heights as described in the Software Interface
section of the manual.
2.4.4 Consumable Warnings
As the adhesive is consumed a sensor detects the consumable level and issues a warning as
shown in the table below.
Consumable Warnings
Title Warning Message Action Options
Stinger Dispenser Consumable
Warning
The Stinger dispenser consum-
able is low. There may be in-
sufficient materials to dispense
the next board.
Select Defer to print and dis-
pense the next board in the
batch. Select Stop
to end the
current print run.
Purge Consumable Low The Stinger purge consumable
needs replenishing. The purge
station may be full and the
nozzle cleaning pad may need
replacing.
Select Defer to carry out a
purge. Select Cancel
to cancel
the purge process.