ASM_Guide To Adhesive Dot Dispensing_Stinger_en_0321_online.pdf - 第51页
2 STINGER, A GUIDE TO ADHESIVE DOT DISPENSING 2.4 PRODUCT CHANGEOVER GUIDE TO ADHESIVE DOT DISPENSING STINGER 03/2021 51 4. Close the cover. 5. Press the System button. 6. Select Back . 7. Carry out the procedure for Cal…
2 STINGER, A GUIDE TO ADHESIVE DOT DISPENSING
2.4 PRODUCT CHANGEOVER
50 GUIDE TO ADHESIVE DOT DISPENSING STINGER 03/2021
2.4.3.2 Calibrated Test Product Page
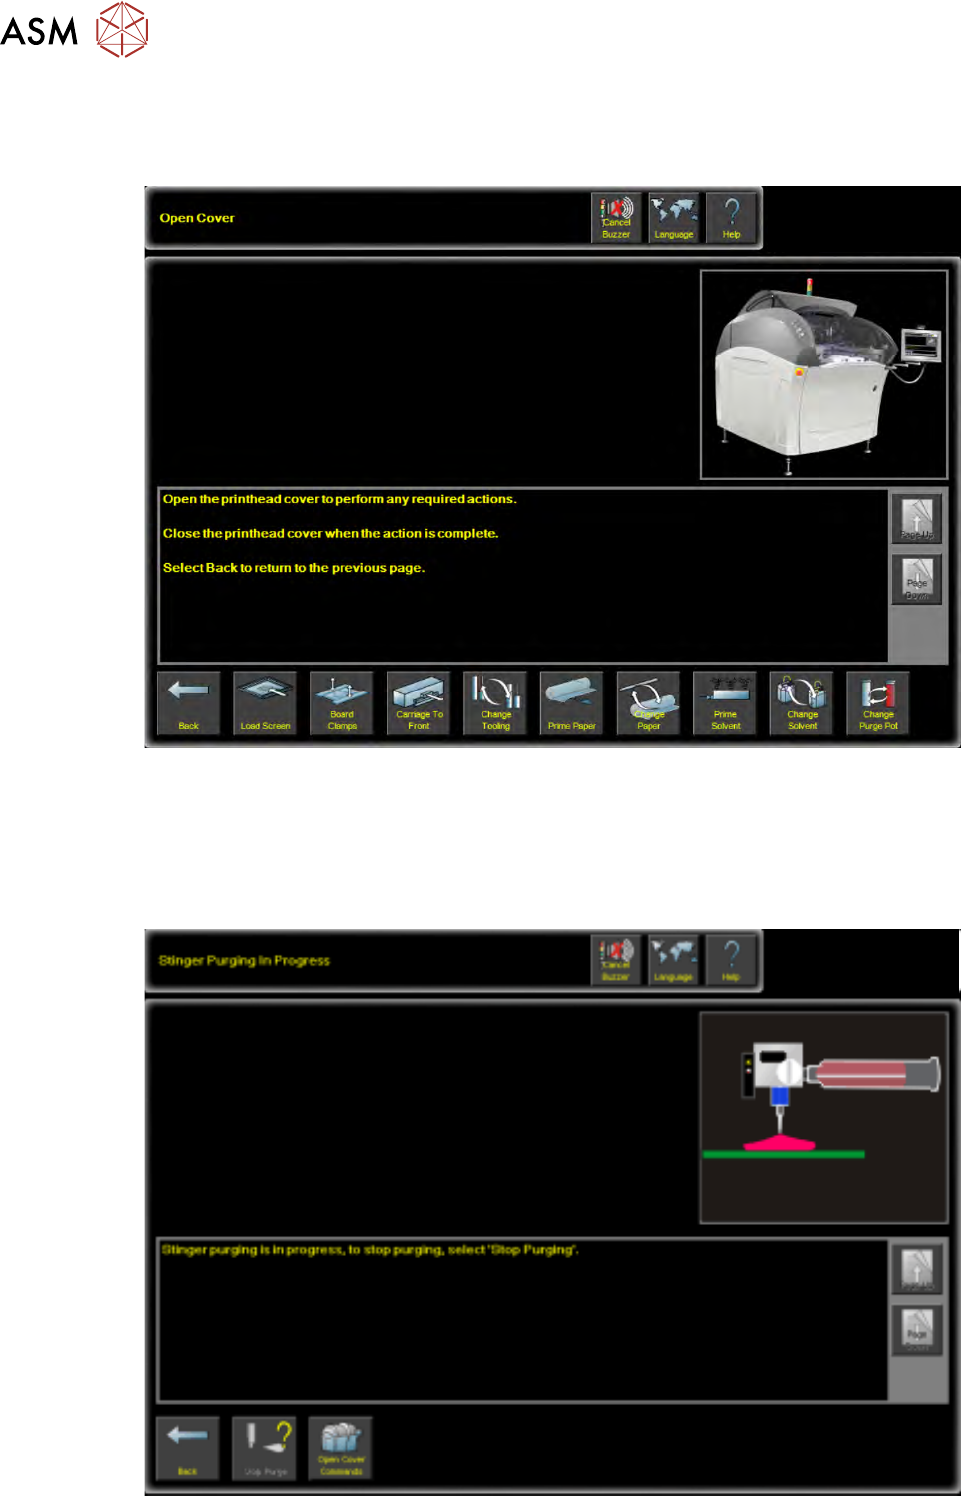
1. For calibrated test product purging, select Open Cover Commands. Open the front printhead
cover.
2. Selecting Start Purge starts the purge routine. Adhesive is delivered onto the centre of the
boards’ upper surface until the Stop Purge
button is selected.
3. Purging should be monitored to ensure that the adhesive delivery is flowing without being
spurious or spluttering. Any signs of inconsistency are likely to be due to air pockets in the de-
livery mechanism. Provided the assembly has been set up correctly this should be almost
negligible.

2 STINGER, A GUIDE TO ADHESIVE DOT DISPENSING
2.4 PRODUCT CHANGEOVER
GUIDE TO ADHESIVE DOT DISPENSING STINGER 03/2021 51
4. Close the cover.
5. Press the System button.
6. Select Back.
7. Carry out the procedure for Calibrating Stinger Heights as described in the Software Interface
section of the manual.
2.4.4 Consumable Warnings
As the adhesive is consumed a sensor detects the consumable level and issues a warning as
shown in the table below.
Consumable Warnings
Title Warning Message Action Options
Stinger Dispenser Consumable
Warning
The Stinger dispenser consum-
able is low. There may be in-
sufficient materials to dispense
the next board.
Select Defer to print and dis-
pense the next board in the
batch. Select Stop
to end the
current print run.
Purge Consumable Low The Stinger purge consumable
needs replenishing. The purge
station may be full and the
nozzle cleaning pad may need
replacing.
Select Defer to carry out a
purge. Select Cancel
to cancel
the purge process.
2 STINGER, A GUIDE TO ADHESIVE DOT DISPENSING
2.5 RUNNING A PRODUCT
52 GUIDE TO ADHESIVE DOT DISPENSING STINGER 03/2021
2.5 RUNNING A PRODUCT
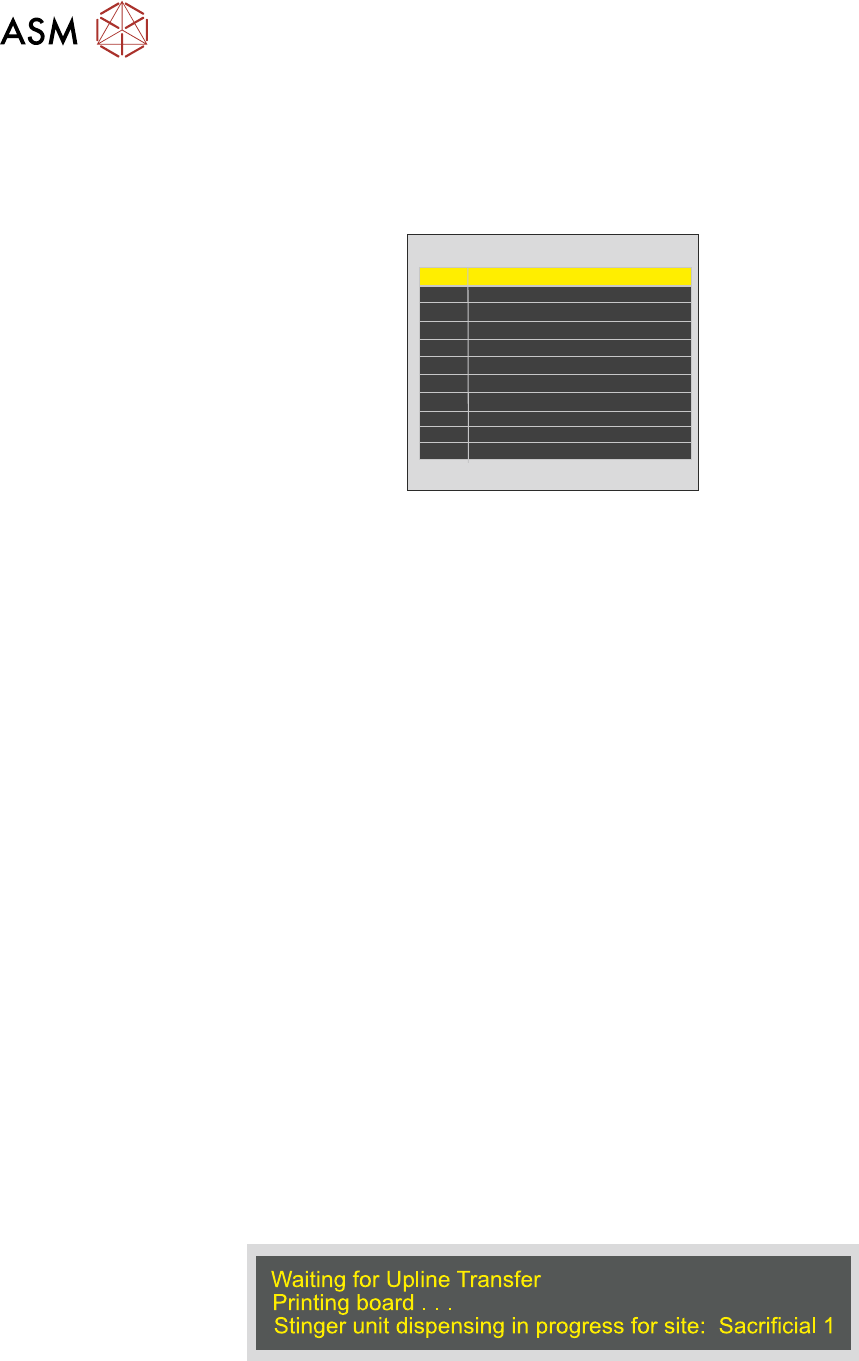
2.5.1 Deposit Sequence
Adhesive deposit follows the sequence programmed in the product file; it is displayed in tabular
form on the Create Site page. It shows the site identity number (ID) and site name.
ID
1
2
3
4
5
6
7
8
9
10
11
Site Name
Purge 1
Purge 2
Purge 3
Purge 4
Production Site 1
Production Site 2
Production Site 3
Production Site 4
Site 5 110 20 DM
Site 6 110 30 DM
Site 7 140 20 M
The system automatically allocates the site name and number. All of the sites opposite have been
edited with information that may be more meaningful, examples being: device type, location and
deposit mode. On-board purging is carried out at sacrificial sites in distinct pre-programmed areas
(denoted by blue rectangles in the board view).
2.5.1.1 Optimisation
The time taken to measure and deposit at a site is approximately 1 second. If a large number of
sites are programmed this may add minutes into the cycle time. Planning can reduce this time:
●
The route that the camera axis moves to get from site-to-site
●
The number of measurement phases that have been programmed into the whole process
●
Run heights. The heights set for the Idle and Z Axis
●
Reordering sites that are added later to similar locations
2.5.1.2 Pre-Flight Checks
Before selecting Print to start the print (if printing is required) and deposit run, check that:
●
A test product has run successfully
●
The printing machine is clean
●
The correct product file is loaded for the product
●
The product is loaded correctly, is clean and ready to run
●
Consumable items required for the complete process (print and deposit) are at levels suffi-
cient to complete the run cycle
2.5.1.3 Print
Select Print to start the production run.
The interface informs the user which sites are being processed by pasting a message in the prompt
bar at the bottom of the page.
The cycle continues until the batch has been processed or:
●
A consumable low warning is posted
●
An error occurs that stops the process
●
The operator halts the process