ASM_Guide To Adhesive Dot Dispensing_Stinger_en_0321_online.pdf - 第62页
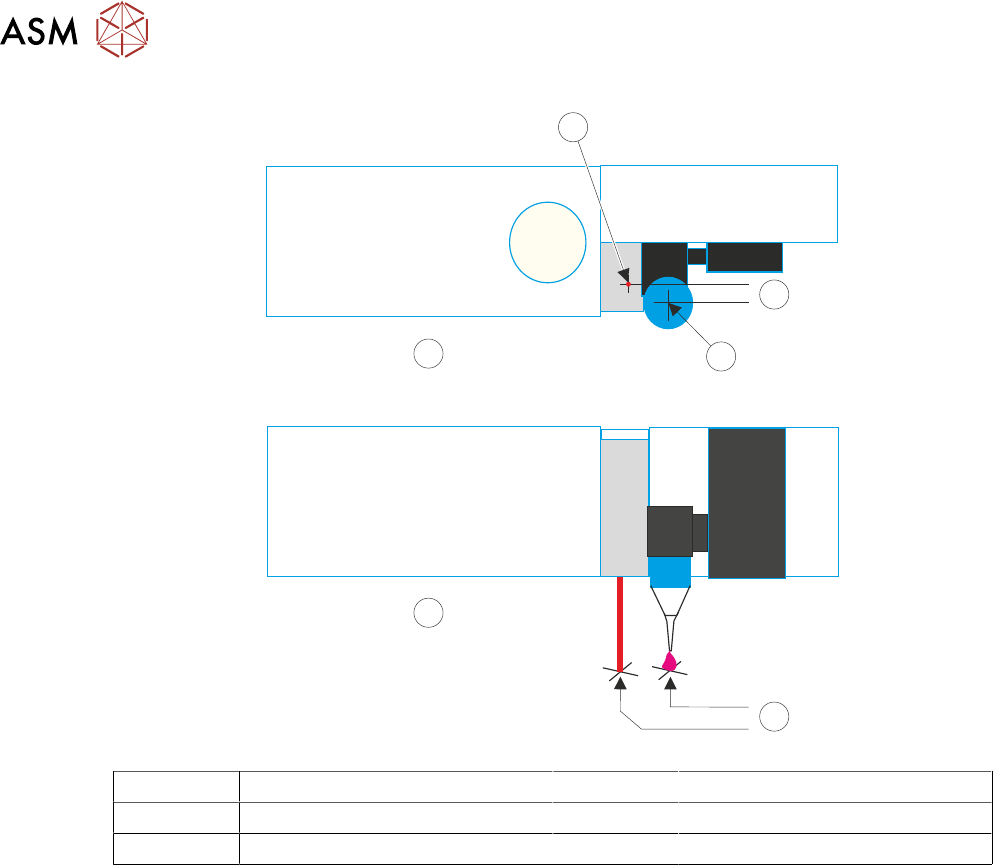
2 STINGER, A GUIDE TO ADHESIVE DOT DISPENSING 2.8 APPENDIX 62 GUIDE TO ADHESIVE DOT DISPENSING STINGER 03/2021 1 2 A 3 B 4 A Top View 2 Y Offset B Front View 3 Nozzle Centre 1 Laser Centre 4 X Offset

2 STINGER, A GUIDE TO ADHESIVE DOT DISPENSING
2.8 APPENDIX
GUIDE TO ADHESIVE DOT DISPENSING STINGER 03/2021 61
3. Select Stinger Dispenser.
4. Select Setup Sites.
5. Select Create Site.
6. Set the dispense mode to Measure Only (on a single site).
7. Select Confirm.
8. Select Back.
9. Select Load Screen.
10. Open the cover.
11. Cover the screen present sensor and select Continue. The screen clamps actuate.
12. Select Back.
13. Select Fiducials.
14. Select Global Settings.
15. Select Alignment Mode.
16. Select Non Vision.
17. Select Accept.
18. Select Back.
19. Select Back.
20. Select Options.
21. Select Stinger Dispenser.
22. Select Load Board. Choose the preferred load board method, auto or manual.
23. Select Dispense Sweep.
24. Select Back.
25. Select Open Cover Commands.
26. Open the printhead front cover.
27. Measure the Laser Offset X and Y between the dispensed dot and the laser beam position.
The object must have the laser beam shining on the dot centre. Edit the laser X and Y offsets
as required (see illustration at end of procedure).
28. Close the printhead front cover.
29. Select Save.
30. Select Setup Sites.
31. Select Adjust Site, set the dispense mode to its original state.
32. Select Fiducials.
33. Select Confirm.
34. Select Back.
35. Select Back.
36. Select Back.
2 STINGER, A GUIDE TO ADHESIVE DOT DISPENSING
2.8 APPENDIX
62 GUIDE TO ADHESIVE DOT DISPENSING STINGER 03/2021
1
2
A
3
B
4
A Top View 2 Y Offset
B Front View 3 Nozzle Centre
1 Laser Centre 4 X Offset