00196577-03 JG S-Feeder Care Test Station EN.pdf - 第16页
Preparations – User Interface 16
Preparations – User Interface
15
– User Interface
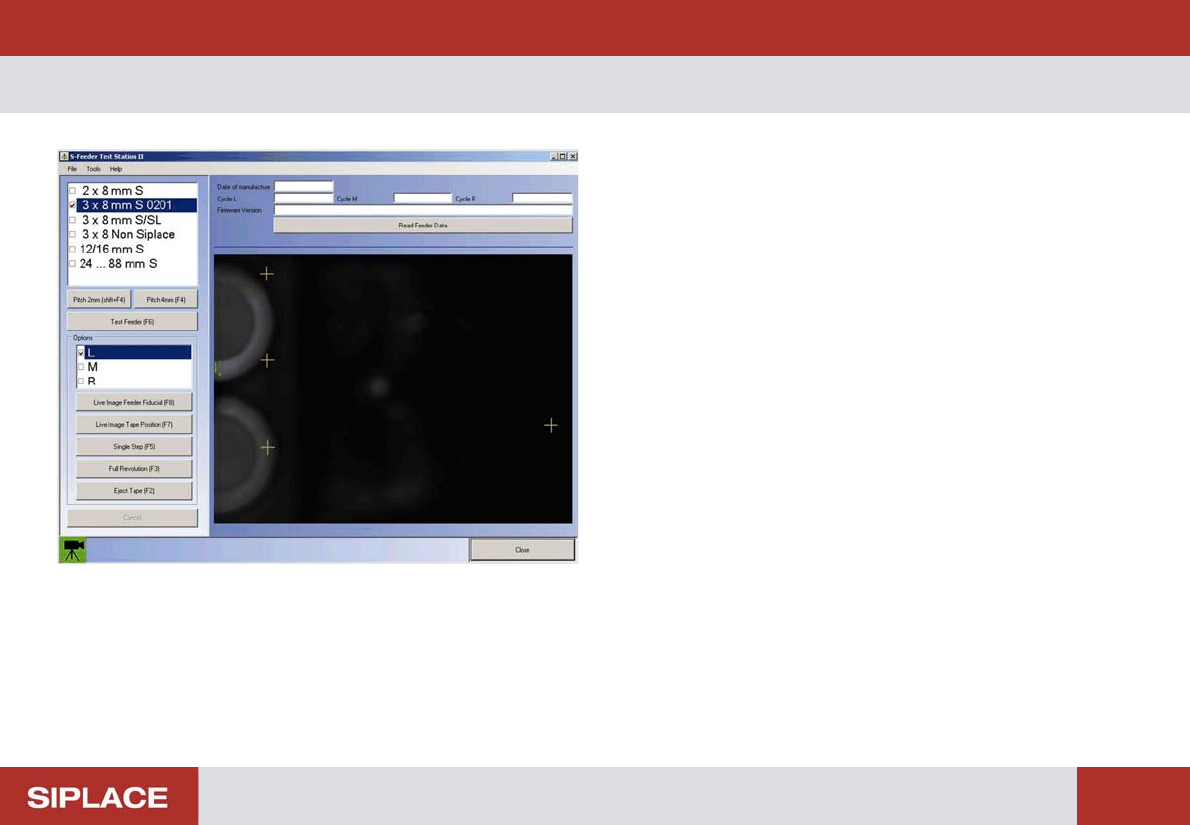
After starting the S feeder Test Station software you will see
the following dialog box.
On the left side of the dialog box you will see operating con-
trols with which you can set and start the test.
On the right side of the dialog box you will see the camera
image. The tape positions and feeder fiducials to be meas-
ured are marked by orange crosses.
At the bottom left of the dialog box you will see the current
status of the S Feeder Test Station in the form of a camera
icon.
Green: The camera of the S-Feeder Test Station is ready for
operation, the buttons on the user interface are active.
Red: The camera of the S-Feeder Test Station is NOT ready
for operation and the buttons on the user interface are NOT
active.
To exit the test software, click on Exit in the File menu.
Preparations – User Interface
16
Performing the Test
17
Performing the Test
When testing the feeders, always perform the individual steps in the following order:
▪ Precondition: the computer, power pack and
S-Feeder Checking Device
are switched on; the
S-Feeder Test Station
software has started.
1. Place the feeder on the contact surface of the
S-Feeder Checking Device
and connect it.
2. Select the feeder type in the software.
3. Alter the pickup position on the feeder if necessary.
4. Set the pitch of the track(s) to be tested to 4 mm.
5. Insert the metal test tape into the track(s) to be tested.
6. Test the feeder.
7. Evaluate the test result and save if required.
8. Automatic tape ejection.
9. Remove the feeder from the contact surface of the
S-Feeder Checking Device
.
NOTICE
Test requirement
The feeders should have reached approximately ambient temperature before performing the test.