00196577-03 JG S-Feeder Care Test Station EN.pdf - 第19页
Performing the Test – Connecting the Feeder 19 – C o n n e c t in g t h e F e e d e r ► Connect the feeder connecto r to the left connection on the testing device. Make sure that the red dot on the connecto r is at th e …
Performing the Test – Fitting the Feeder
18
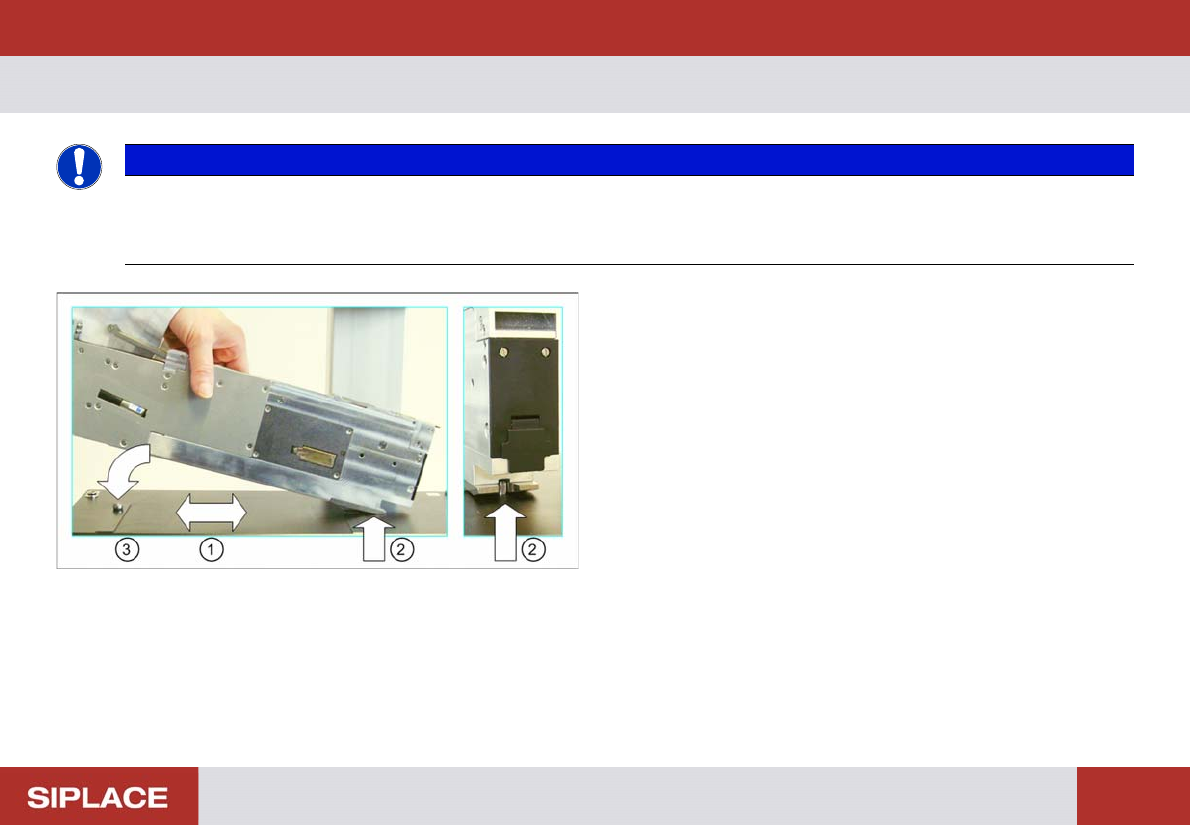
– Fitting the Feeder
NOTICE
Before you fit the feeder:
Clean the contact surface of the testing device and the underside of the feeder with a clean, lint-free cloth and re-
move any foreign bodies. If necessary, clean the contact surface of the feeder with a dressing stone.
► Fit the feeder onto the contact surface (1) from the left
and make sure that it engages with the centering pin (2).
Also make sure that the feeder does not hit the camera.
► Lower the feeder at the back, over the calotte (3) and let
it engage there.
The feeder is held in its position on the contact surface by
the centering pin, the magnetic plate and the calotte.
► Check whether the feeder is positioned stably on the
contact surface.
If not, you will be unable to correctly measure the posi-
tion of the teeth.
Performing the Test – Connecting the Feeder
19
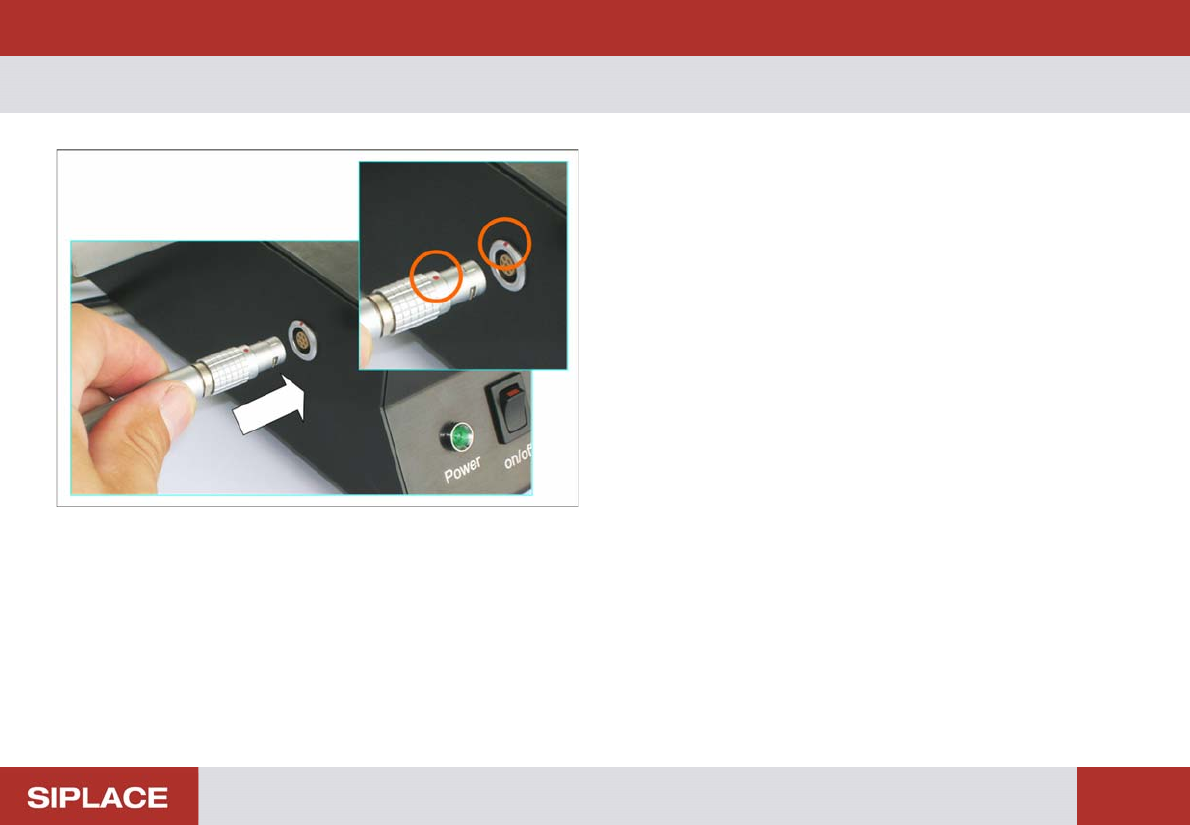
– Connecting the Feeder
► Connect the feeder connector to the left connection on
the testing device.
Make sure that the red dot on the connector is at the top.
Performing the Test – Selecting the Feeder Type
20
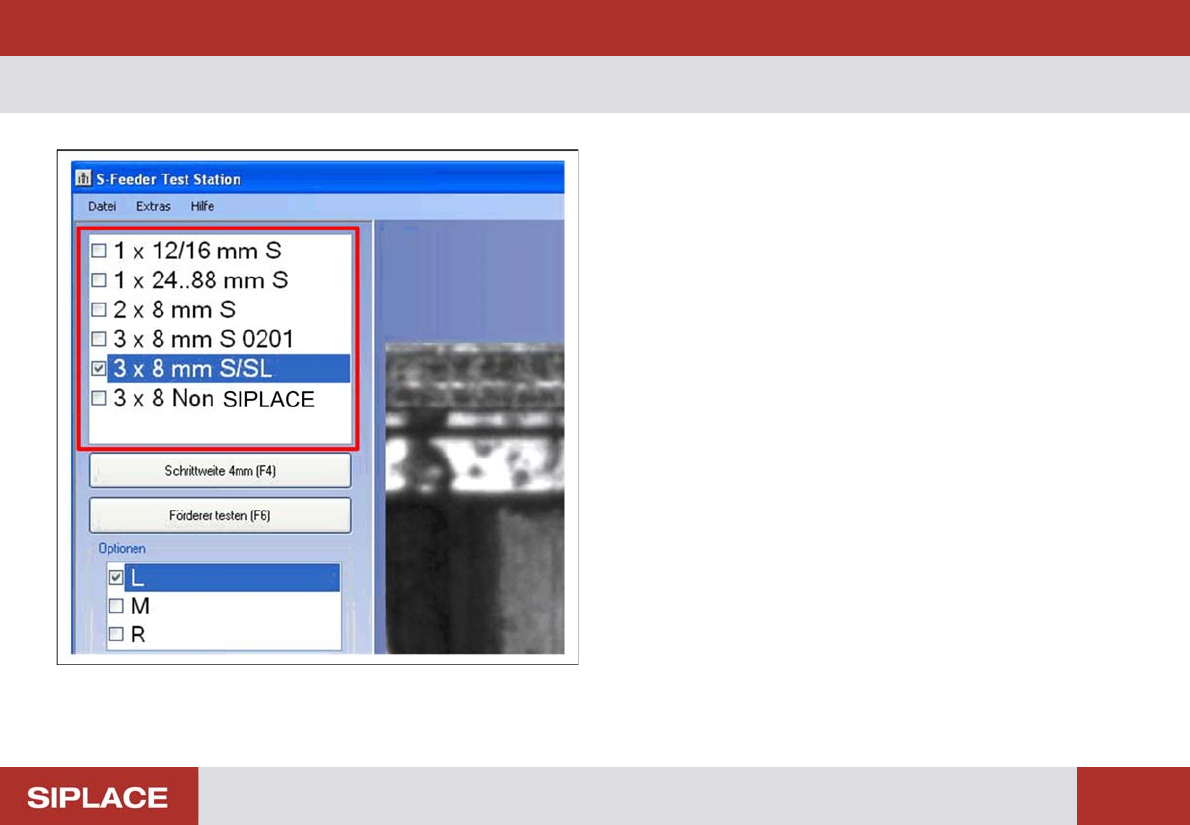
– Selecting the Feeder Type
On the left side of the software you will see a selection list
for the feeder type. When you select the required type, the
corresponding parameters for the test will automatically be
set in the software.
► Click on the feeder type to be tested in the selection list.