JO-109-002_JG-0209.pdf - 第60页
3-8 JO-109 1 106-002 3. "T ype Listup" Window 3. "T ype Listup" Window When you press the [Setting] button again while the "T ype Setting" window is active, the "T ype Listup" wind…
3-7
JO-109
1005-001
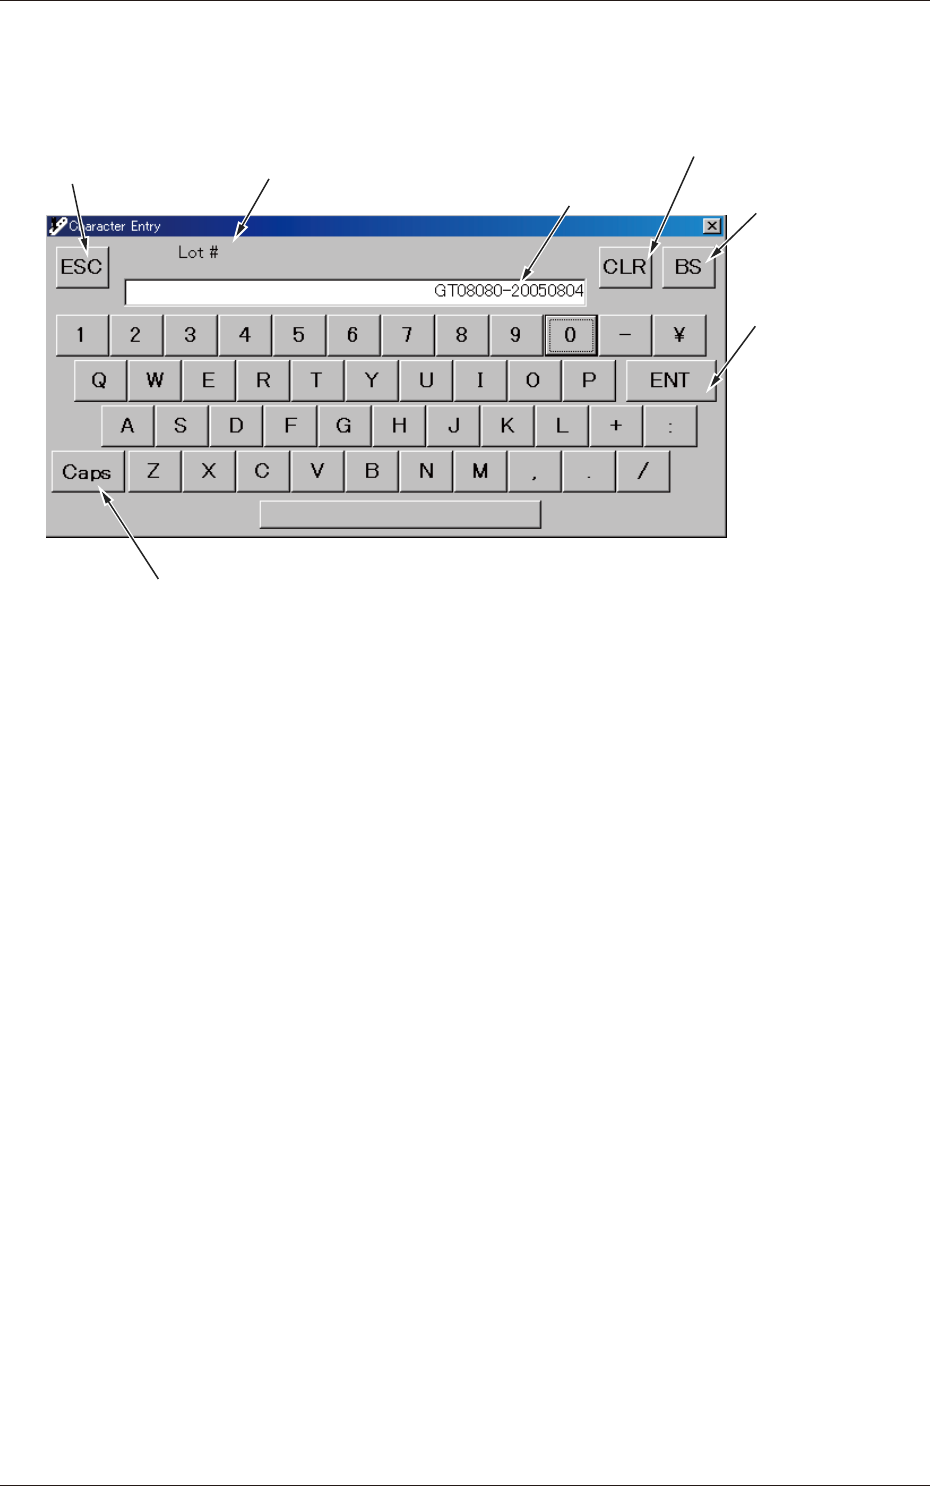
"Character Entry" Window
When a set value is alphanumerical, this window appears.
Selection of Uppercase or Lowercase Letters
Interrupts the
change process.
Lot # for Set
Value Change
Entered Value
Deletes the
entered value.
Deletes a character to the
left of the cursor.
Applies the
entered value.
Fig. C10 "Character Entry" Window
2. Set Data Change
3-8
JO-109
1106-002
3. "Type Listup" Window
3. "Type Listup" Window
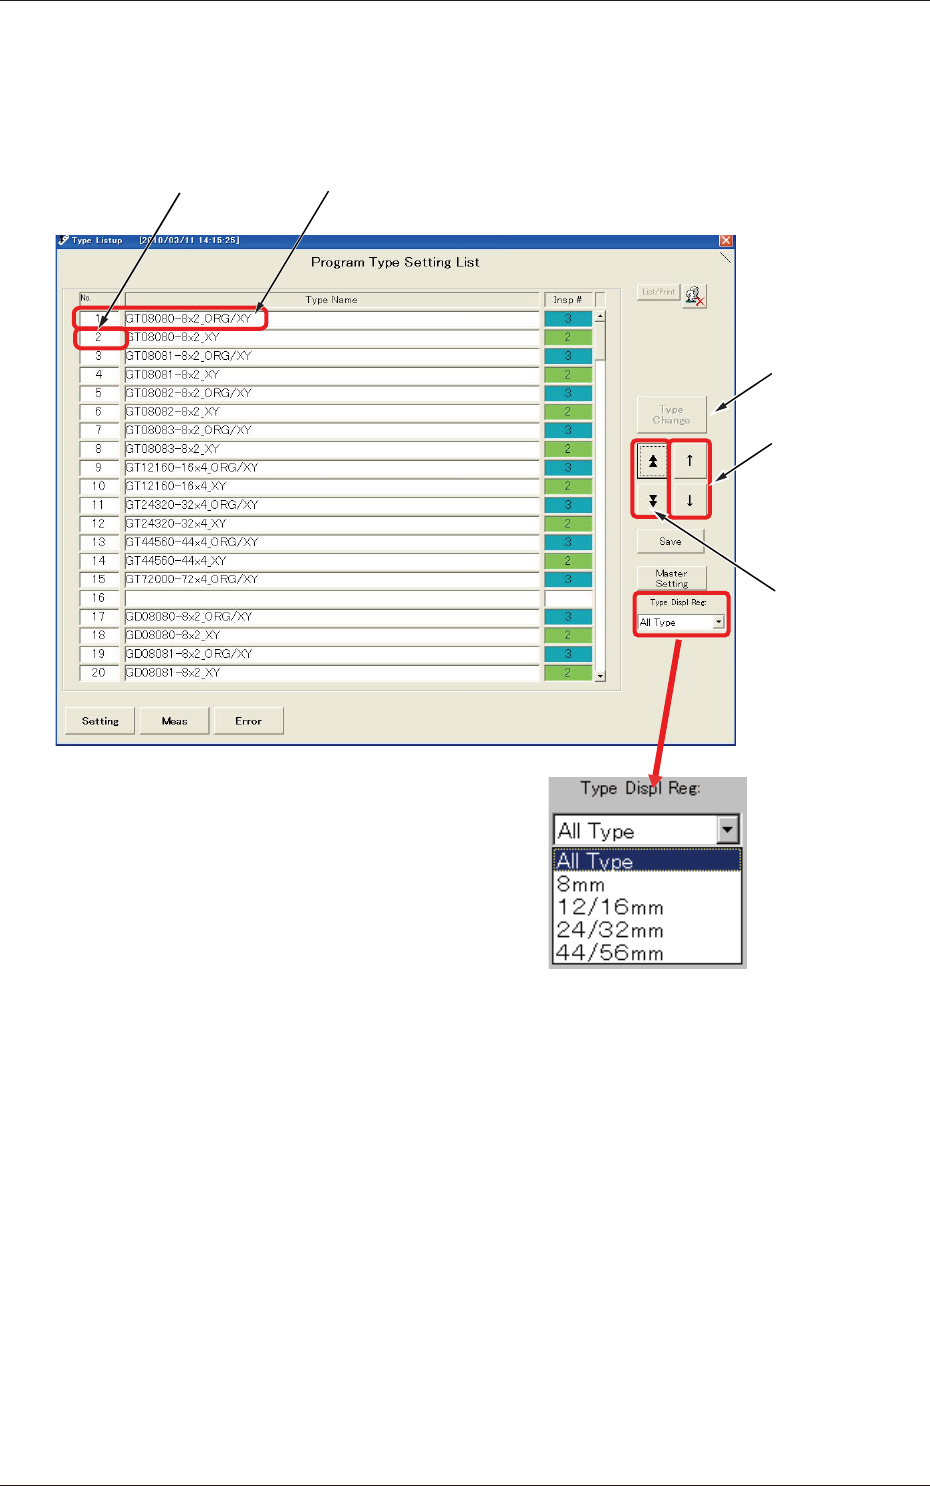
When you press the [Setting] button again while the "Type Setting" window
is active, the "Type Listup" window appears.
Subcursor Currently Selected Type
Used to change
the type.
Used to move
the cursor.
Used to open
another page.
Fig. C11 "Type Listup" Window
Type Display Regulation
It is possible to regulate the types to be displayed according to the option
selected in the "Type Displ Reg" combo box.
As a result, your objective type can quickly be selected from the type list.
Type Sorting
When you press the "No.", the "Type Name" or the "Insp #" area, the data in
the corresponding column is sorted and displayed.
When you press the title area again, the data is rearranged in the ascending or
descending order.
3-9
JO-109
1106-002
3. "Type Listup" Window
Type Editing
The authority "Power User" or higher is required to edit the types.
Change the authority level to "Power User" or "Administrator".
Reference
Refer to "1. Administrative Authority Change" in "Section 3" for details.
(1) Type Copy
It is possible to make a copy of the currently selected type and allocate
it to another type No.
Move the subcursor ("No." Cell in Blue) to the destination type No.
area for copying.
The [Copy] button appears. Press it.
The message box of the conrmation opens. Press the [OK] button.
The data is copied.
(2) Type Deletion
It is possible to delete a type other than the currently selected one.
Move the subcursor ("No." Cell in Blue) to the destination type No.
area of the type to be deleted.
The [Delete] button appears. Press it.
The message box of the conrmation opens. Press the [OK] button.
Notice
Once the data is deleted, it cannot be recovered.